

Every page on your MyEvent website is built from sections, and each section holds blocks: a title, text and images, a gallery, a ticket form, and so on. The new page editor lets you change all of it from one screen, with a live preview of your page beside it. You can describe a change in plain words and let the AI Page Editor make it, or use Manual Forms to edit each block yourself.
Package: Manual Forms is included in every package. The AI Page Editor is a Premium feature.
Your changes are safe until you publish. Everything you do in the editor is saved automatically as a draft. Visitors only see your changes after you click Publish Changes.
Open the new editor
1. Find your page
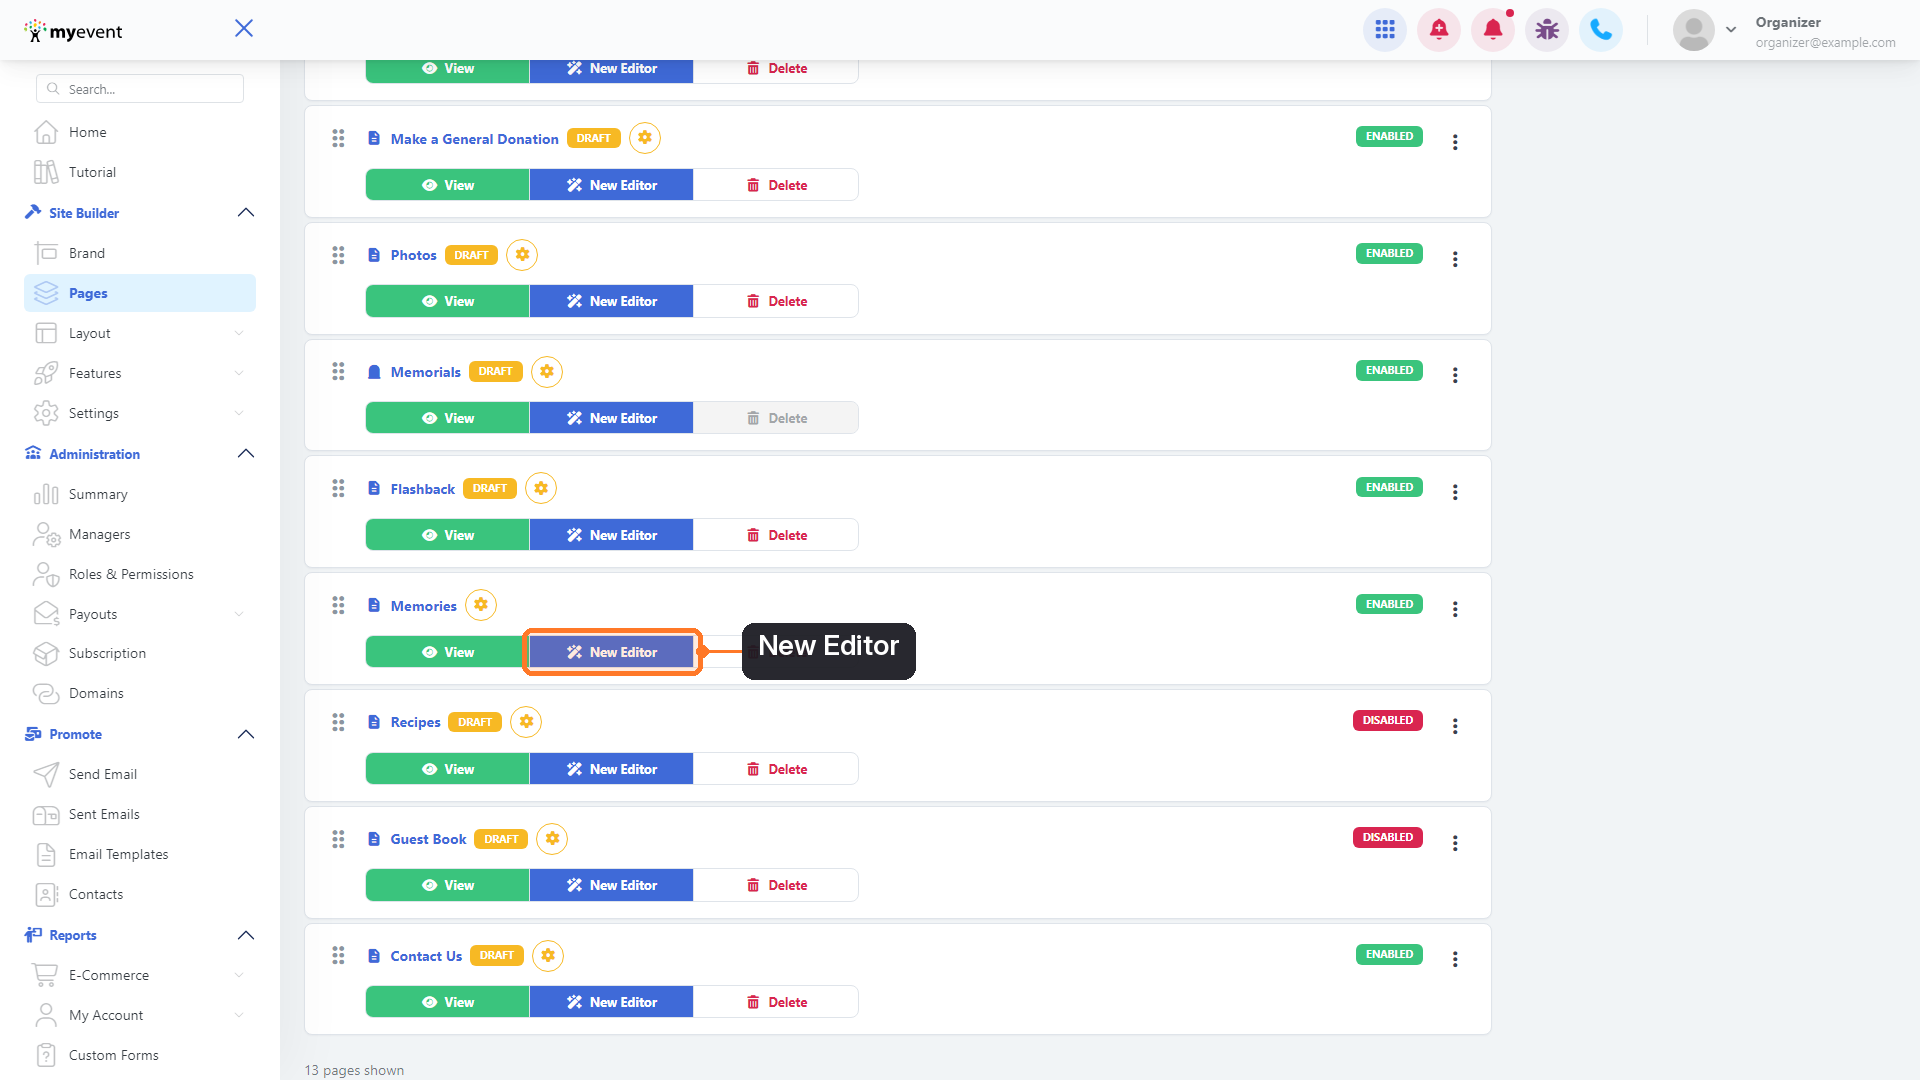
From your dashboard, go to Site Builder → Pages. Find the page you want to change and click New Editor, next to View.
2. Choose how you want to edit
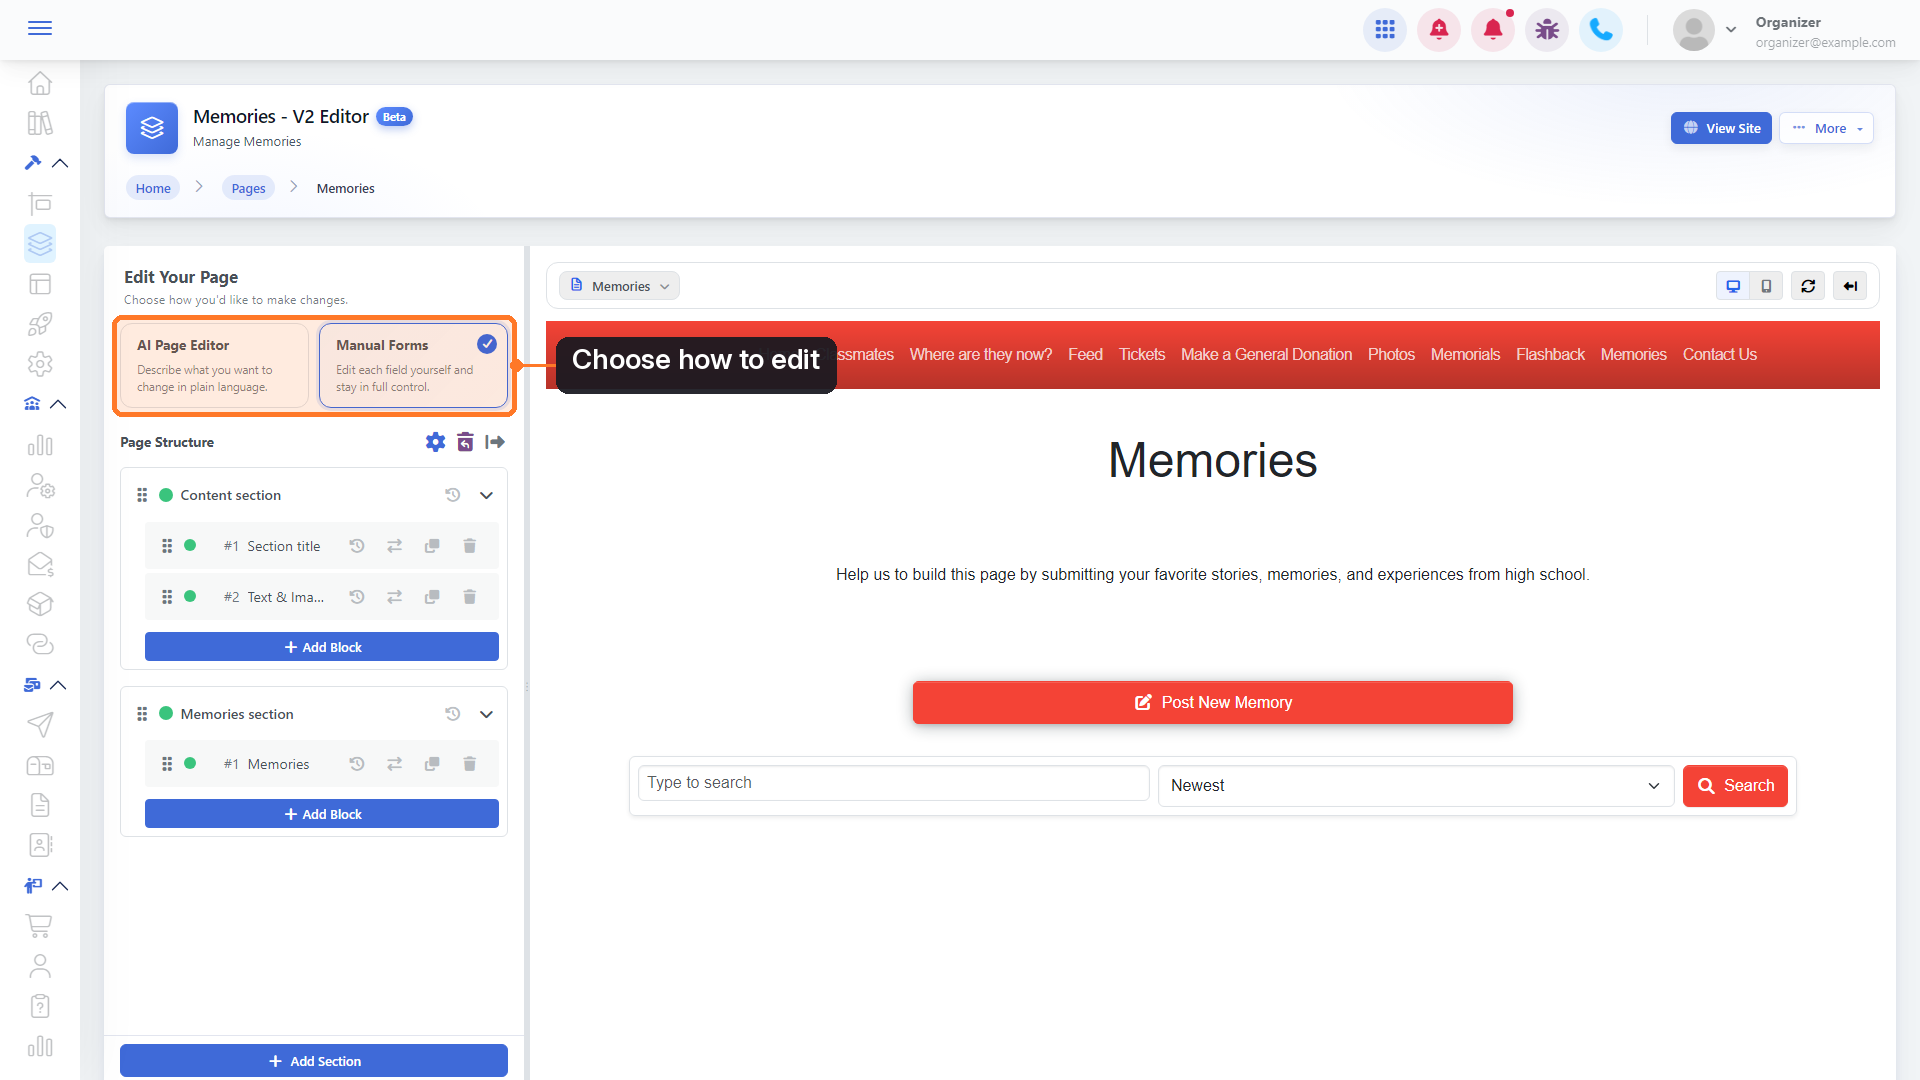
The editor opens with your page in a live preview on the right. On the left, under Edit Your Page, pick a mode:
- AI Page Editor: describe what you want to change in plain language.
- Manual Forms: edit each field yourself and stay in full control.
Edit with the AI Page Editor (Premium)
3. Describe your change
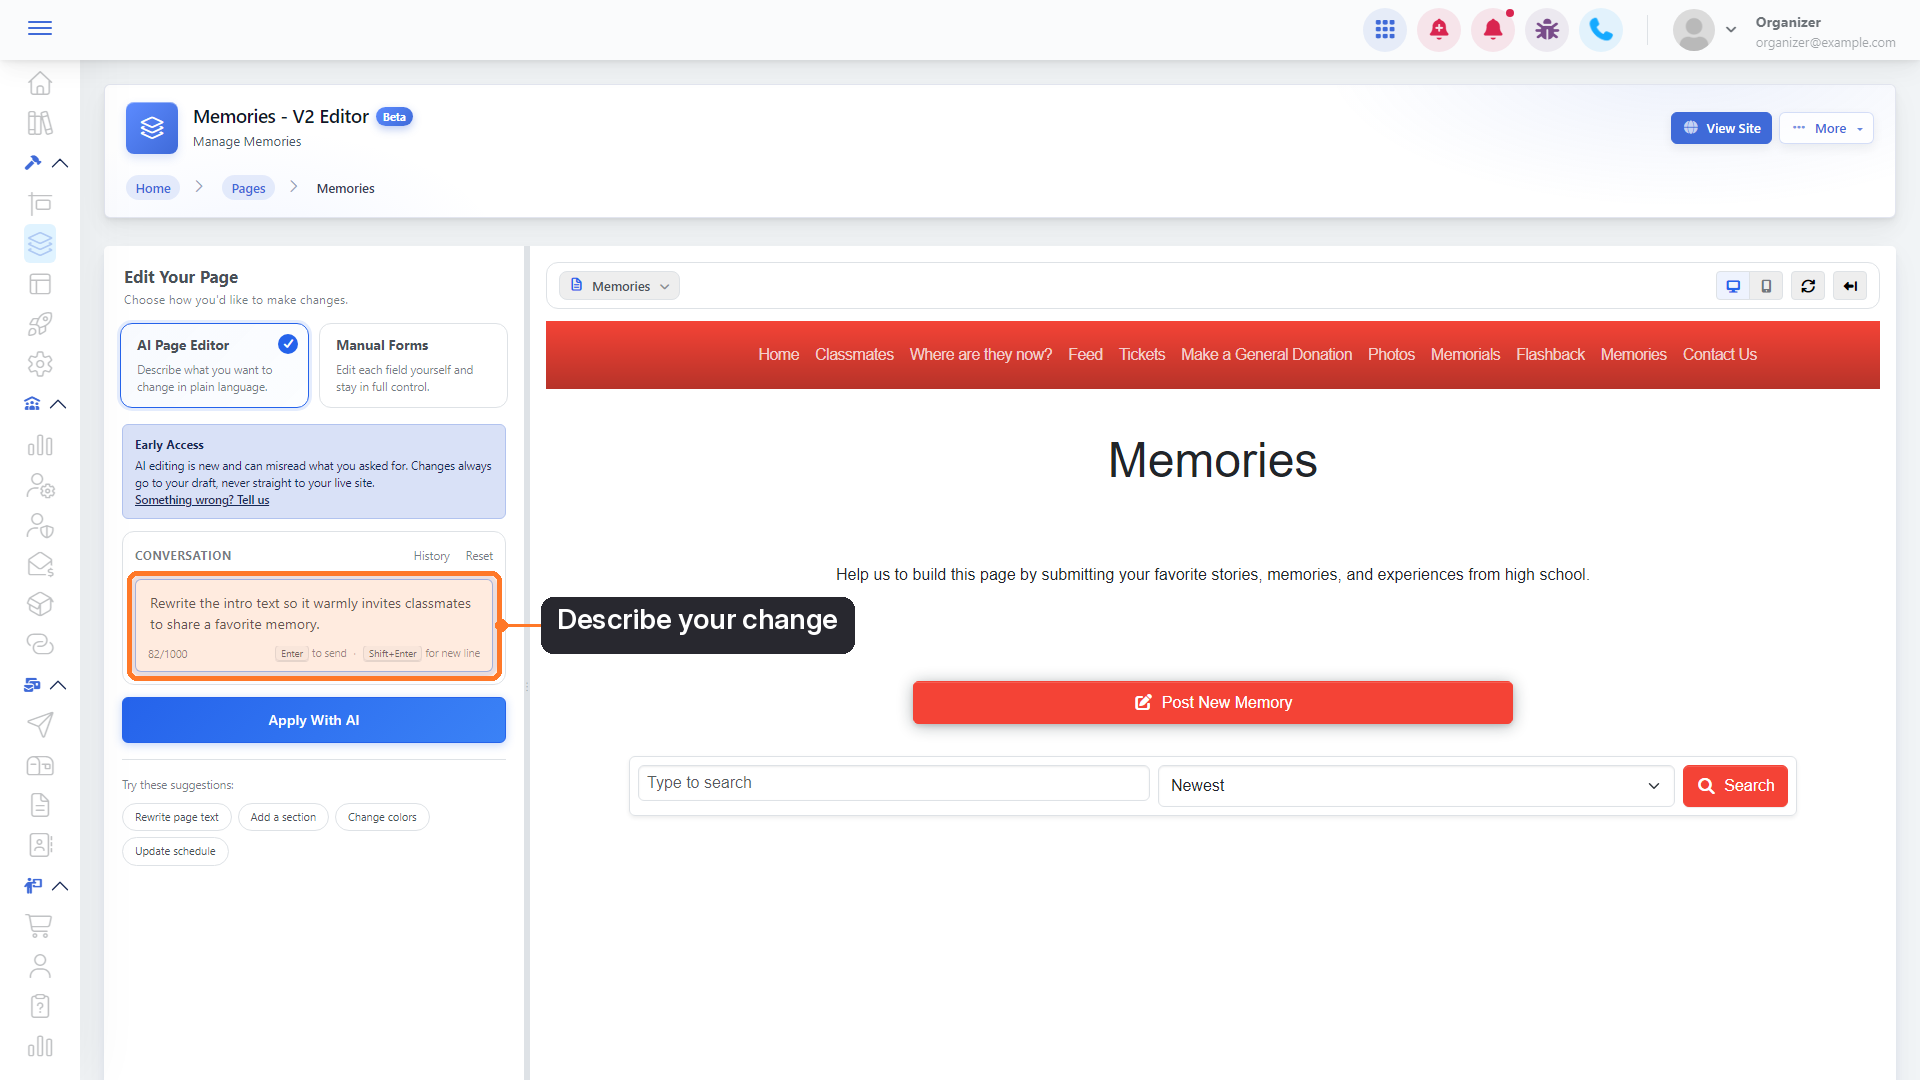
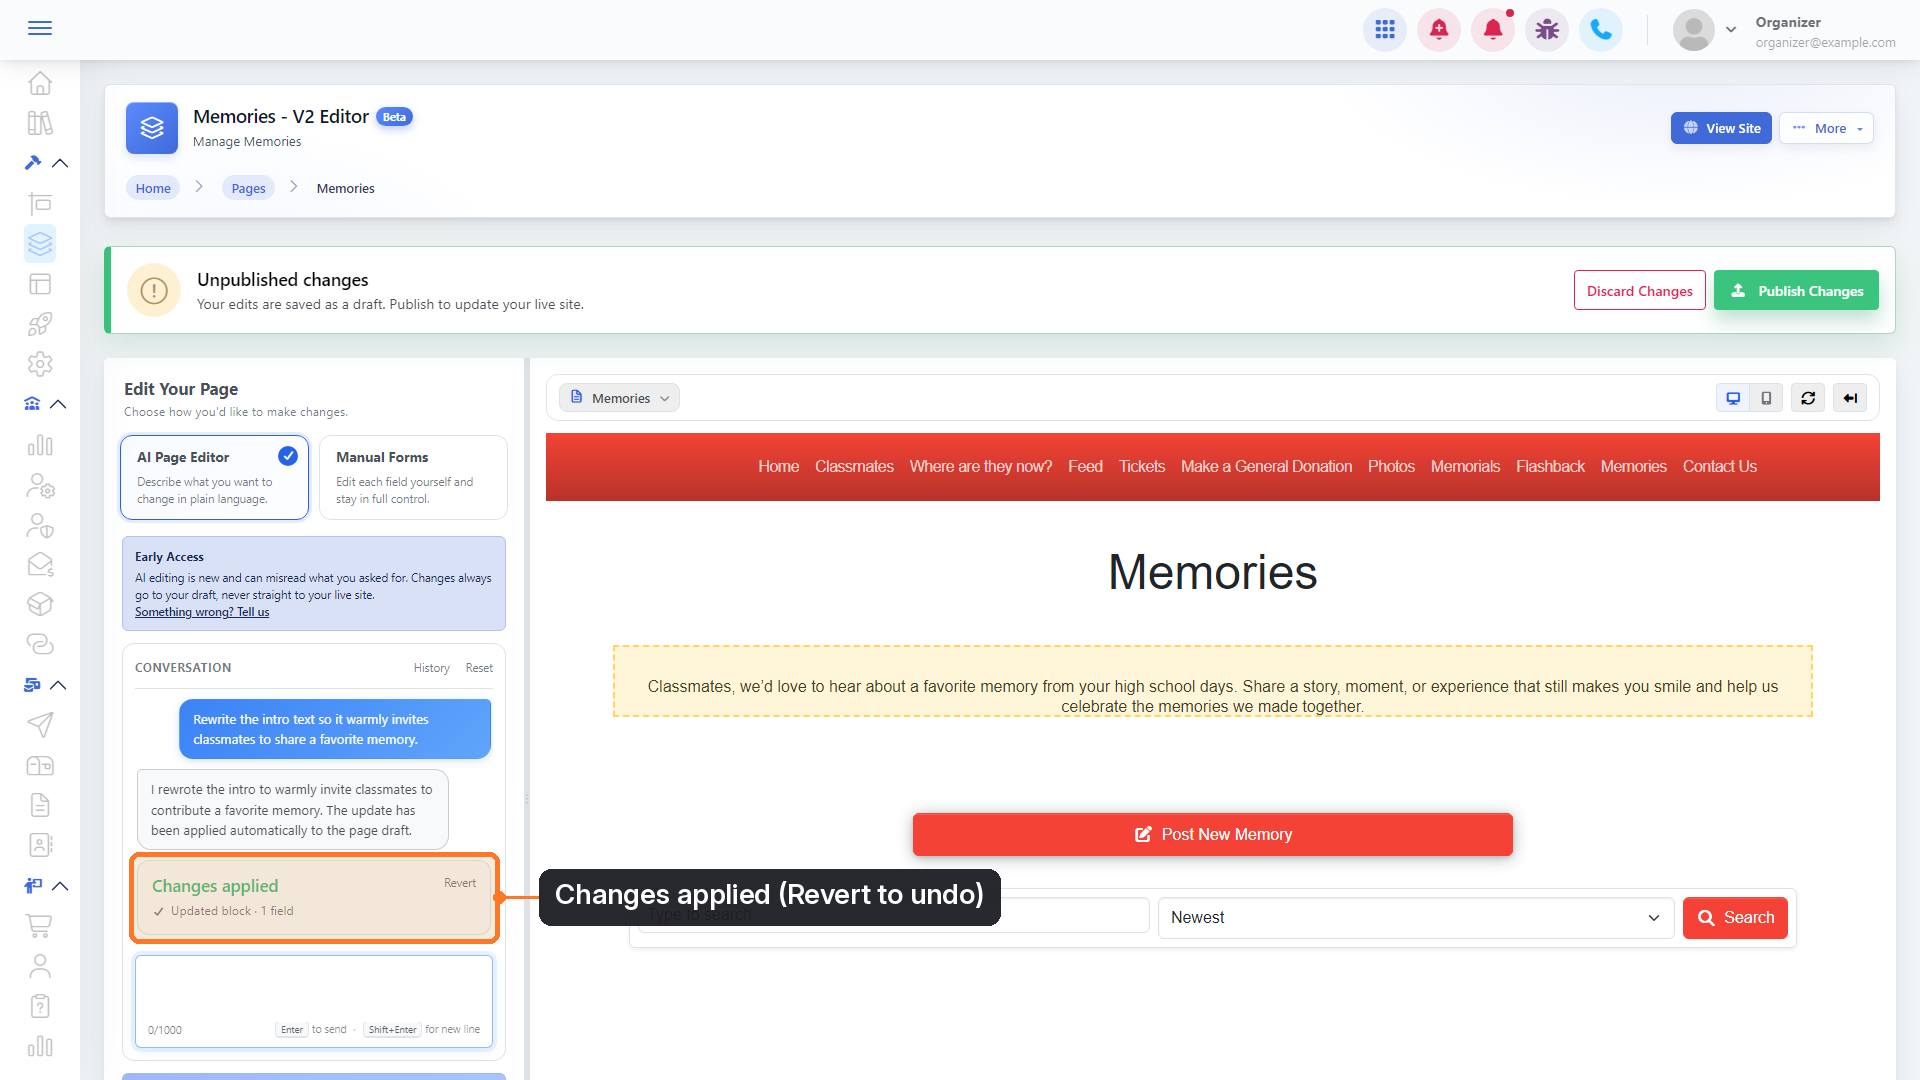
Click AI Page Editor, then type what you want in the conversation box. For example: "Rewrite the intro text so it warmly invites classmates to share a favorite memory." Not sure where to start? Click one of the suggestions under the box: Rewrite page text, Add a section, Change colors or Update schedule.
4. Apply it
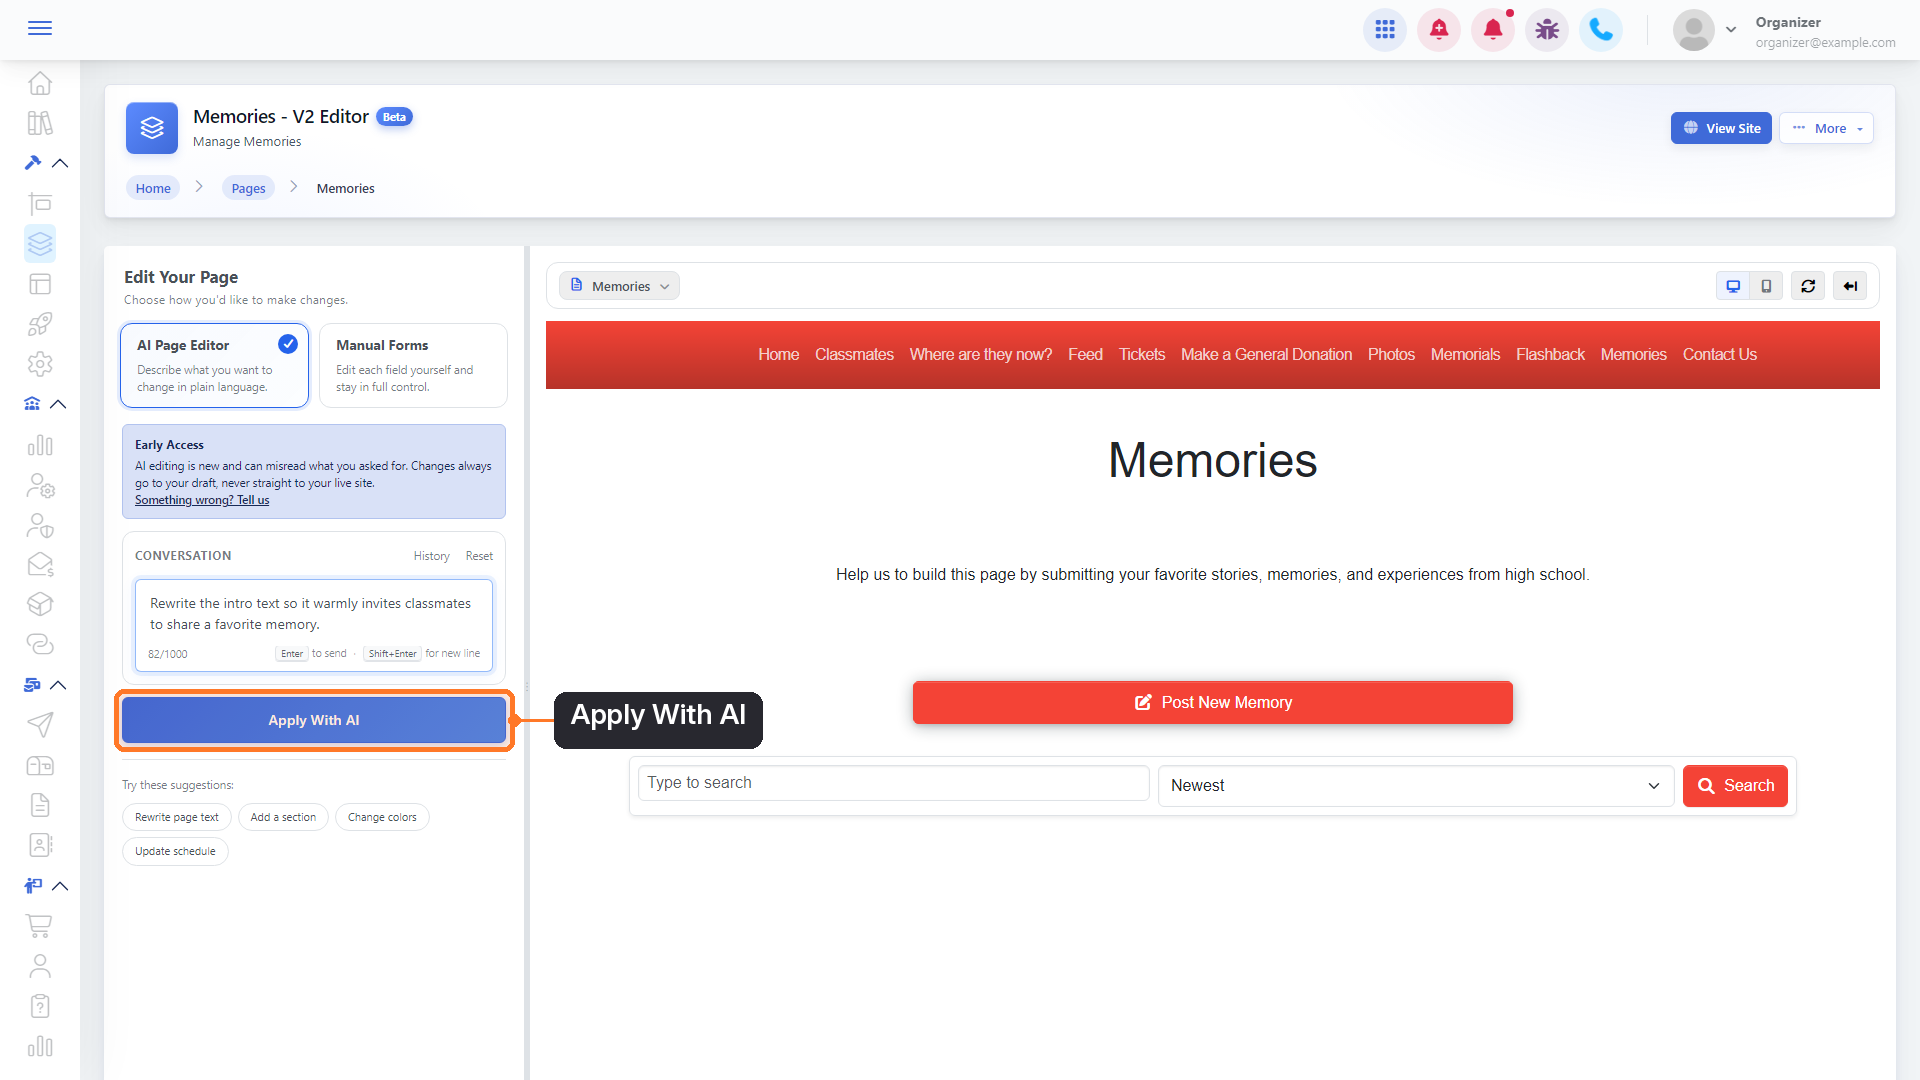
Click Apply With AI (or press Enter). It takes a few seconds.
5. Check the result
The AI explains what it did, and a Changes applied card lists what changed. The updated block is outlined in the preview. If it's not what you wanted, click Revert on the card to undo that change. You can also type a follow-up request to adjust it.
Edit with Manual Forms
6. Look at your page structure
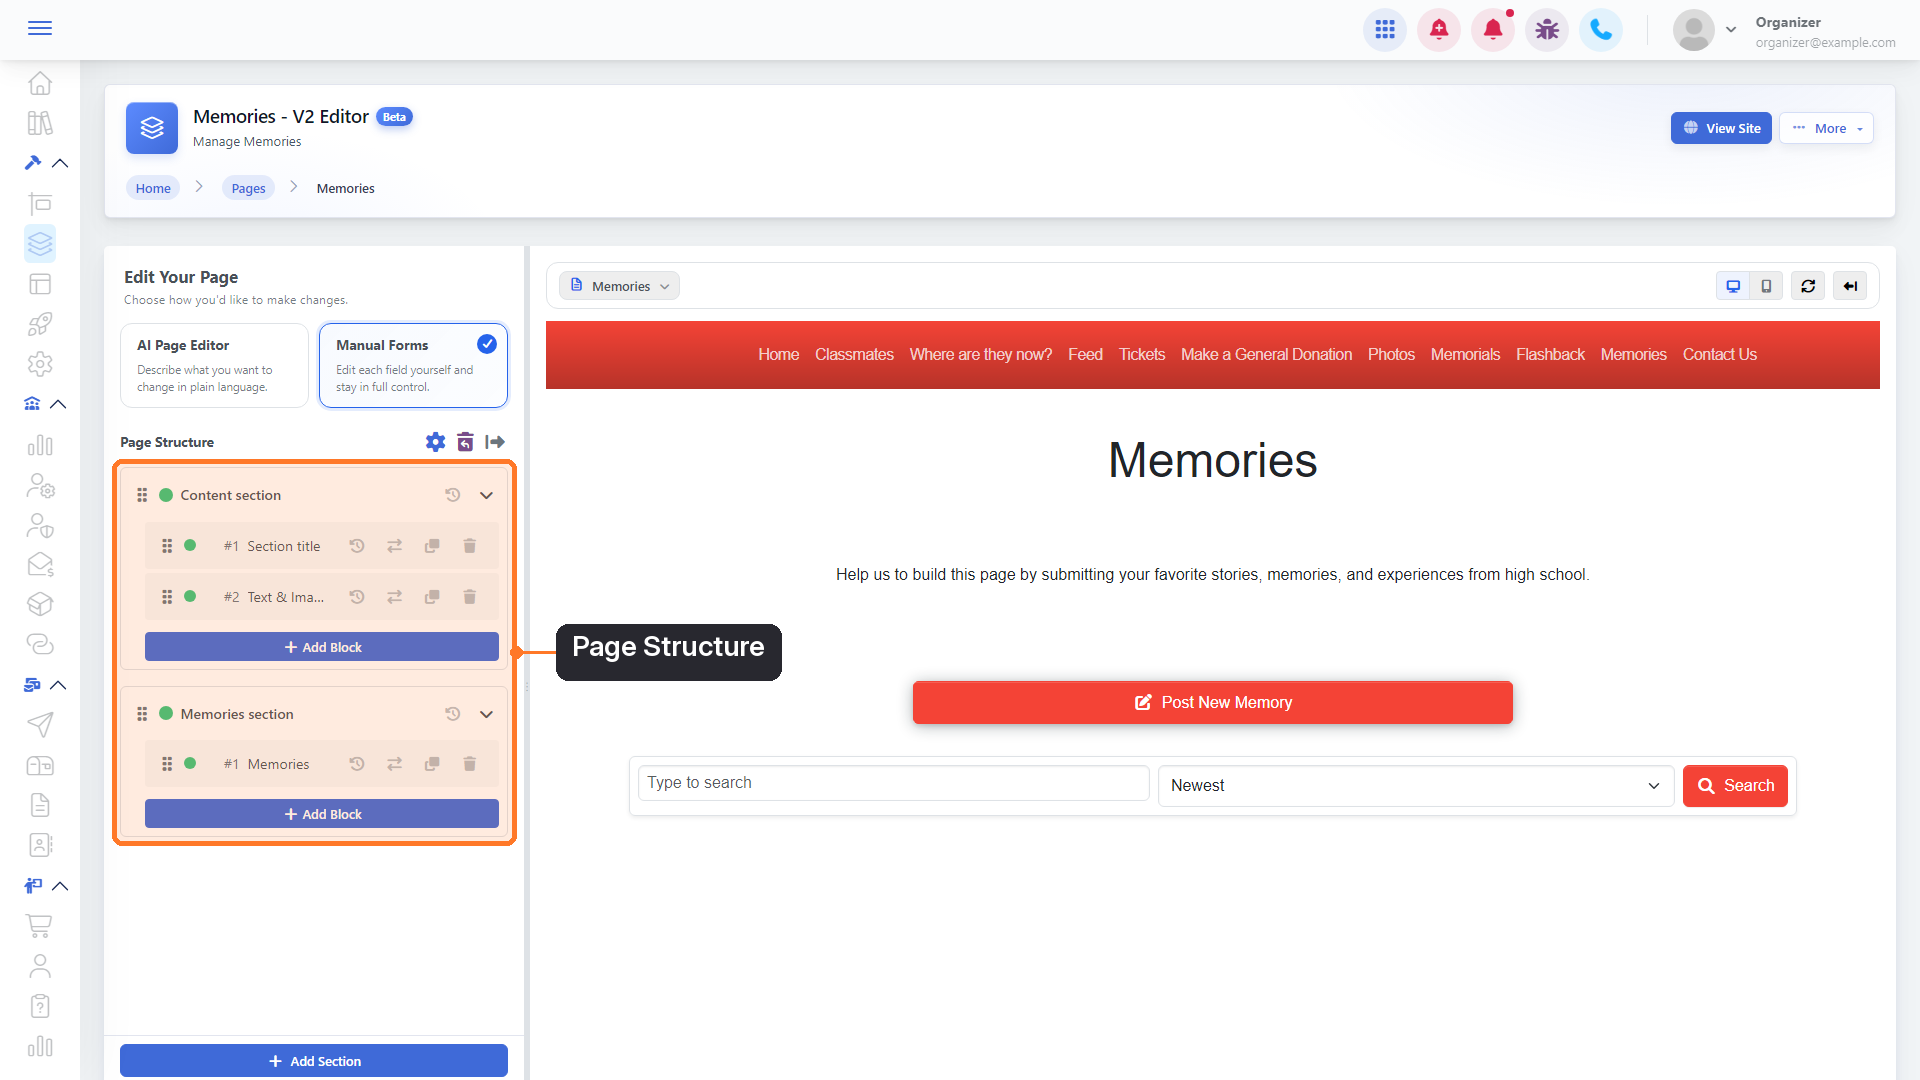
Click Manual Forms. Under Page Structure you'll see each section of your page and the numbered blocks inside it. Hover over a block to outline it in the preview.
7. Add a block
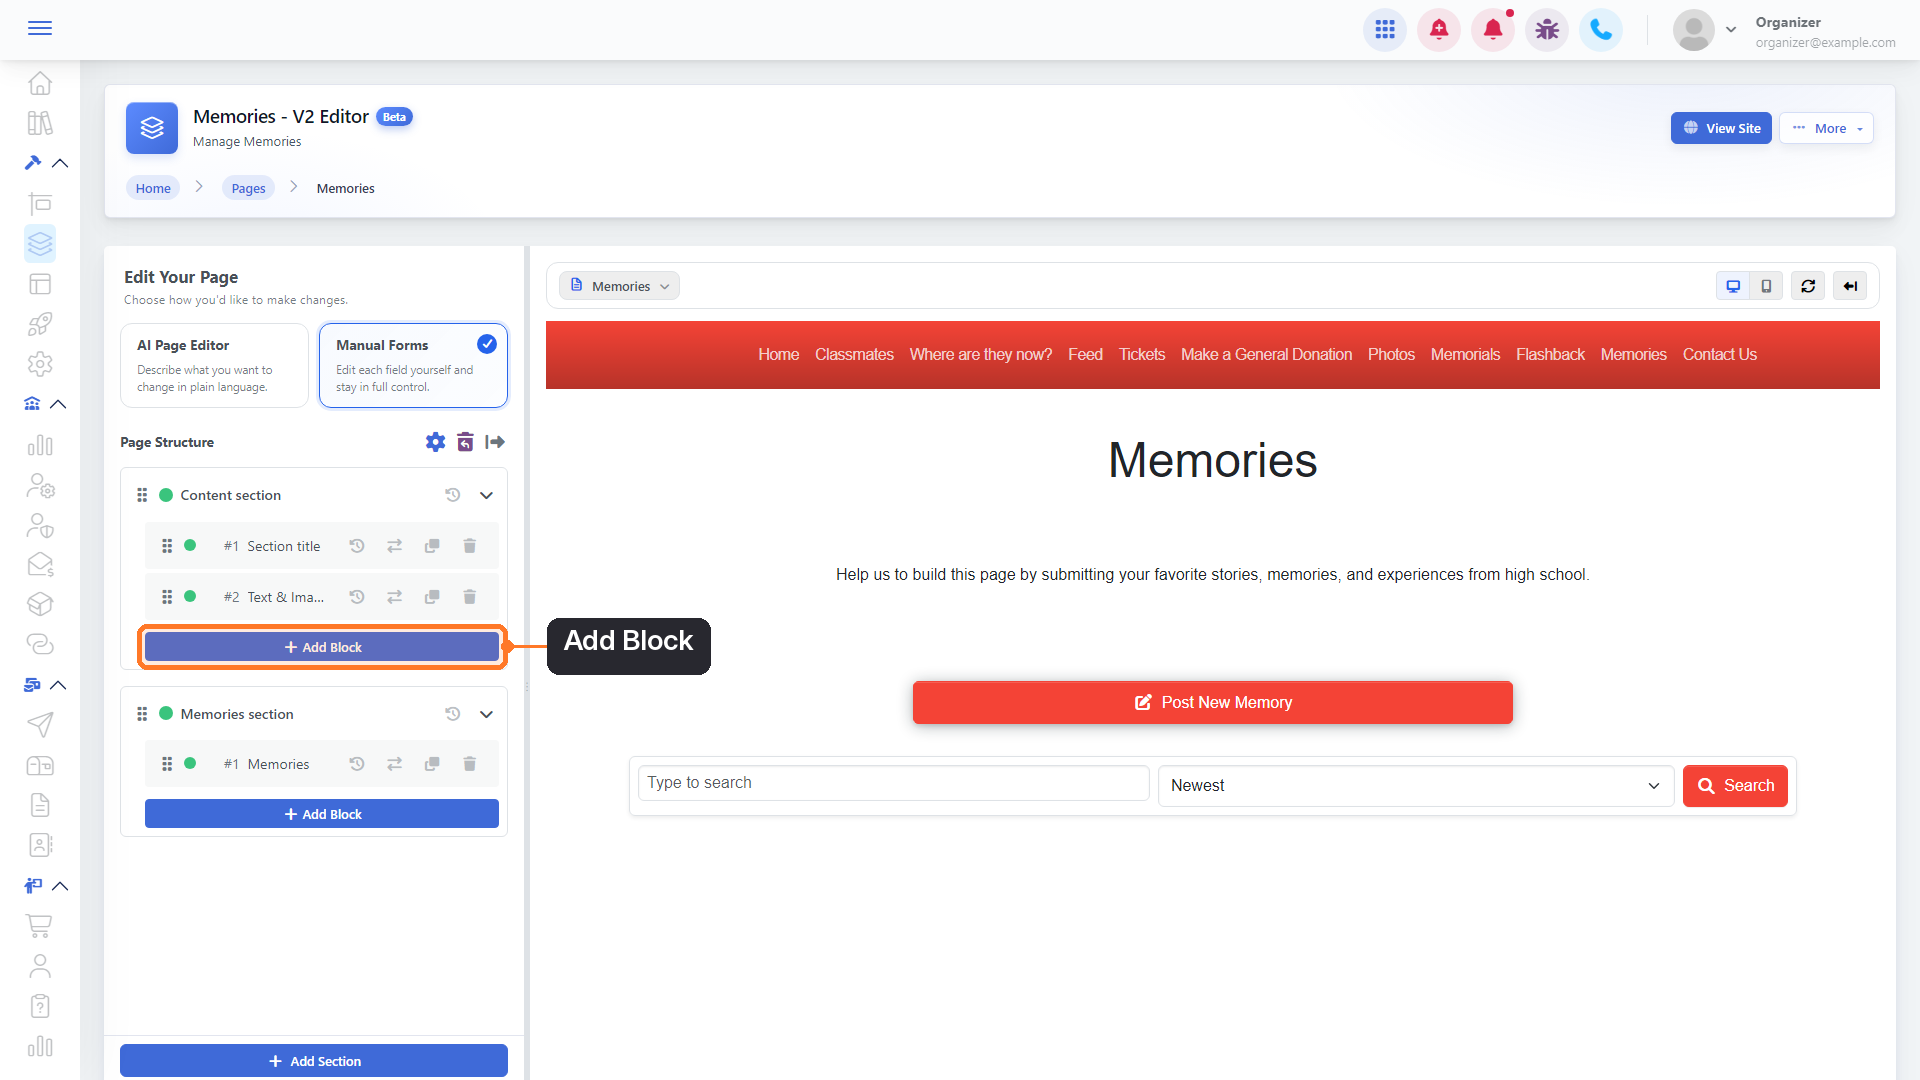
Click Add Block under the section where you want the new content.
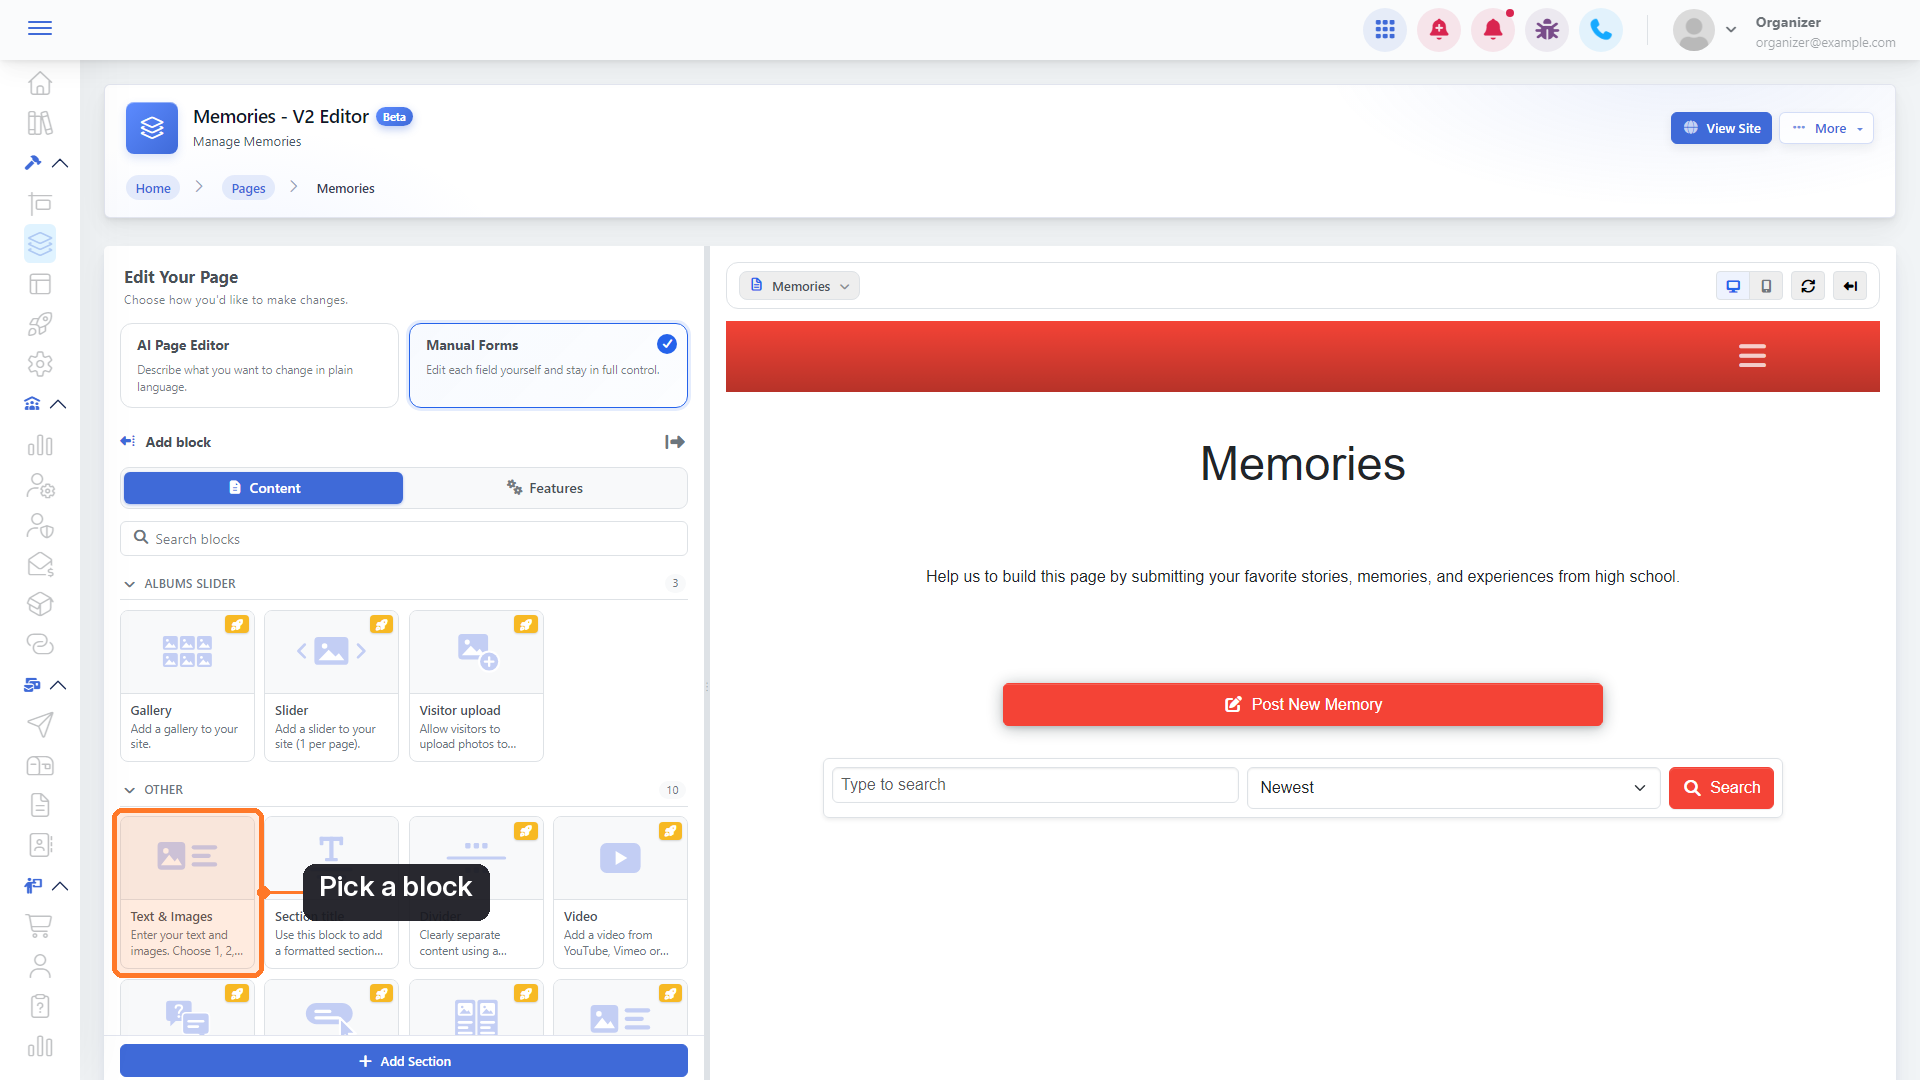
8. Pick Content or Features
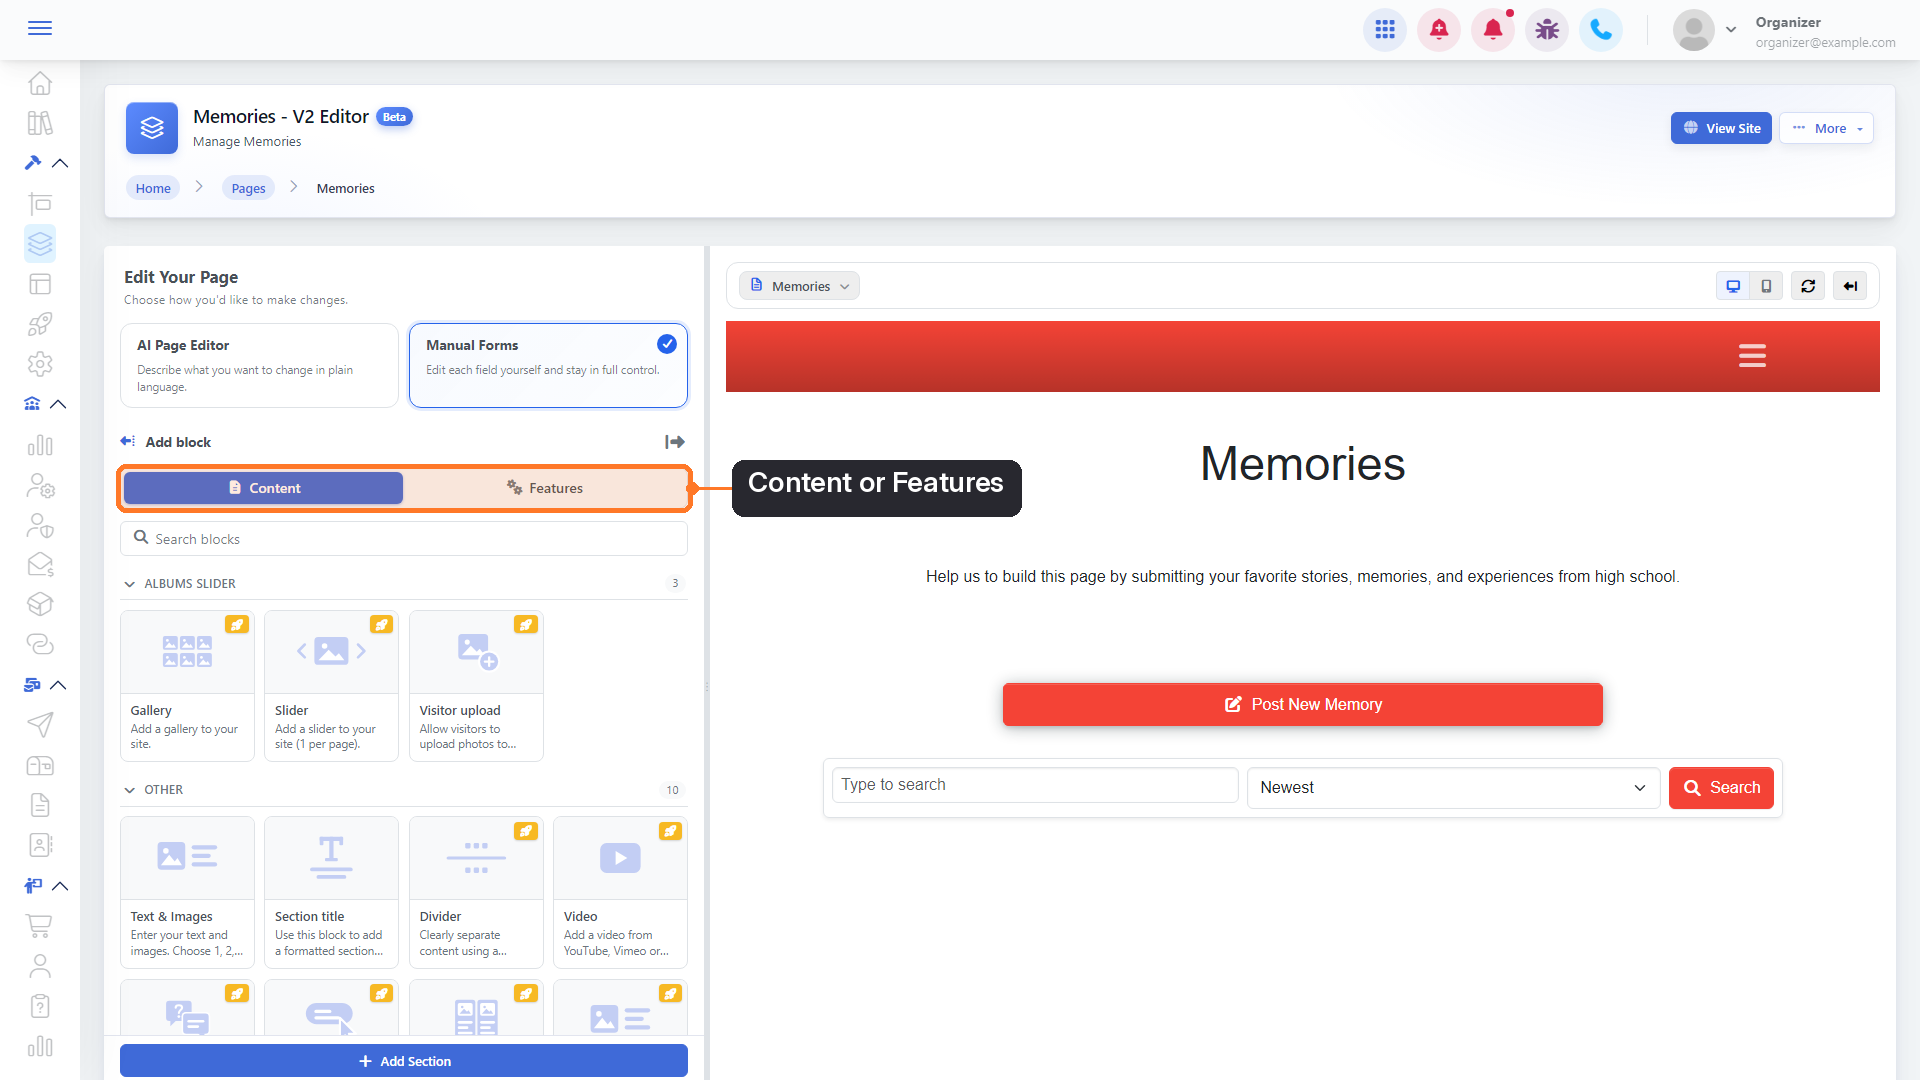
Choose Content for blocks like text, images, galleries, videos, FAQs and buttons, or Features for blocks like tickets and registrations, an event countdown, the schedule, a donation form or a contact form. You can also use Search blocks. Blocks marked with an orange badge are Premium.
9. Choose a block
Click the block you want, for example Text & Images. It's added at the bottom of the section.
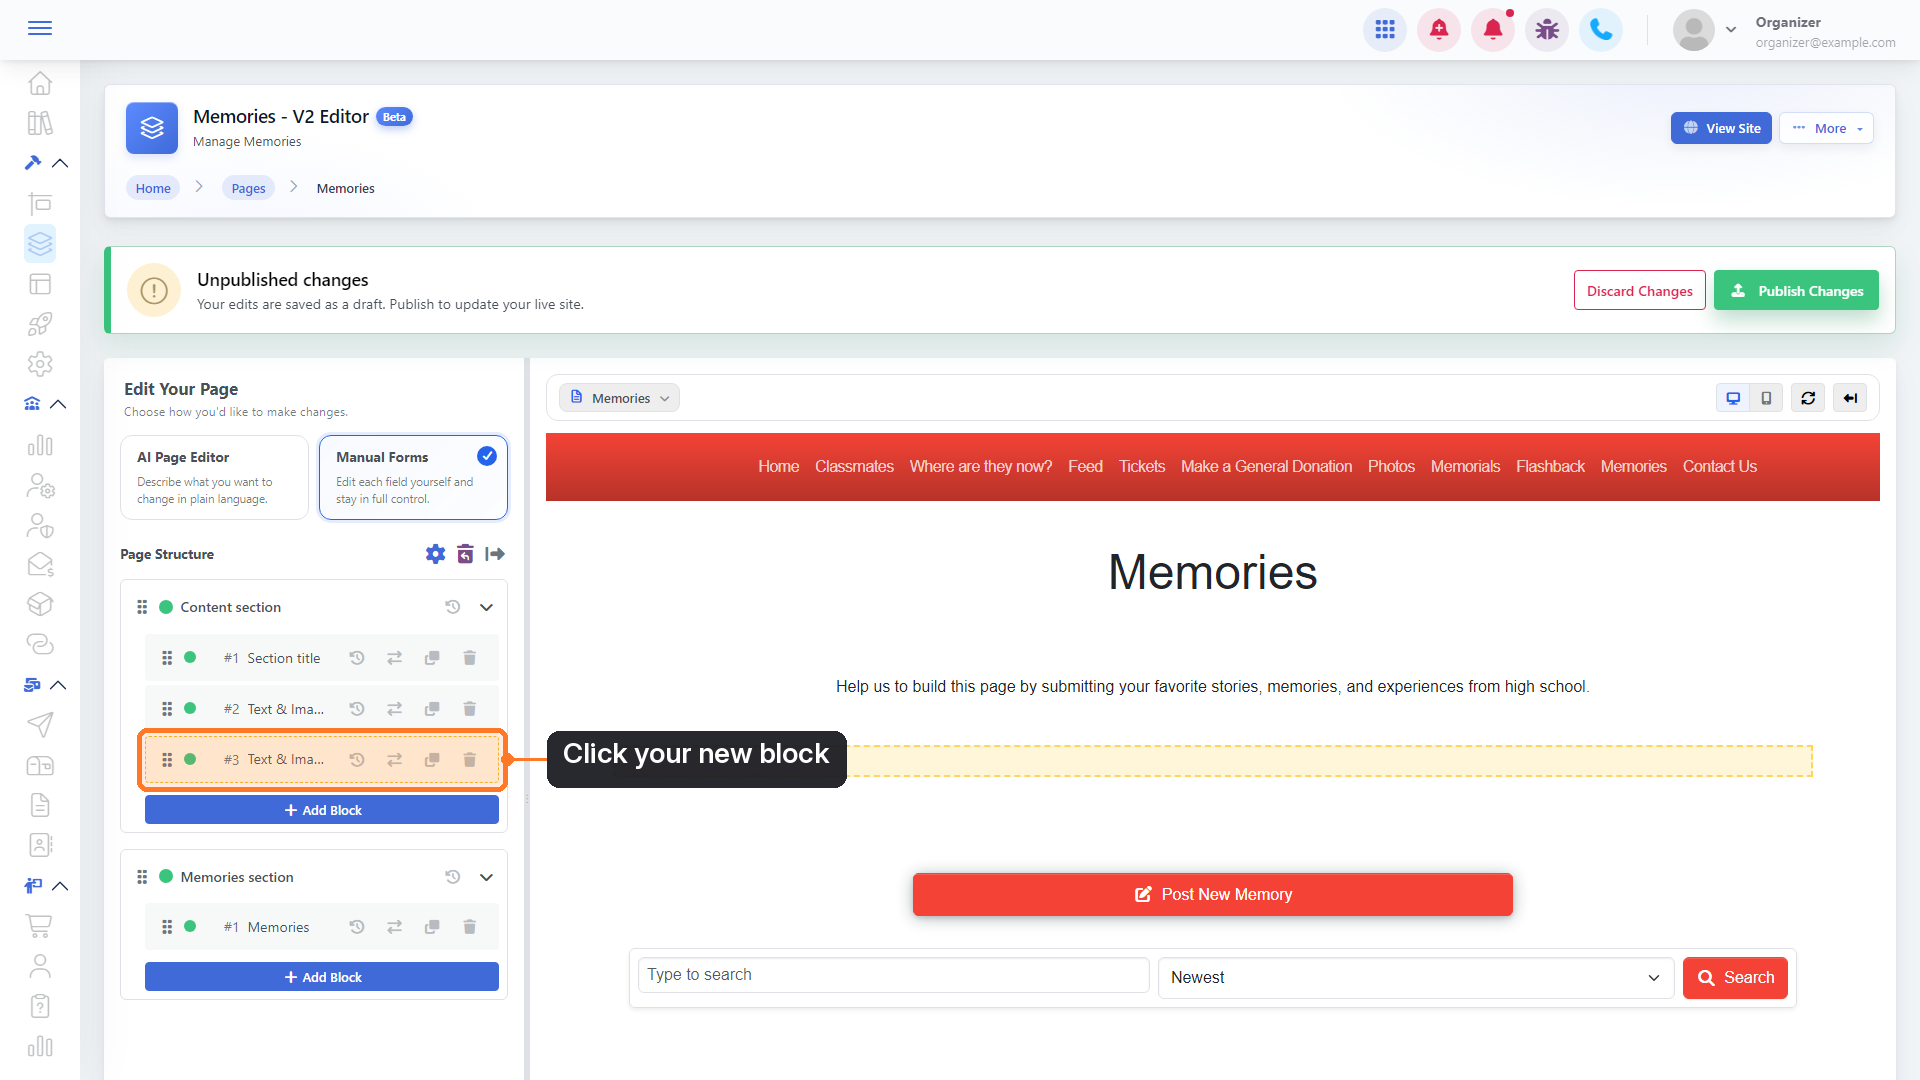
10. Open your new block
Click the new block in Page Structure to open its Block Settings.
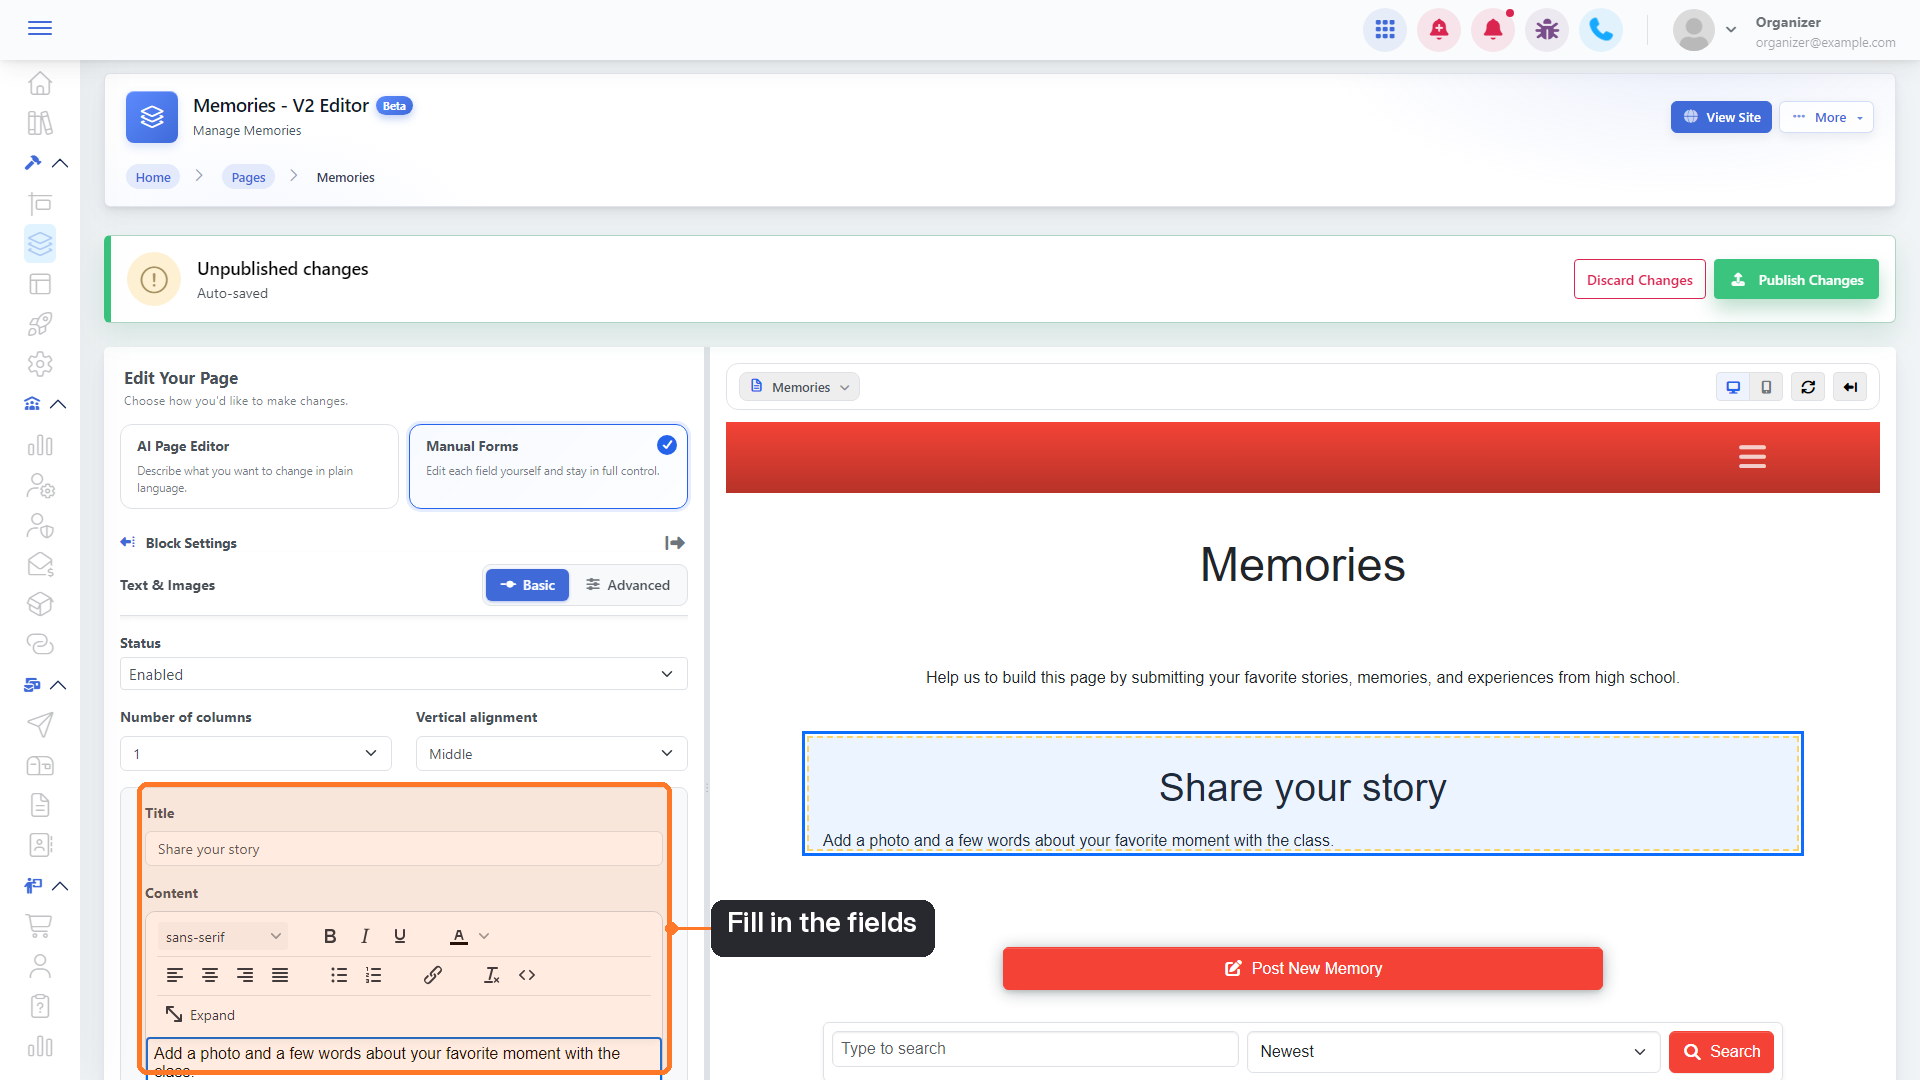
11. Fill in the fields
Type your title and content, and add an image if you like. Your changes appear in the preview within a moment and are saved automatically as a draft. Want more options? Switch from Basic to Advanced at the top of the settings.
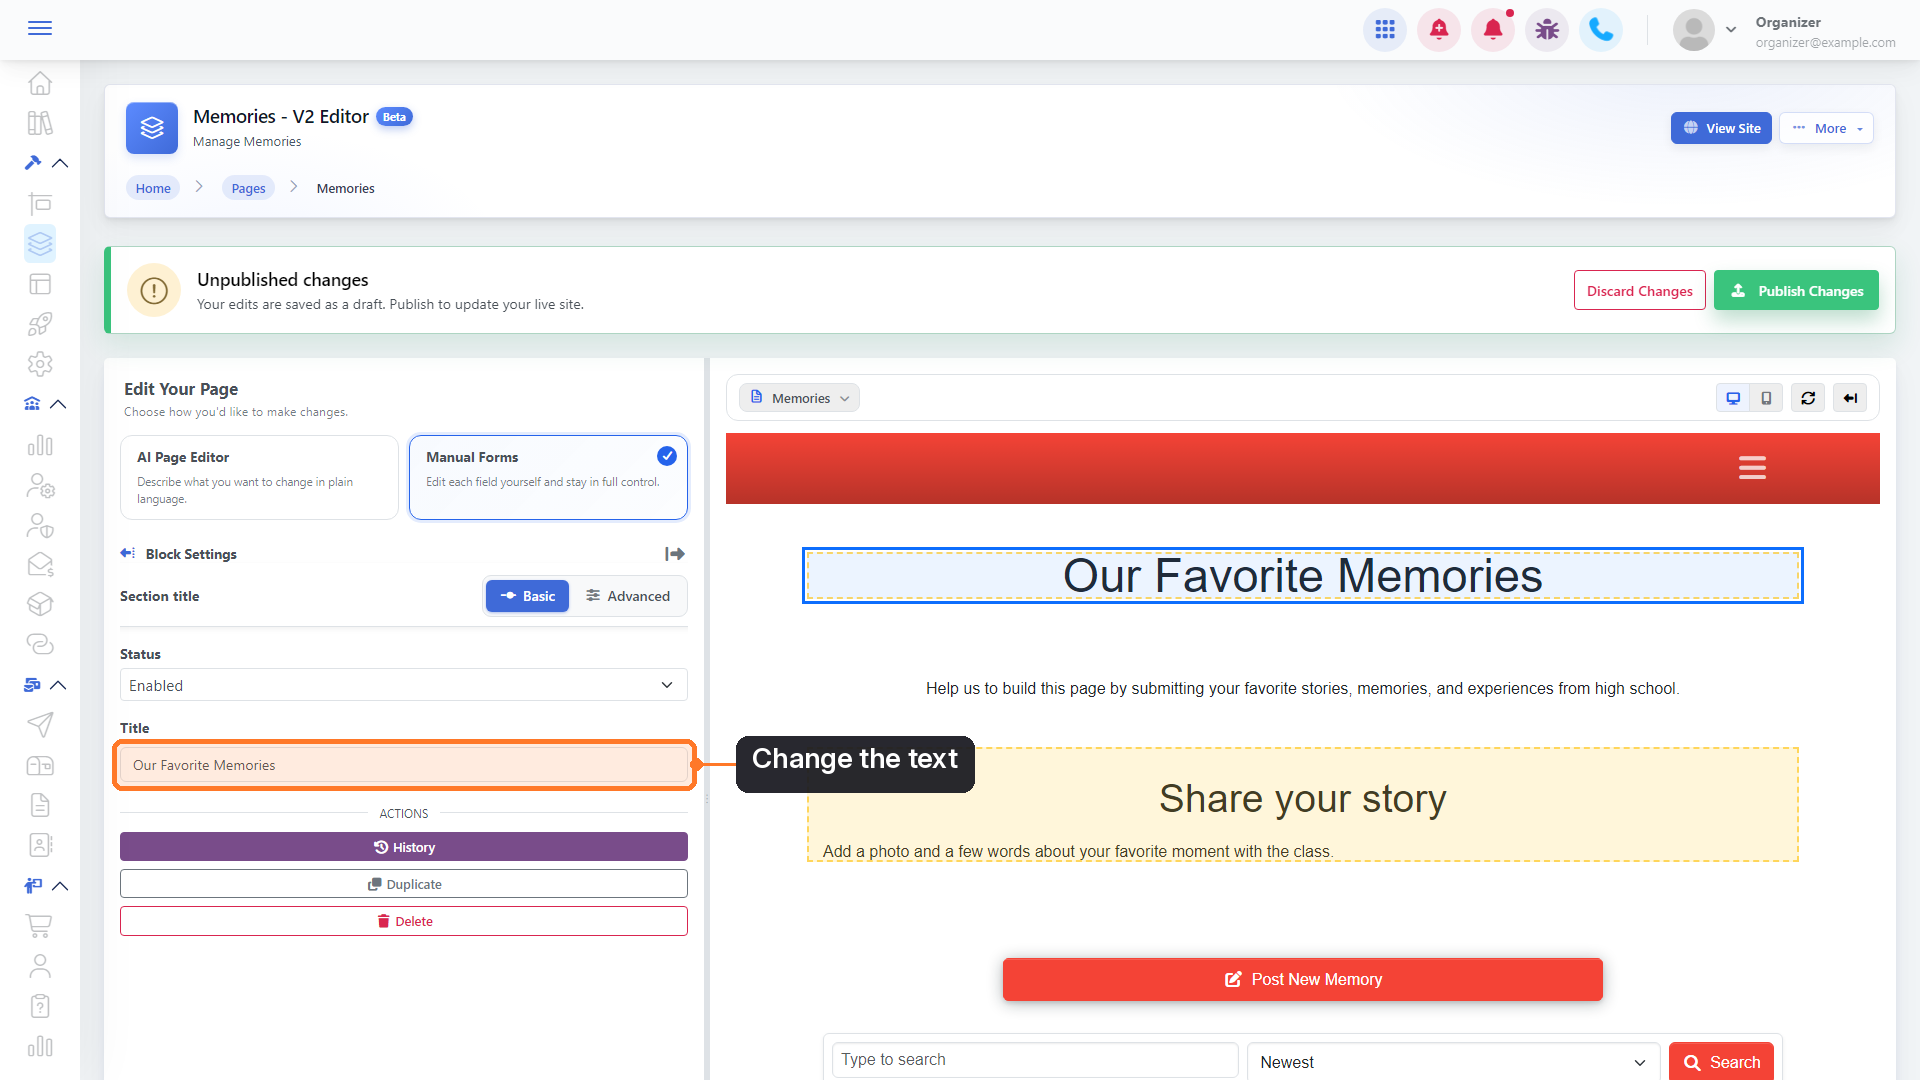
12. Edit a block that's already on the page
Click any block in Page Structure (use the back arrow next to Block Settings to return to the list), then change its fields the same way.
13. Move a block
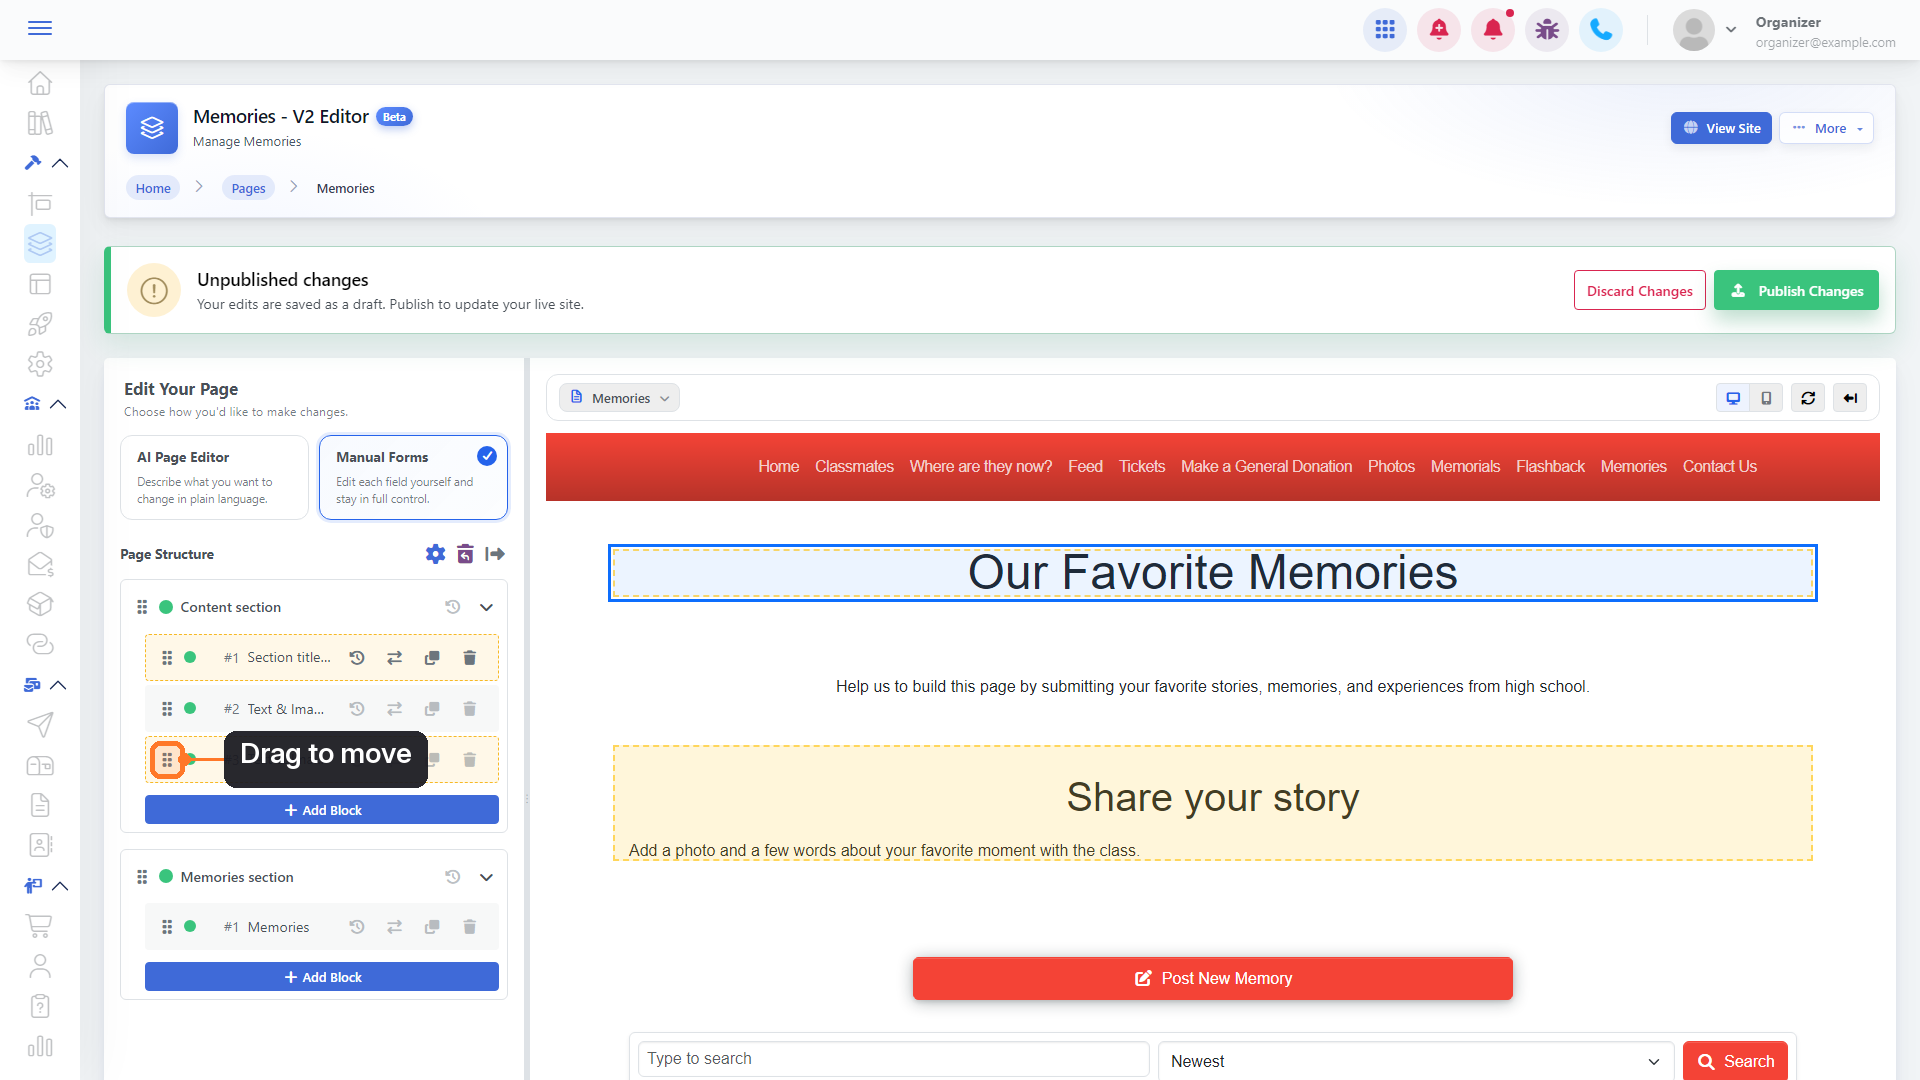
Drag a block by its handle (the dotted icon on the left of the row) and drop it where you want it, even into another section. You can also use the Move (arrows) icon on the row.
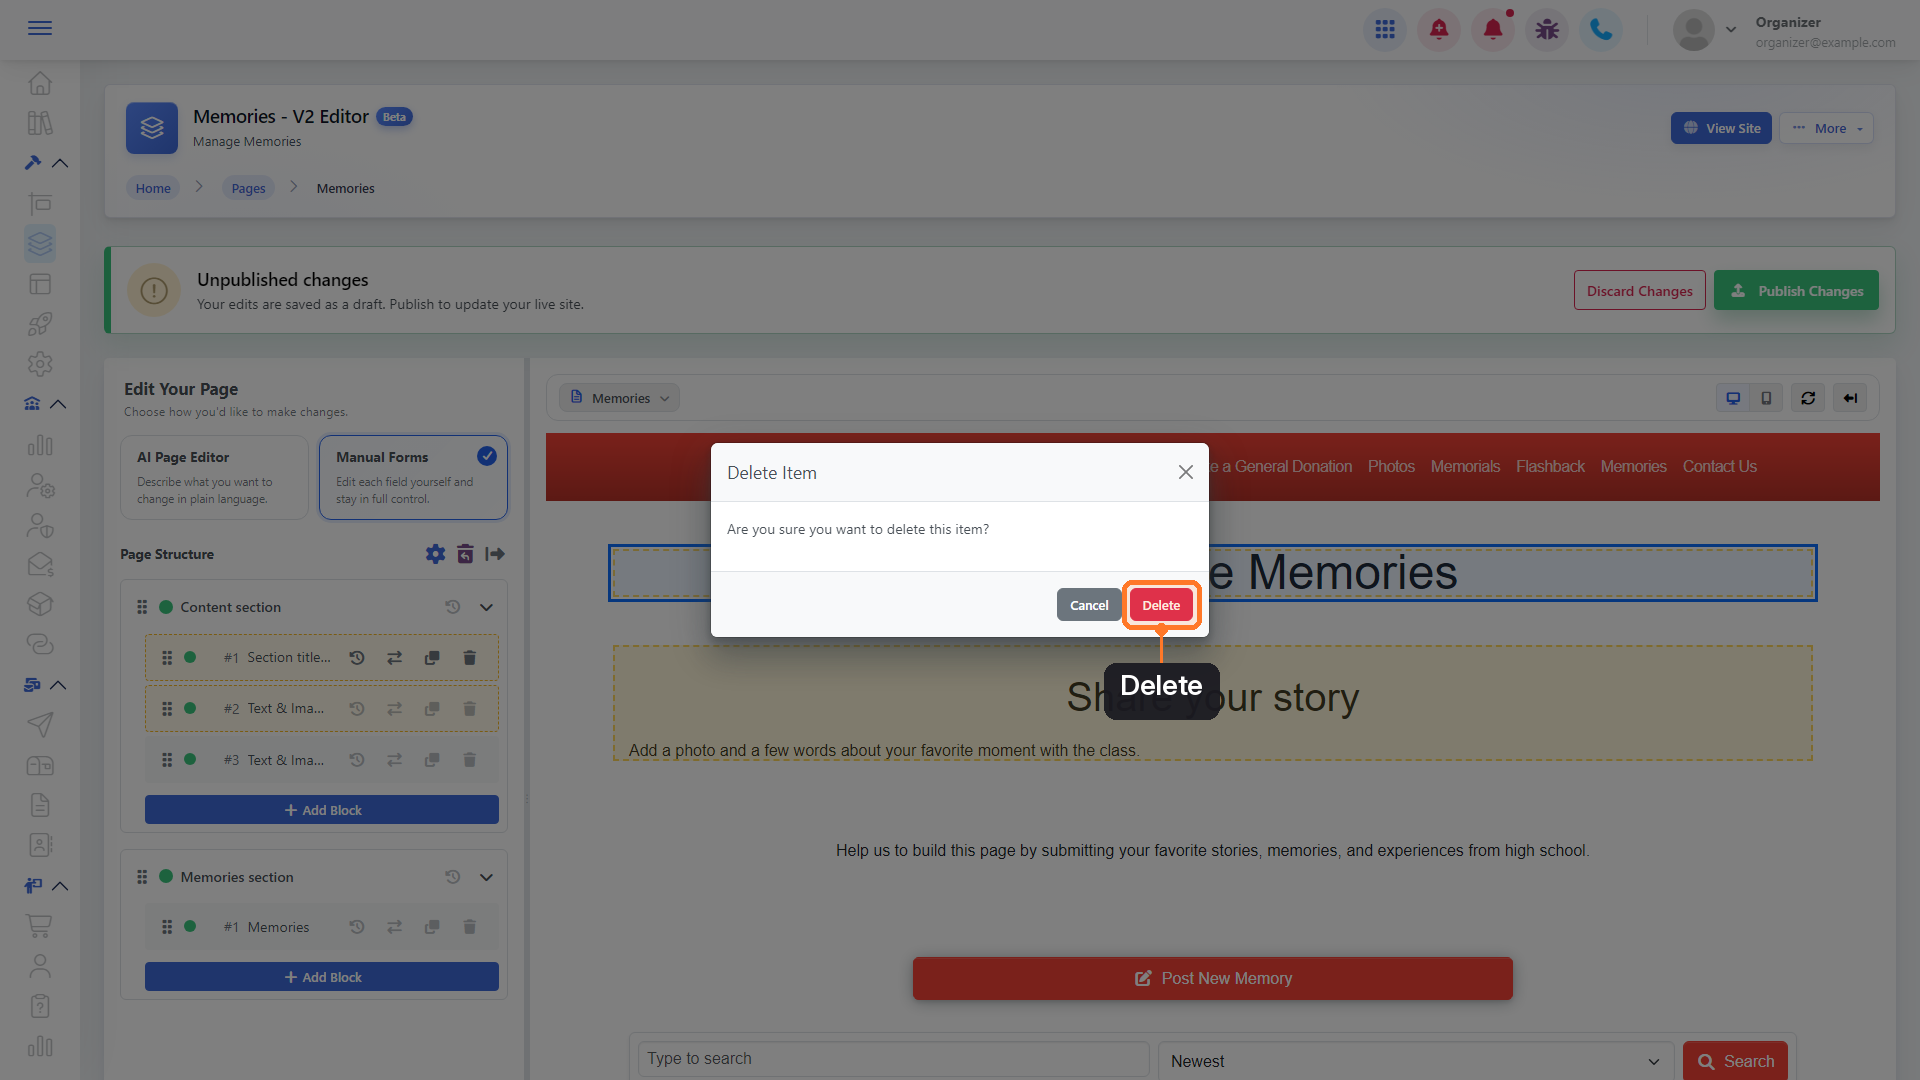
14. Delete a block
Click the trash icon on the block's row, then click Delete to confirm.
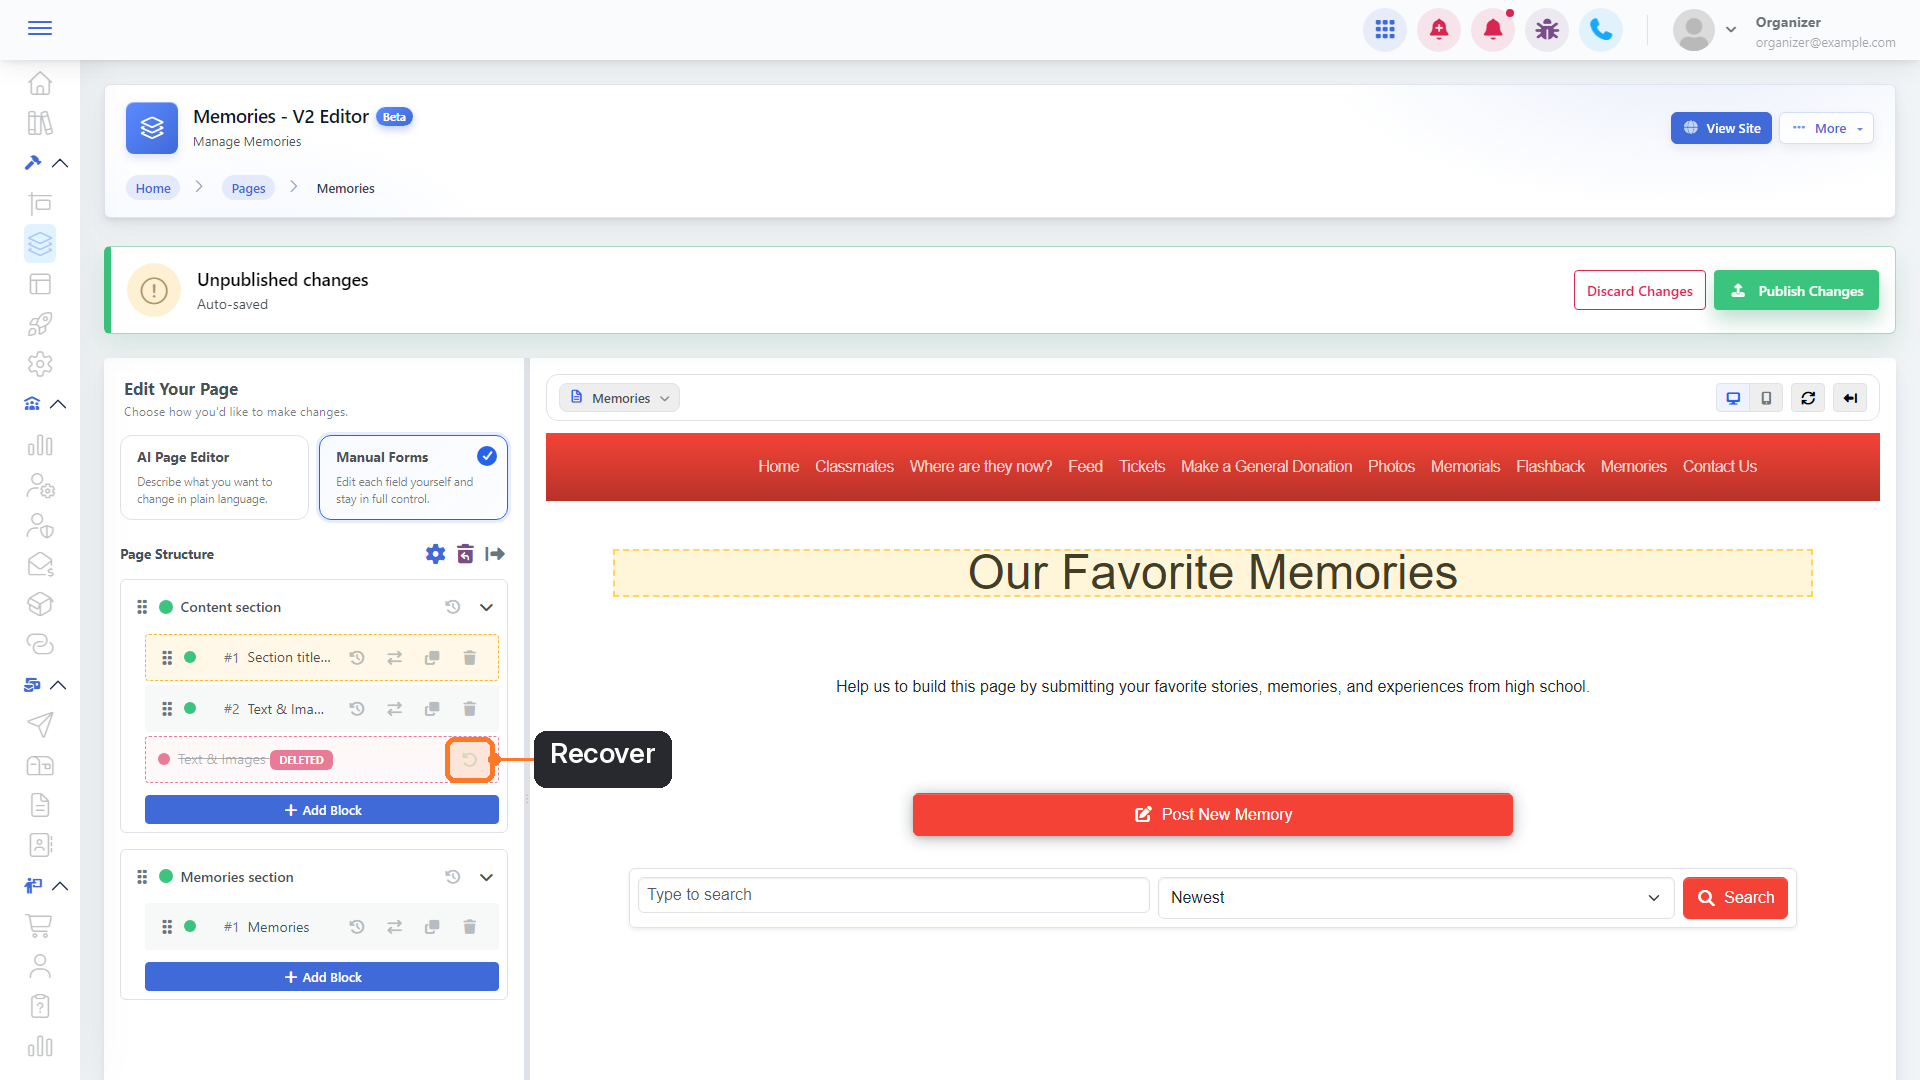
15. Changed your mind? Recover it
A deleted block stays in the list, crossed out and marked Deleted, until you publish. Click the green Recover arrow to bring it back.
Publish or discard your changes
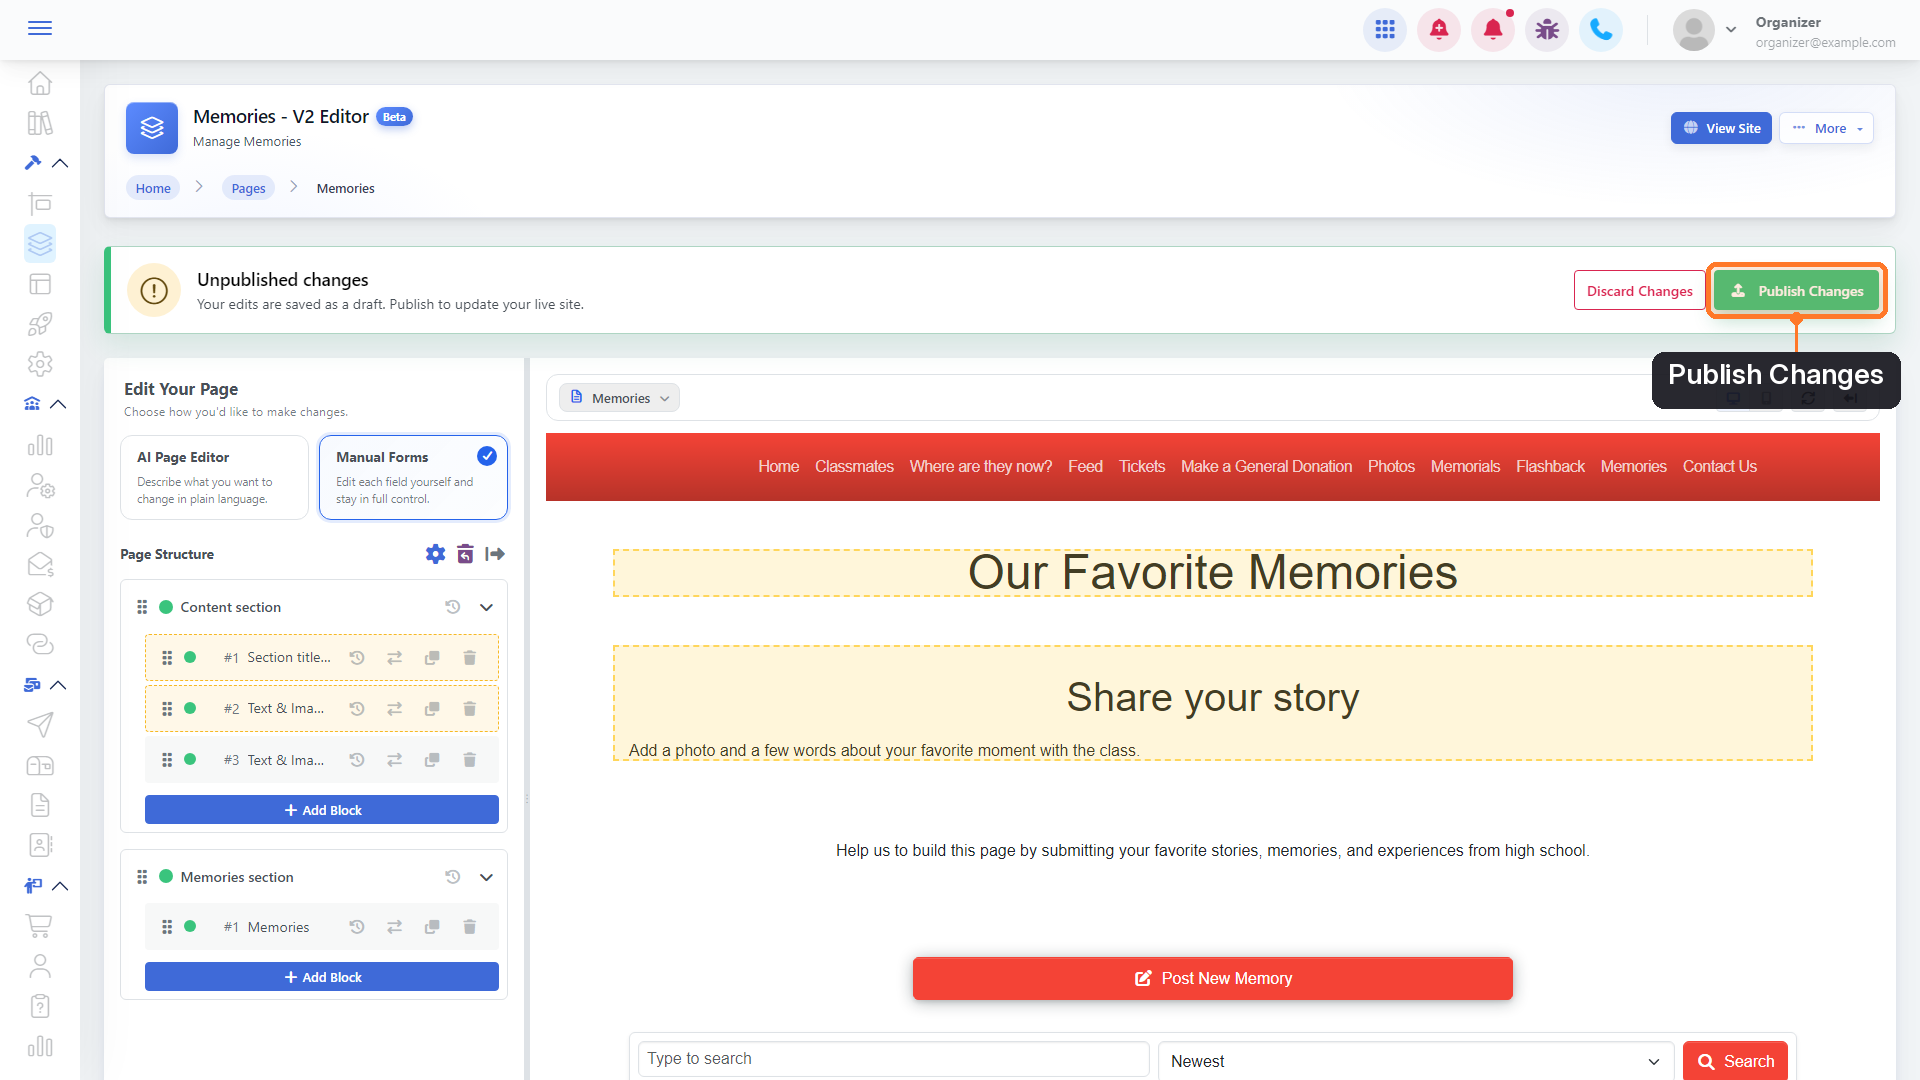
16. Publish your changes
When you're happy with the preview, click Publish Changes in the Unpublished changes bar at the top.
17. Confirm
The Publish Changes window lists every change about to go live. Click Save to publish them, or Cancel to keep working.
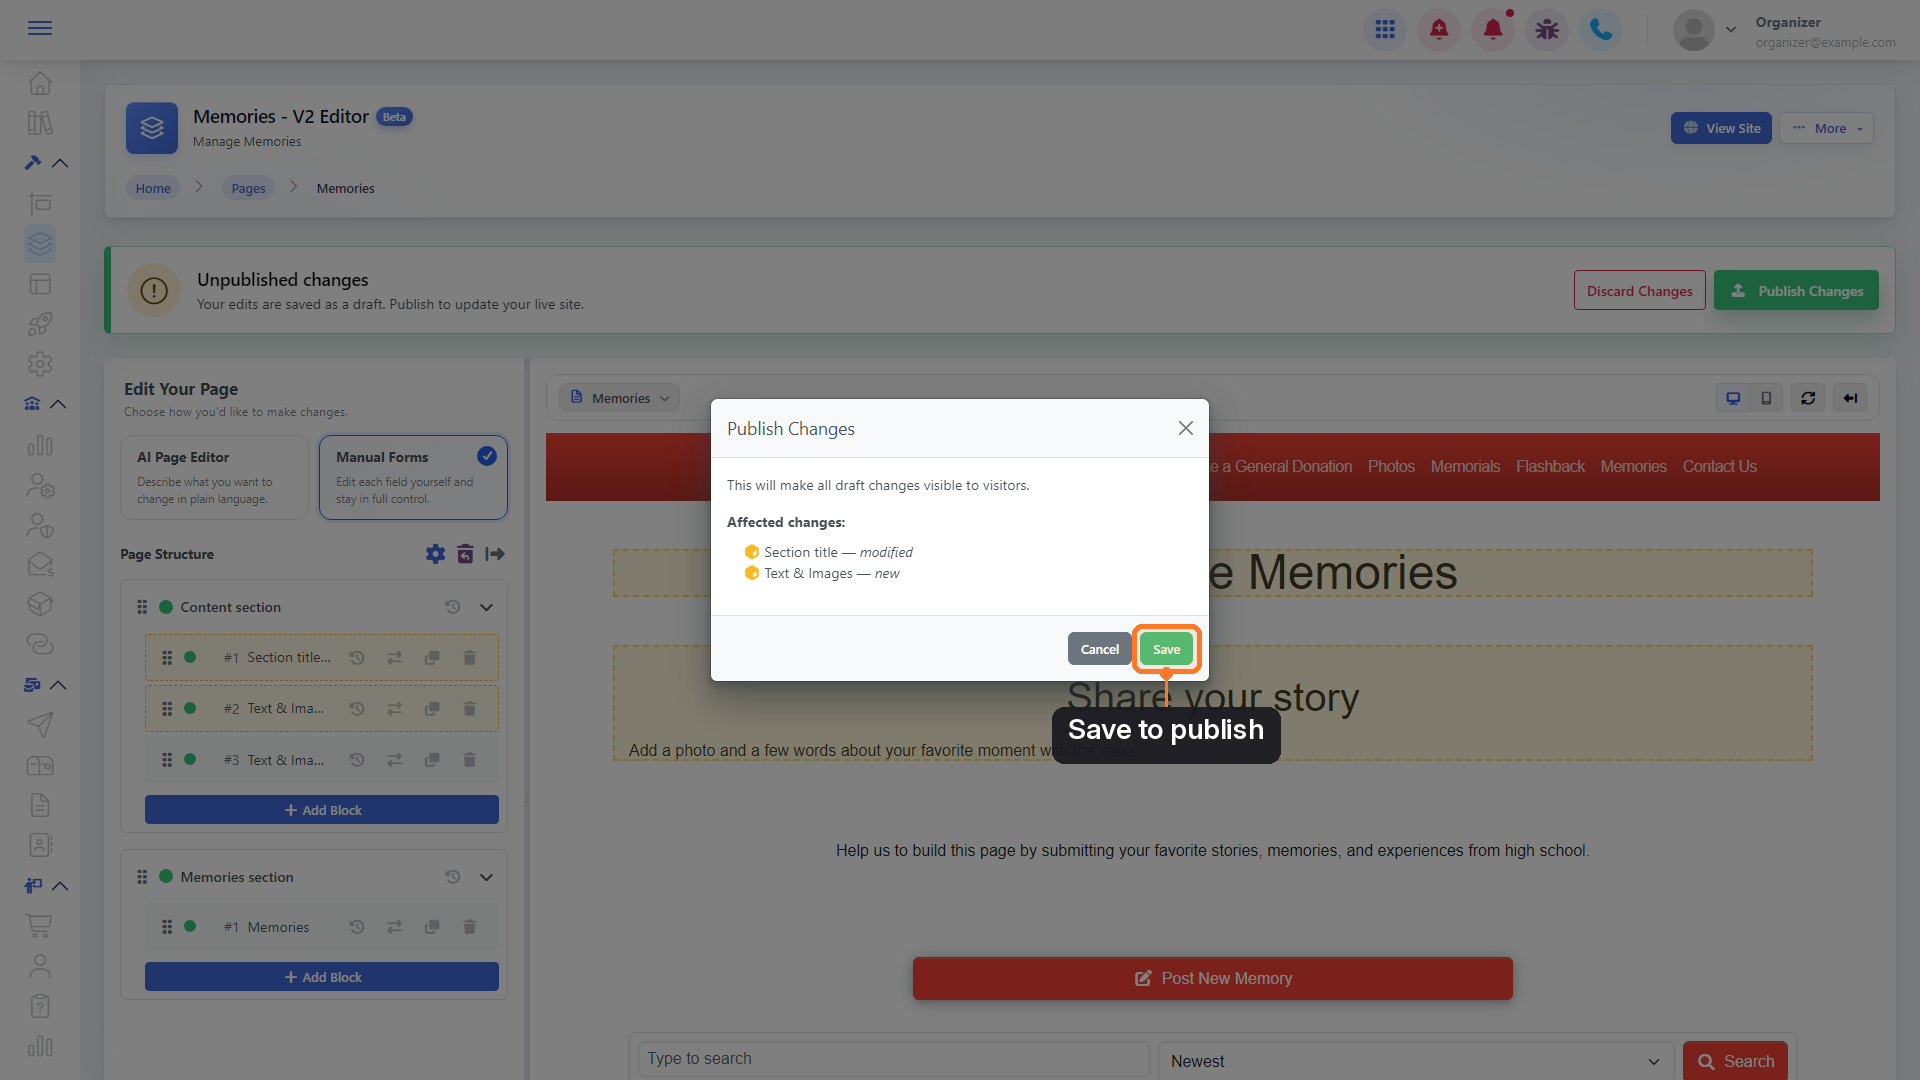
18. Or start over
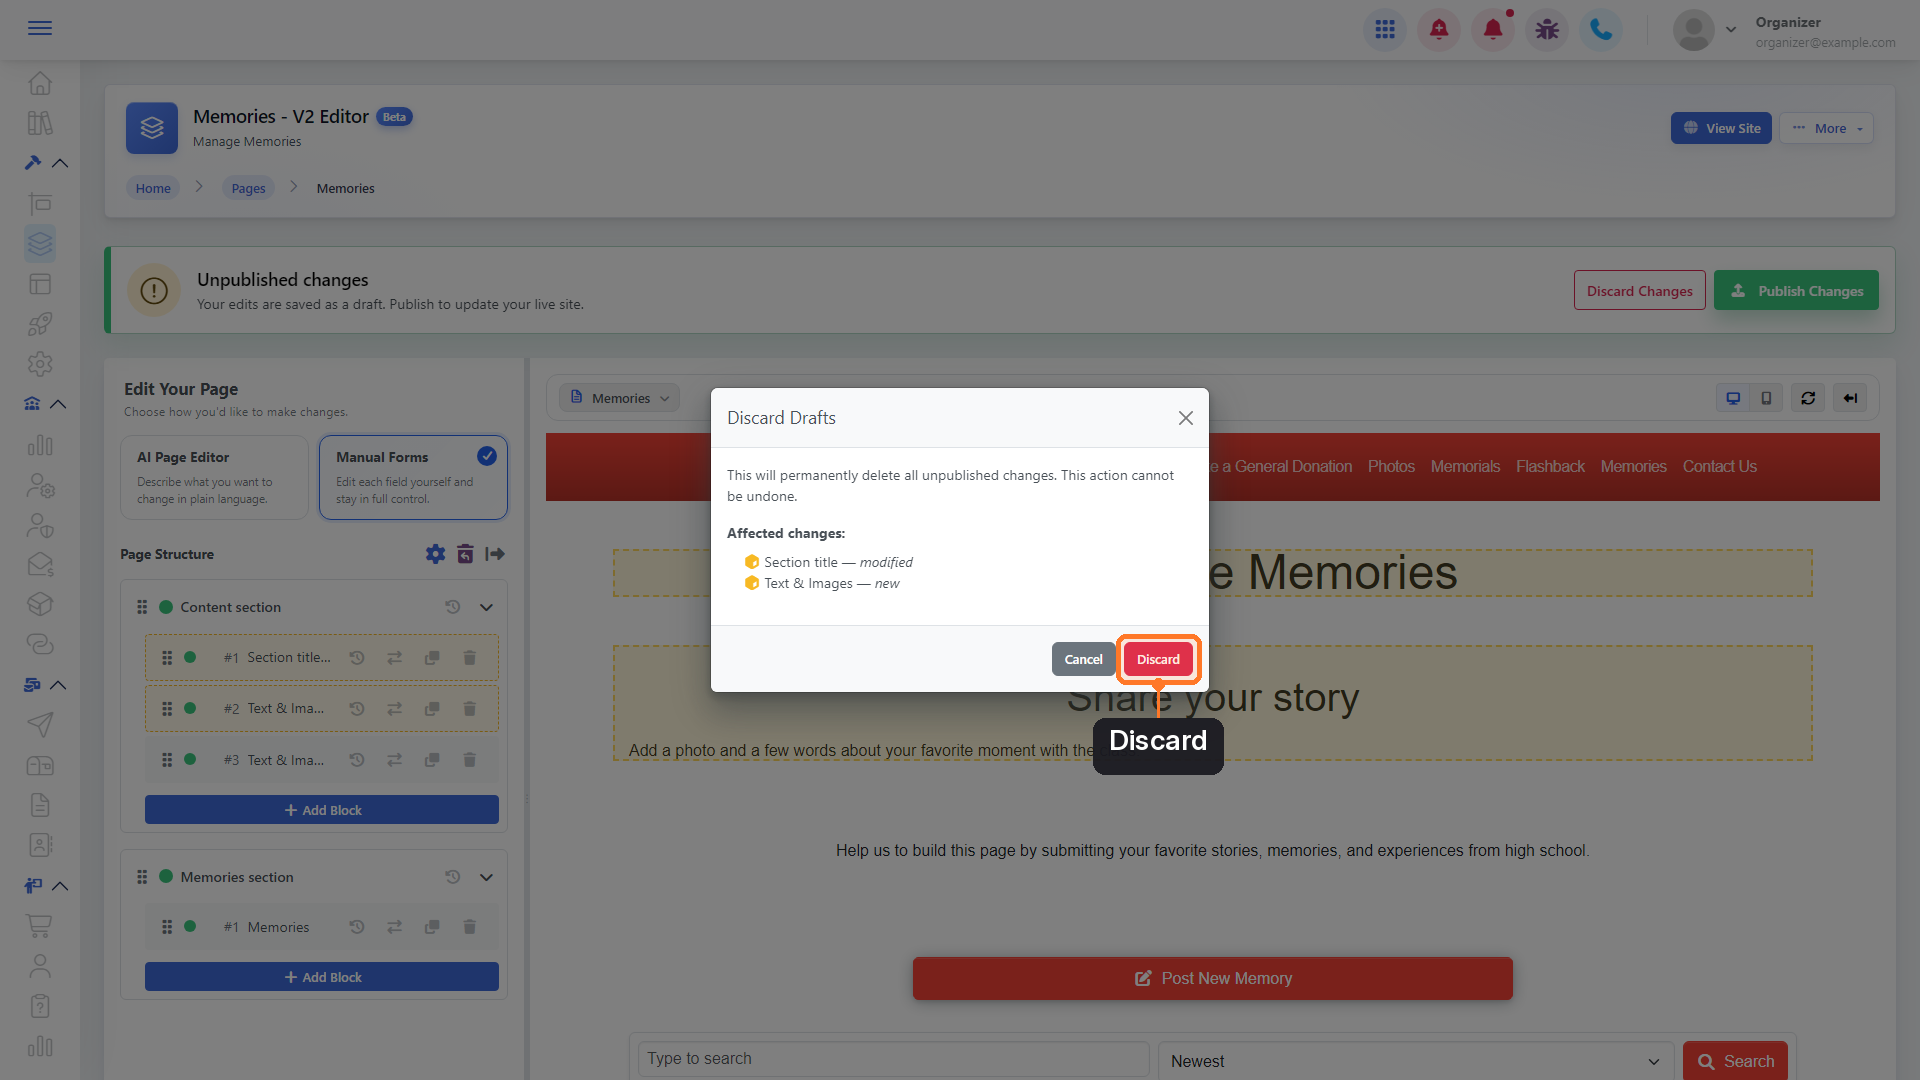
To throw away everything you haven't published yet, click Discard Changes, then Discard. This can't be undone, and your page goes back to its last published version.
Good to know
- Switch pages without leaving. Use the page menu at the top of the preview to jump to another page. The Desktop and Mobile buttons show how the page looks on each screen.
- Add a whole section. Click Add Section at the bottom of the Page Structure panel.
- Hide a section or block without deleting it. Click its green status dot, or set Status to Disabled in its settings.
- Duplicate and History. Each block can be duplicated, and History lets you look back at earlier versions.
- Restore something you deleted earlier. Blocks and sections deleted before your last publish are kept under Deleted Items (the trash icon next to Page Structure), where you can restore them.
- Feature content lives in Features. A feature block (like Tickets, Memories or a Poll) shows the feature on your page. You manage the feature's own content in Site Builder → Features.
- Change every page at once. On Site Builder → Pages, the AI Page Editor: all pages panel lets you describe a change once and have it made on every page (Premium). Publish All and Discard All Changes handle drafts on all your pages together.
- Need the old editor? Click More → Use Old Editor at the top of the new editor.