

Got a pile of checks, cash or match-day pledges for many participants? You don't have to enter them one at a time. Fill in a spreadsheet, upload it, check the preview, and MyEvent adds every donation to the right participant or team in one go.
To get this feature, contact support. Offline donation import is turned on for each website by the MyEvent support team. If you don't see the Actions button described below, contact support and ask them to turn on offline donation import for your website.
Before you start
- Every imported donation is saved as an offline donation: by check if you fill in a check number, otherwise as cash. Offline donations count toward participant, team and event totals like donations you enter by hand.
- Donors are not emailed. The import doesn't send receipts or thank-you emails to donors. Only you (the person who uploaded the file) get an email when the import is done.
- Nothing is imported until you confirm. After you upload, you see a preview of every row and what it matched.
- You can undo a whole import later if something went wrong.
Step 1: Open the P2P Donations report
In your dashboard, go to Reports → E-Commerce → P2P Donations. (The same tools are also on Reports → E-Commerce → Donations.)
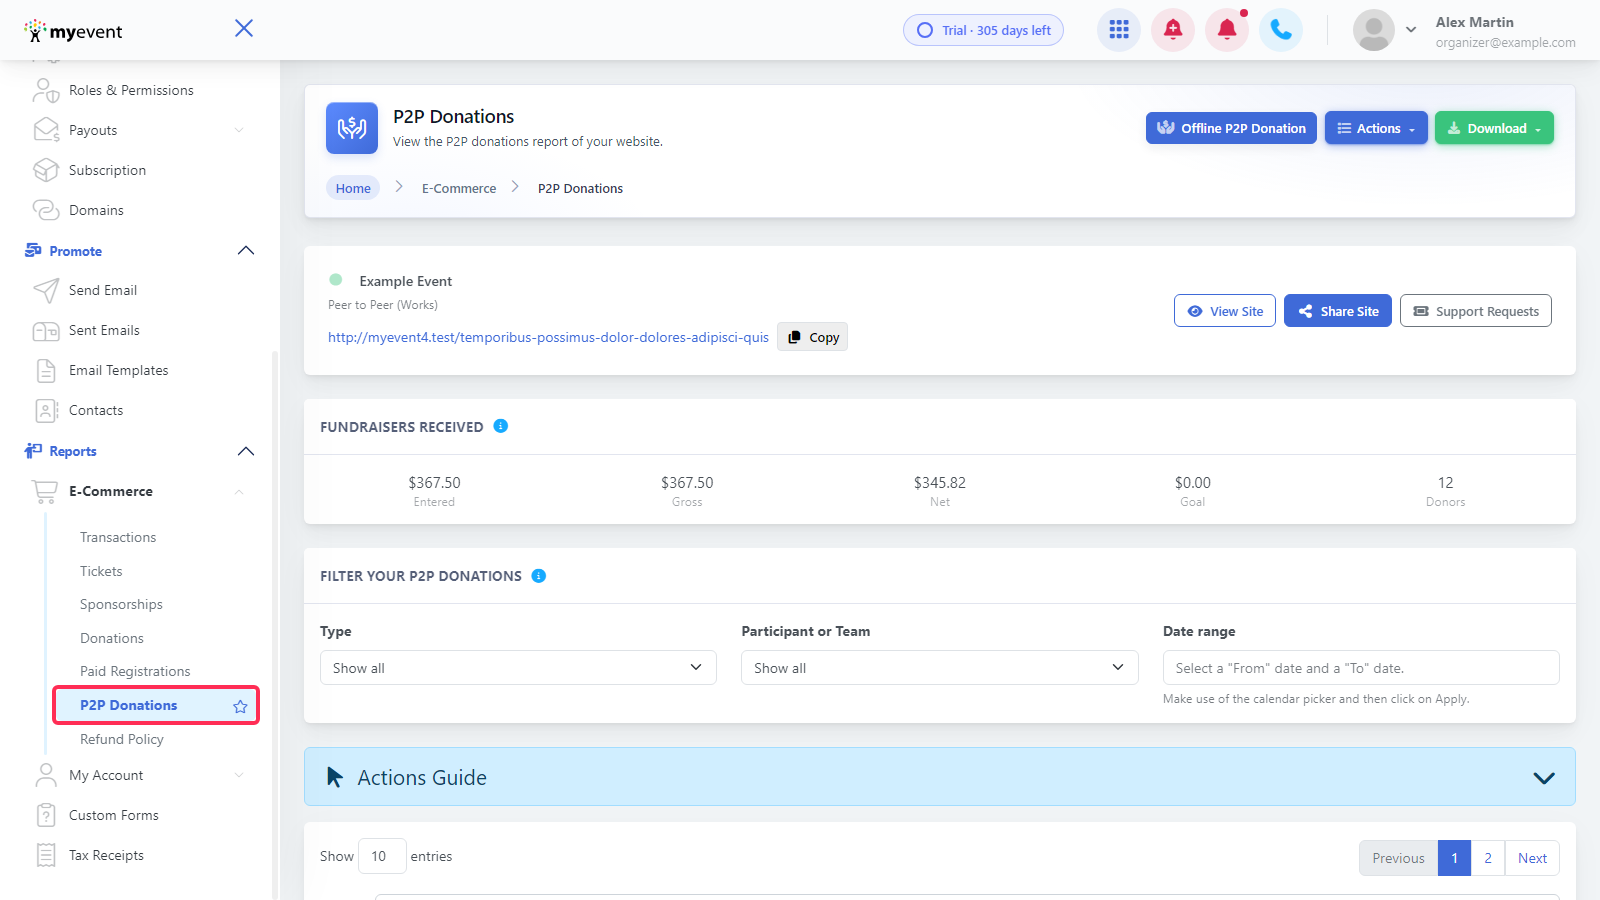
Step 2: Open the Actions menu
At the top right of the report, click Actions.
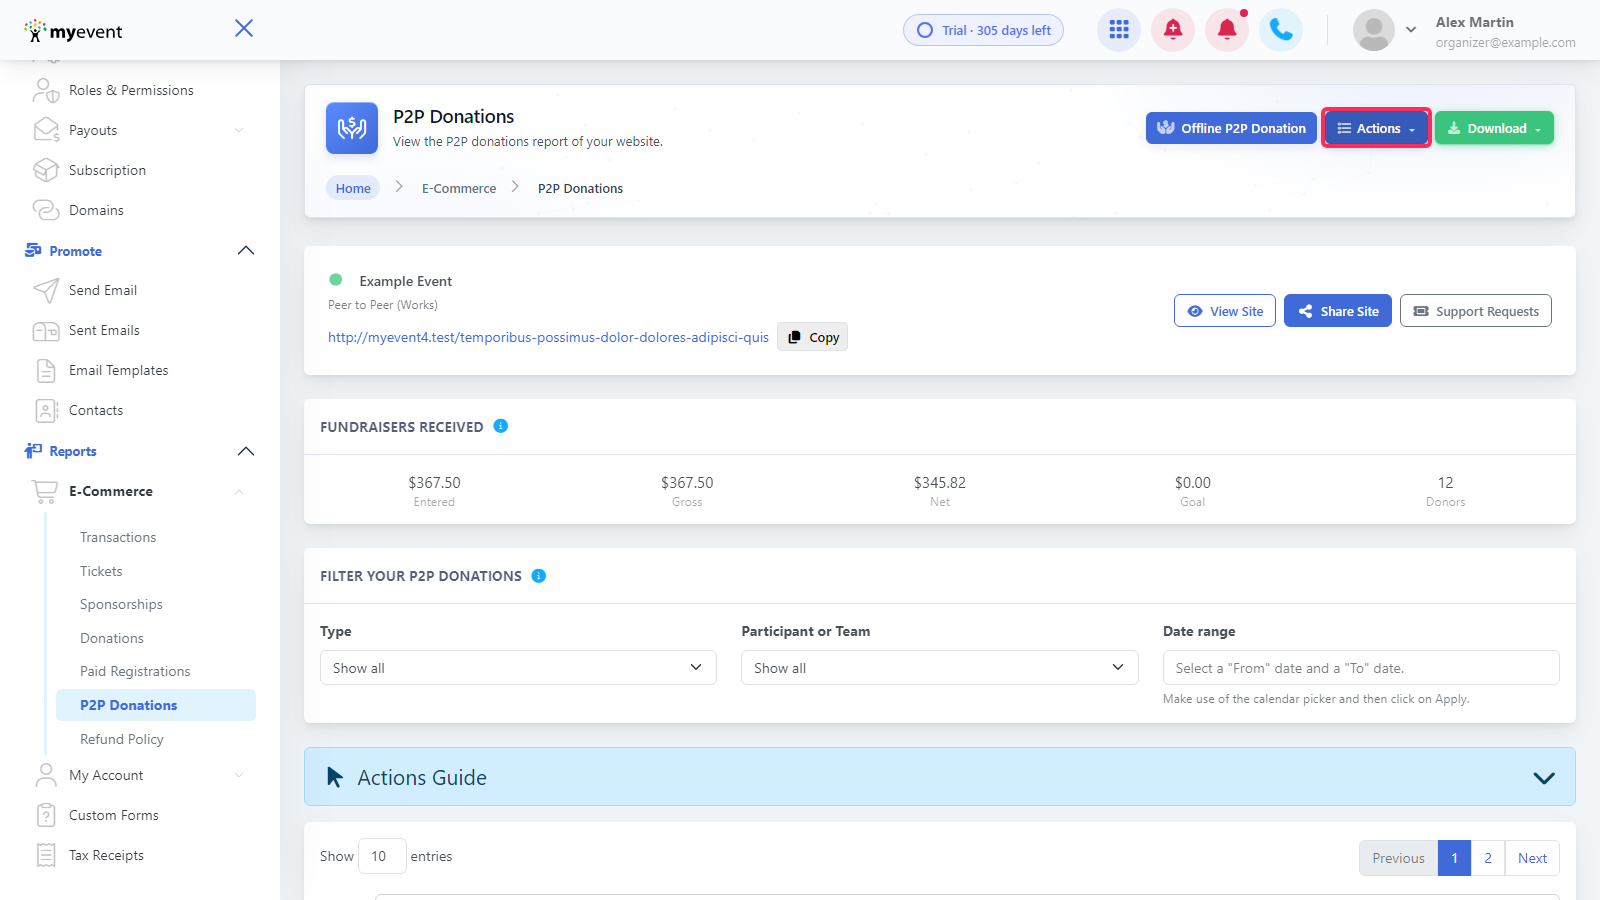
The menu has four options:
- Download template: a blank spreadsheet with all the columns.
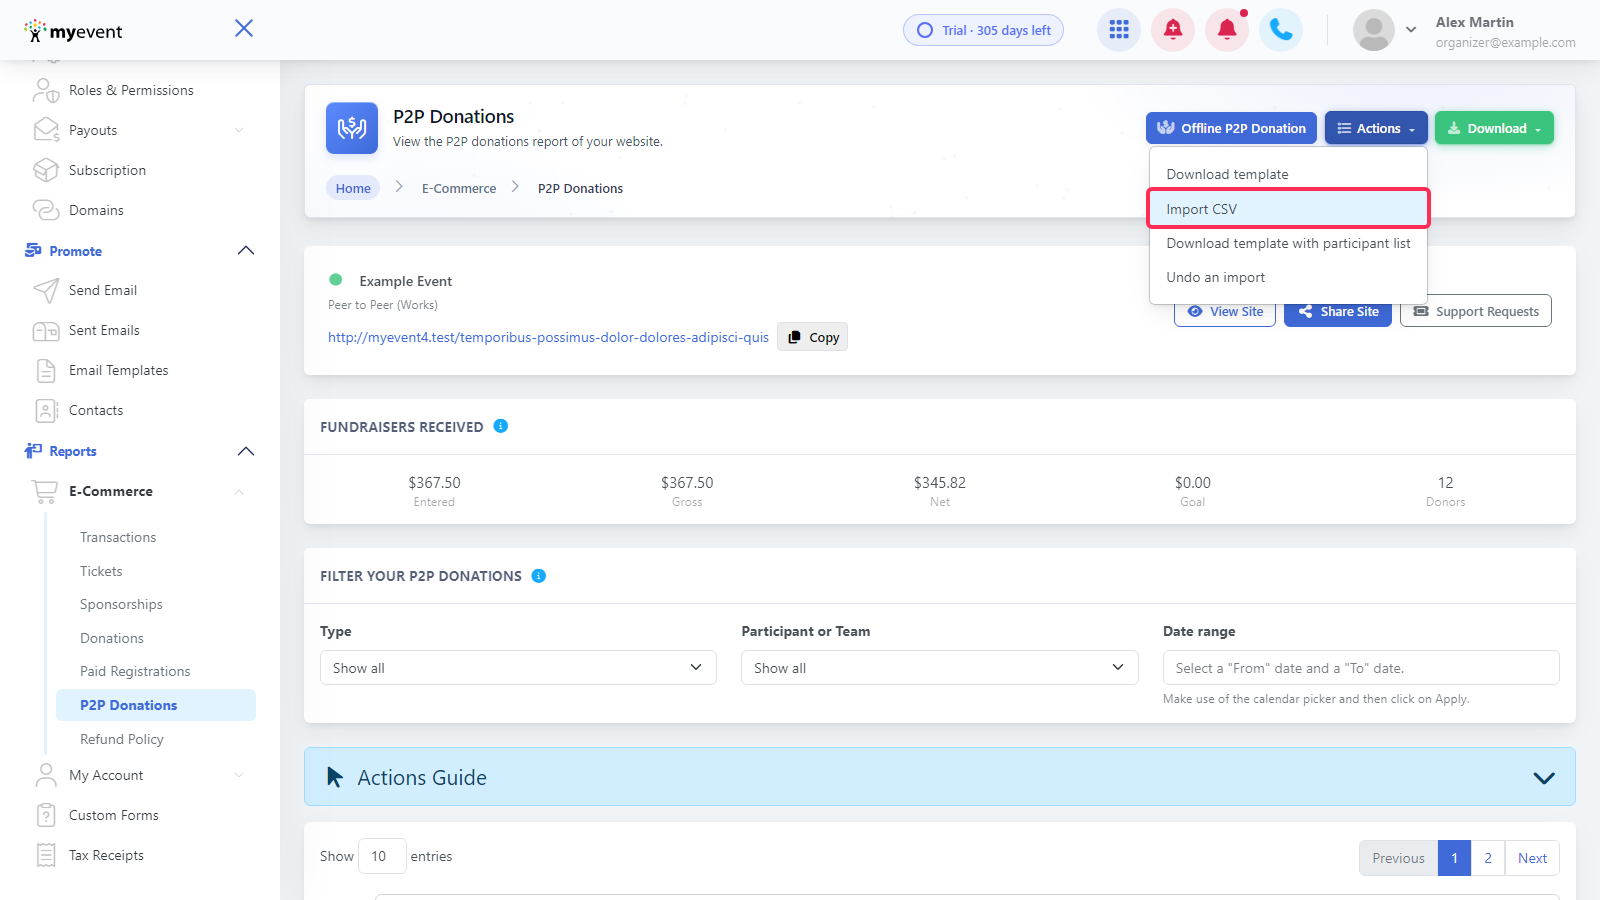
- Import CSV: upload your filled-in file.
- Download template with participant list: a spreadsheet that already lists every participant on your website.
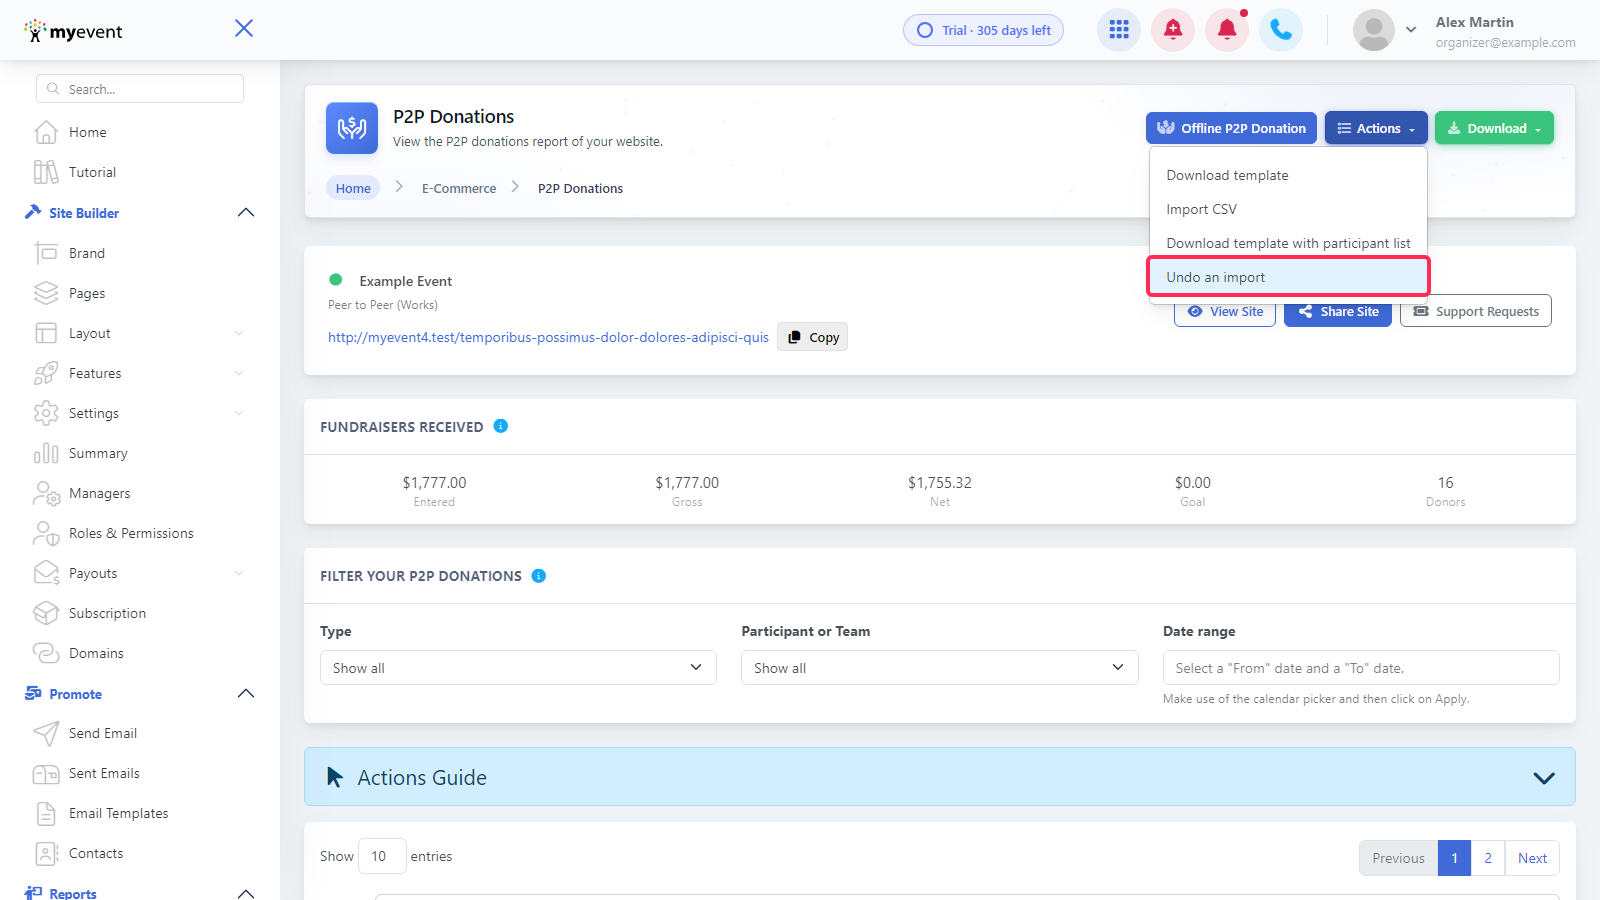
- Undo an import: remove all donations from an earlier import.
Step 3: Download a template
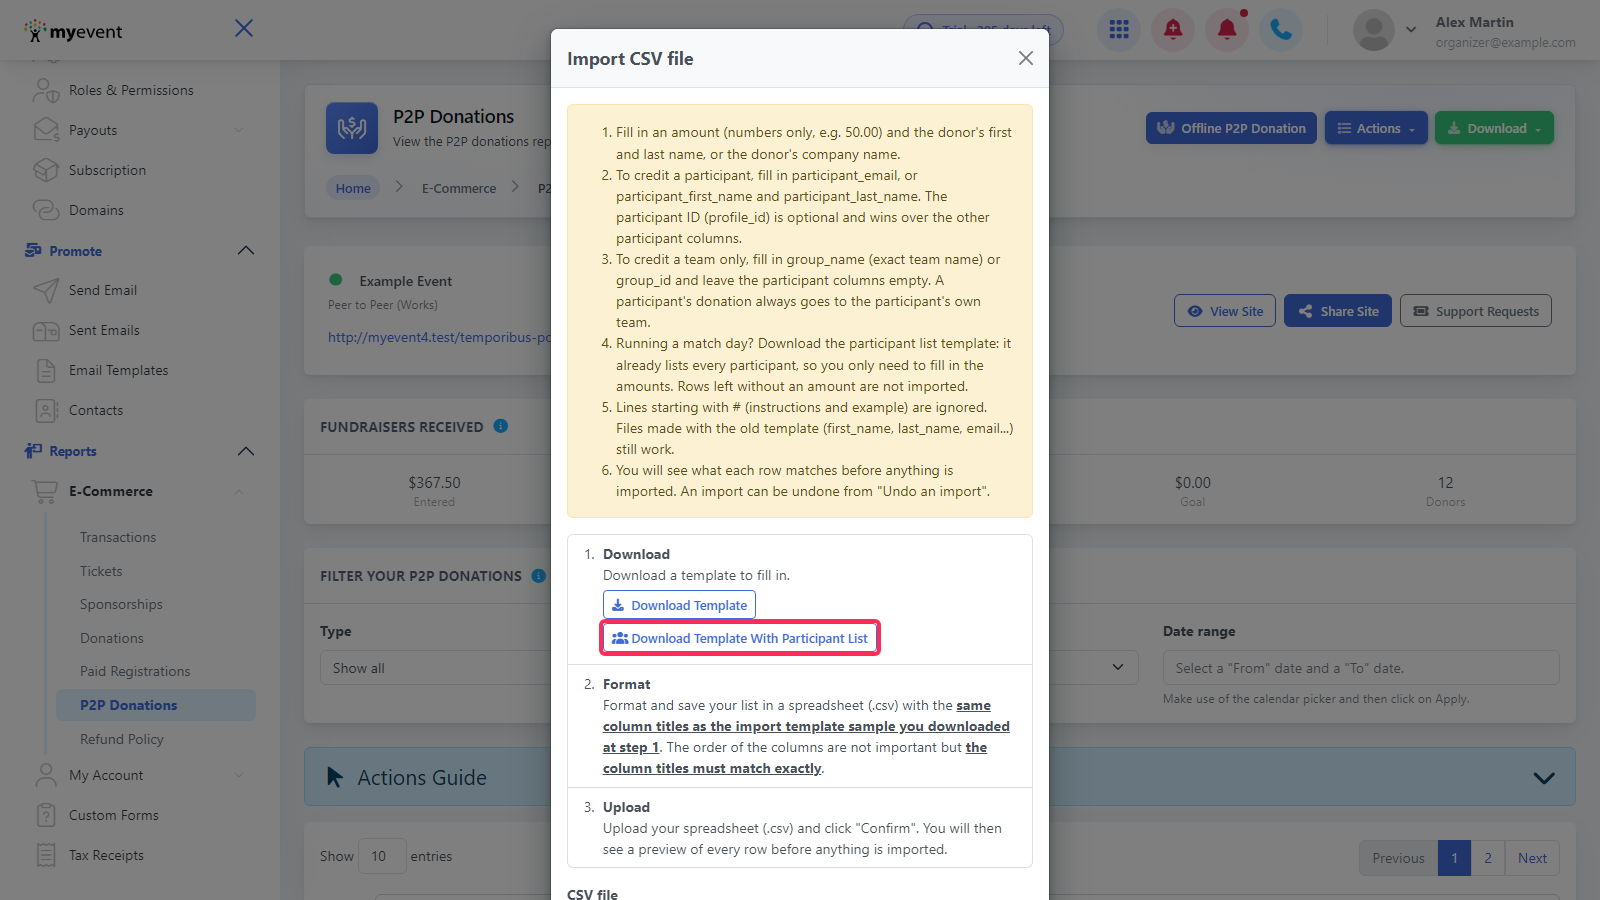
For a match day, or any time you're crediting many participants, click Download template with participant list. Each participant already has a row with their name, email, participant ID (profile_id) and team filled in, so you only need to type the amounts and donor details. Rows you leave without an amount are skipped.

To start from an empty file, choose Download template instead.
Templates start with lines beginning with #: an instructions line (and, in the blank template, an example). Lines starting with # are ignored, so you can leave them. Files made with the old template (first_name, last_name, email…) still work.
Step 4: Fill in the spreadsheet
Open the file in Excel, Google Sheets or Numbers, fill it in and save it as .csv. Keep the column titles exactly as they are. Column order doesn't matter.
Column reference
| Column | Required? | What it does | Format | Example |
|---|---|---|---|---|
| participant_first_name | Conditional: with participant_last_name, when there's no participant_email or profile_id | Participant's first name, used to find who gets credit | Text | Franz |
| participant_last_name | Conditional: with participant_first_name, when there's no participant_email or profile_id | Participant's last name | Text | Purdy |
| participant_email | Optional (the best way to find the participant) | Finds the participant by email | franz@example.com | |
| profile_id | Optional | Participant ID. When filled, it wins over all other participant columns | Number | 1915 |
| group_name | Optional | Exact team name. Use it alone for a team-only donation | Text (exact name) | Team Blue |
| group_id | Optional | Team ID. Wins over group_name | Number | 134 |
| amount | Required (the only column the file must have) | Donation amount | Numbers only | 50.00 |
| donation_date | Optional (today if empty) | Date the donation was received | YYYY-MM-DD | 2026-10-31 |
| donor_first_name | Conditional: with donor_last_name, unless donor_company_name is filled | Donor's first name | Text | Pat |
| donor_last_name | Conditional: with donor_first_name, unless donor_company_name is filled | Donor's last name | Text | Placeholder |
| donor_company_name | Conditional: required if there's no donor first and last name | Company that gave (for example, a matching sponsor) | Text | Example Matching Co. |
| donor_email | Optional | Donor's email (not the participant's) | pat@example.com | |
| donor_phone | Optional | Donor's phone | Text | 555-555-0100 |
| check_number | Optional (cash if empty) | Check number. When filled, the donation is recorded as a check | Text | 1001 |
| message | Optional | Donor's message for the participant | Text | Go team! |
| anonymous | Optional (not anonymous if empty) | Makes the donation anonymous | 1 (also yes, y, x, true, oui) | 1 |
| donor_address | Optional | Donor's street address | Text | 123 Main St |
| donor_city | Optional | Donor's city | Text | Toronto |
| donor_state | Optional | State or province code | Code | ON |
| donor_country | Optional | Country code | Code | CA |
| donor_zip | Optional | ZIP or postal code | Text | M5V 1A1 |
Who gets credit: the rules
The donor. Every row with an amount needs a donor: either donor_first_name and donor_last_name, or donor_company_name. A first name alone isn't enough.
The participant. To credit a participant, fill in one of these:
- participant_email (recommended). Upper/lower case and extra spaces don't matter. You don't need the names when you give an email. If you do fill in the names too, they must match that participant.
- participant_first_name and participant_last_name, both of them. If two participants have the same name, the row is flagged and you need to add participant_email or profile_id.
- profile_id, the participant ID. It's optional, but when it's filled it wins over the other participant columns, and the names aren't checked.
The team.
- A donation to a participant always goes to that participant's own team. You can leave group_name and group_id empty. If you fill in a team that isn't the participant's team, the row is flagged.
- To credit a team only, leave all participant columns empty and fill in group_name (exact team name, case and spacing don't matter) or group_id. If both are filled, group_id is used. If two teams share the name, use group_id.
- If you leave all participant and team columns empty, the row is imported as a general donation to the event.
Amounts. Numbers only, for example 50 or 50.00. Spaces and $, € or £ signs are removed, and 1,234.50 is read as one thousand two hundred thirty-four fifty. A comma followed by one or two digits (50,25) is read as a decimal. The amount must be more than zero.
Dates. Use YYYY-MM-DD (for example 2026-10-31). Other common date formats usually work too. Dates are read in your website's time zone. Future dates aren't accepted. Leave the date empty to use today's date.
Blank values. Empty date = today. Empty check_number = cash. Empty anonymous = not anonymous. A row with no amount and no donor is skipped. A row with a donor but no amount is flagged.
Step 5: Upload the file
From Actions, click Import CSV.
The Import CSV file window repeats the main rules. Both templates can also be downloaded from here.
Under CSV file, click Choose File, pick your .csv (max 10 MB) and click Confirm.
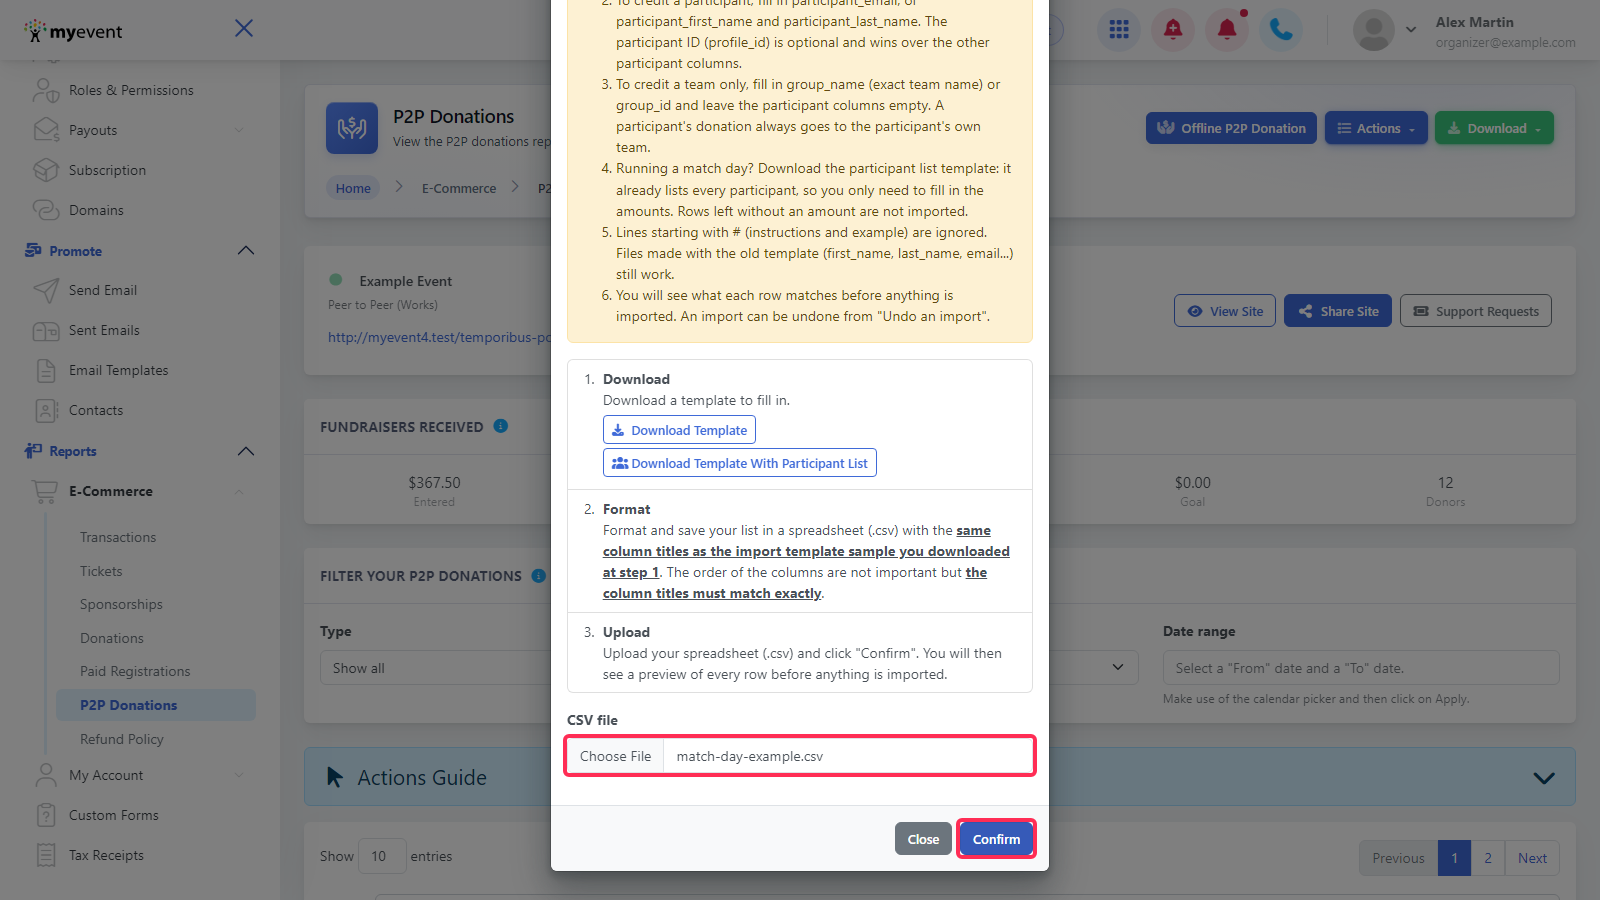
If the amount column is missing, you'll see "The file is missing required column(s): amount." Add the column and upload again.
Step 6: Review the preview
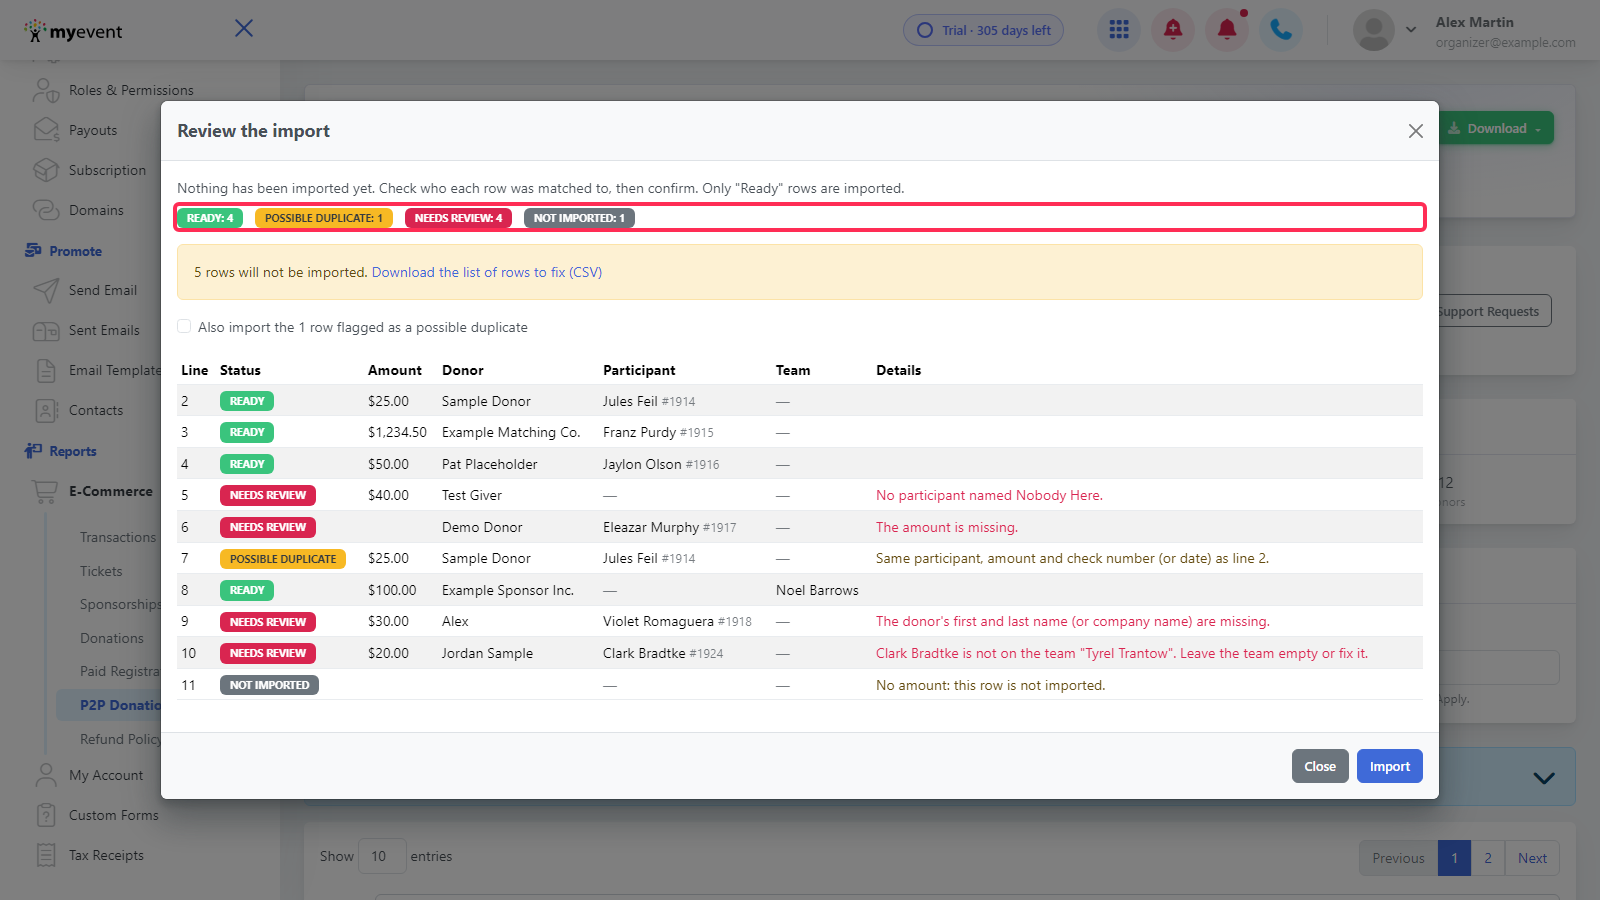
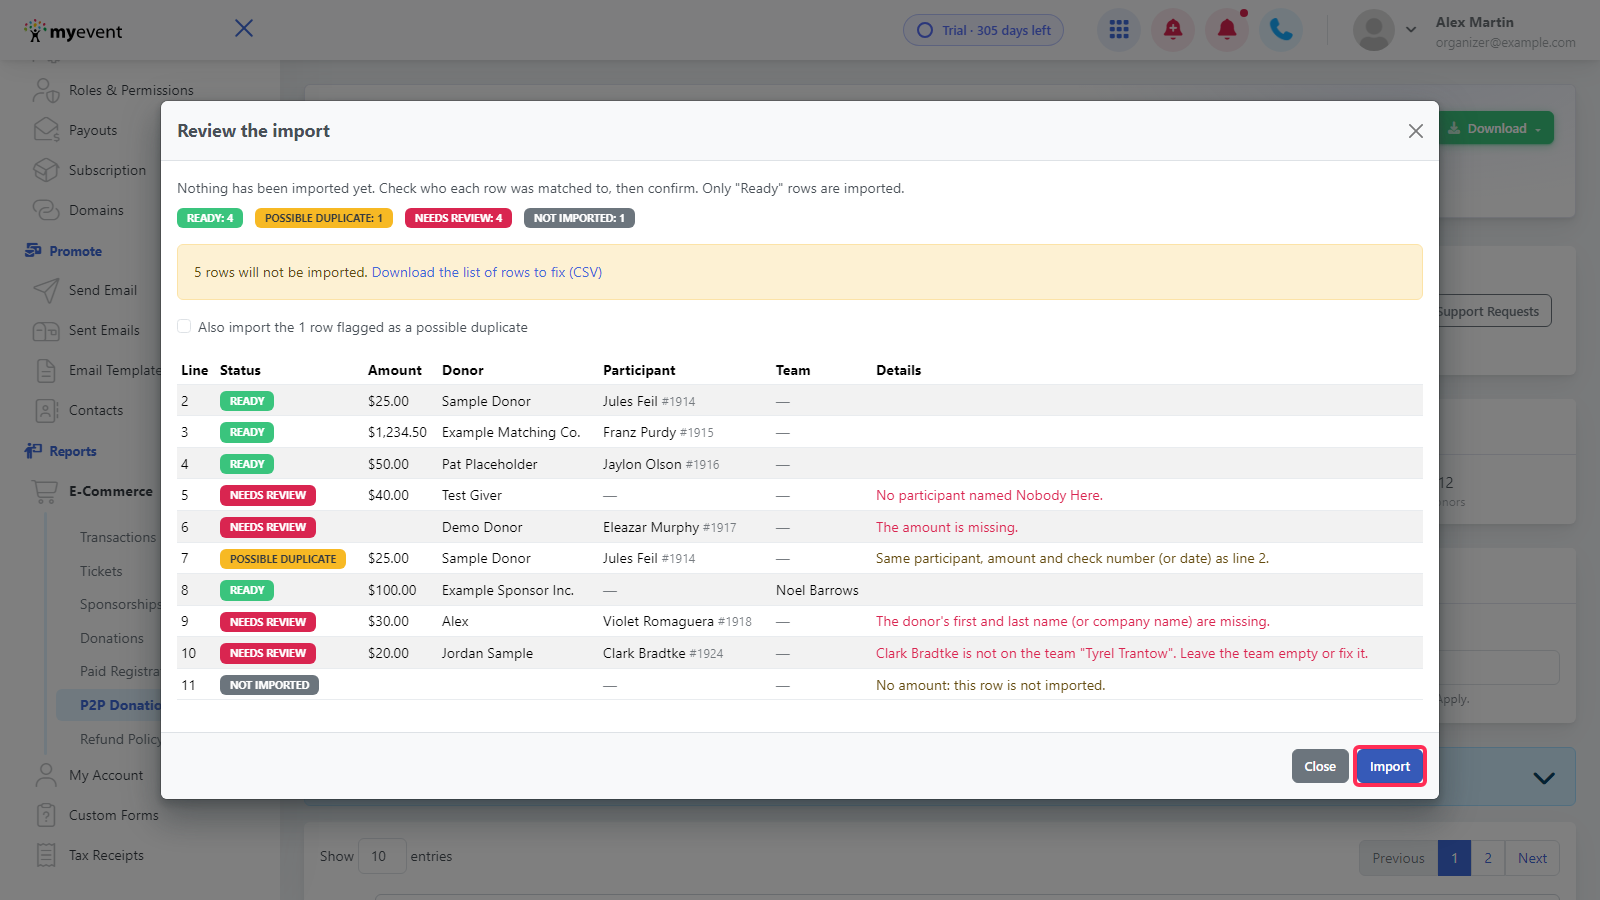
The Review the import window shows what each row matched. Nothing has been imported yet. The counts at the top show how many rows have each status:
| Status | Meaning |
|---|---|
| Ready (green) | Will be imported. |
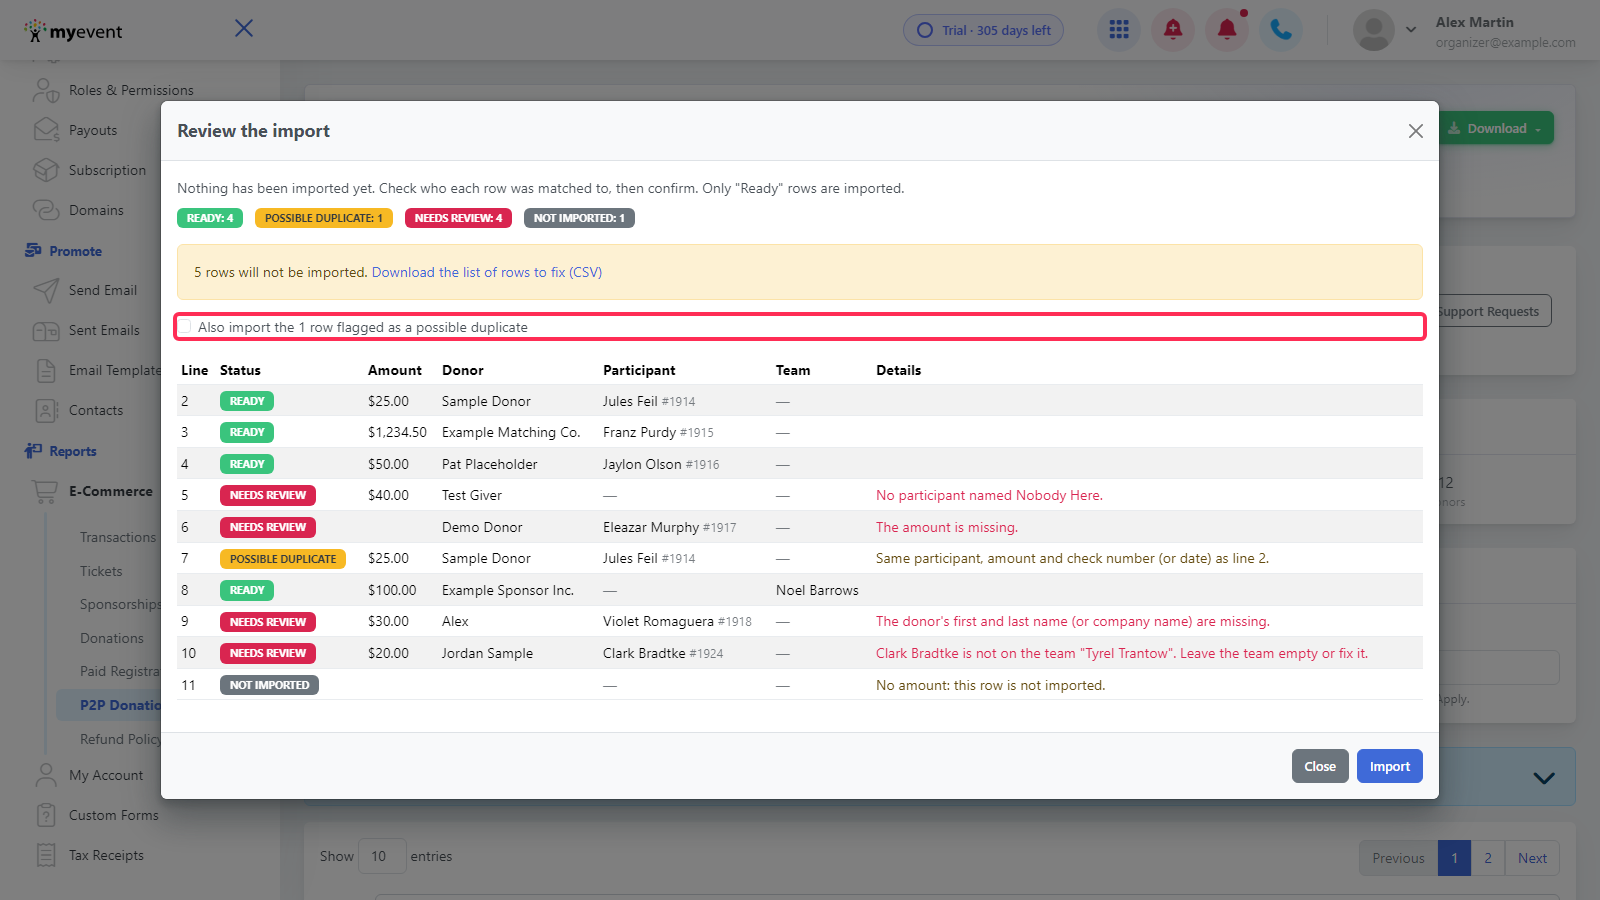
| Possible duplicate (yellow) | Looks like another row in the file, or an offline donation already on your site (same participant, amount and check number, or date). Not imported unless you tick the box in Step 7. |
| Needs review (red) | Has a problem and won't be imported. The Details column says why. |
| Not imported (grey) | No amount and no donor, so the row is skipped. |
For each row, the table shows the line number in your file, the status, amount, donor, the participant it matched (with their ID), the team and the details.
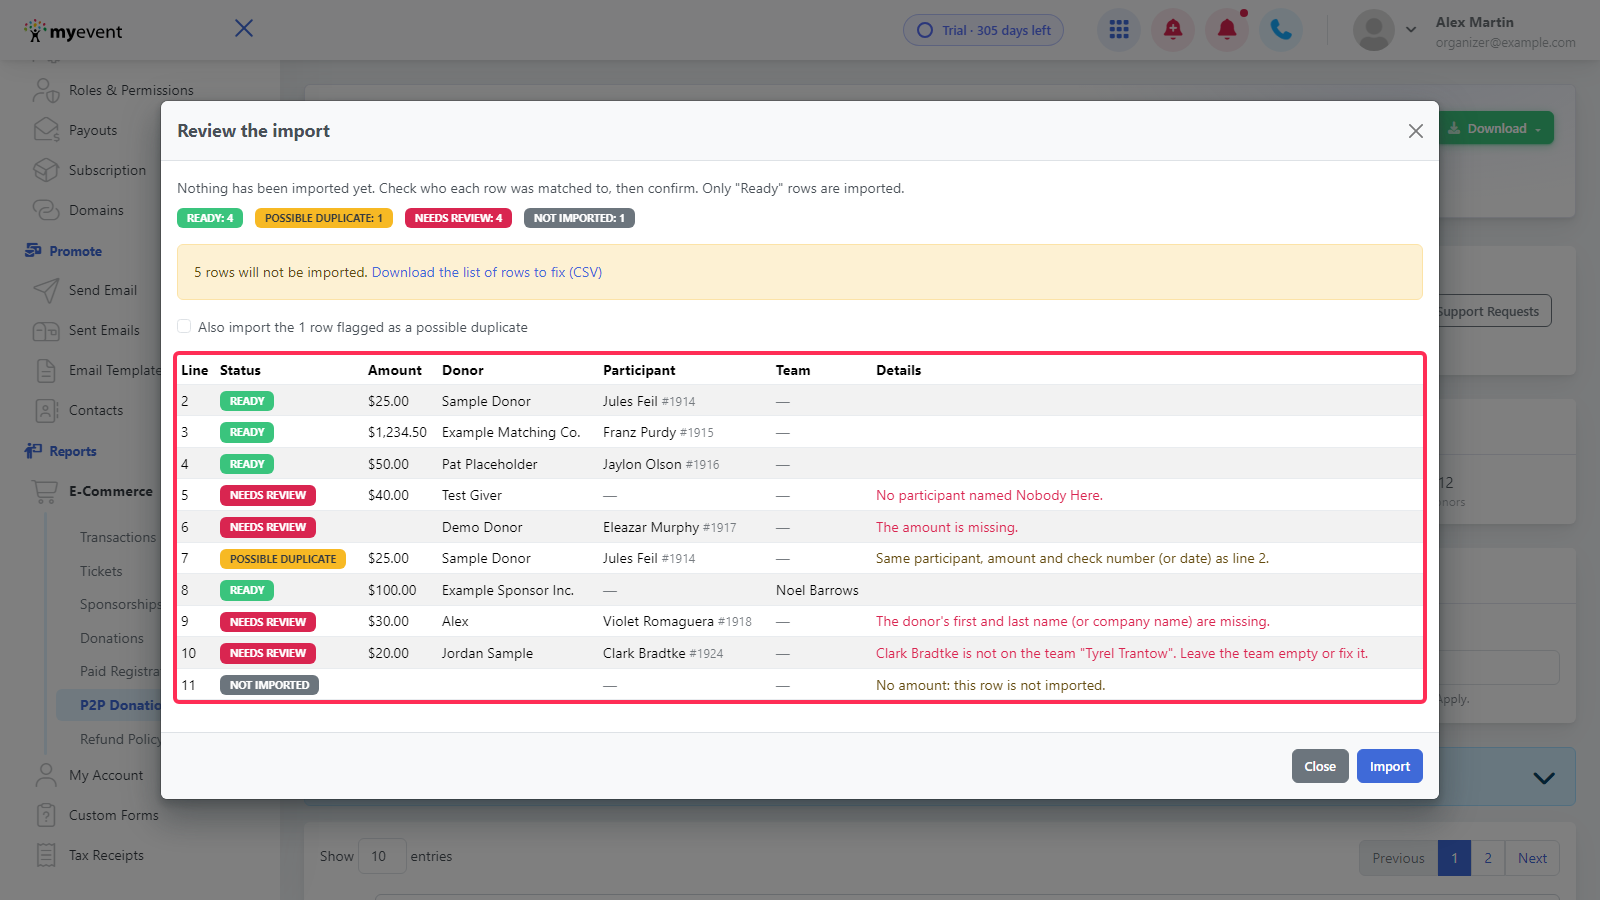
Common messages under Details:
- "No participant named …": check the spelling, or use participant_email.
- "… participants are named …": add participant_email or profile_id.
- "The amount is missing." or "… is not a valid amount."
- "The donor's first and last name (or company name) are missing."
- "… is not on the team …": leave the team empty or fix it.
- "The date … is not valid. Use YYYY-MM-DD."
Step 7: Fix flagged rows (optional)
Click Download the list of rows to fix (CSV) to get only the rows that won't be imported. Each row has its line number, status and reason, followed by the usual template columns. Fix them and upload that file as a new import later.

If the possible duplicates really are separate donations, tick Also import the … rows flagged as possible duplicates.
Step 8: Confirm the import
Click Import. Only Ready rows are imported, plus possible duplicates if you ticked the box. (The Import button doesn't appear if no row can be imported.)
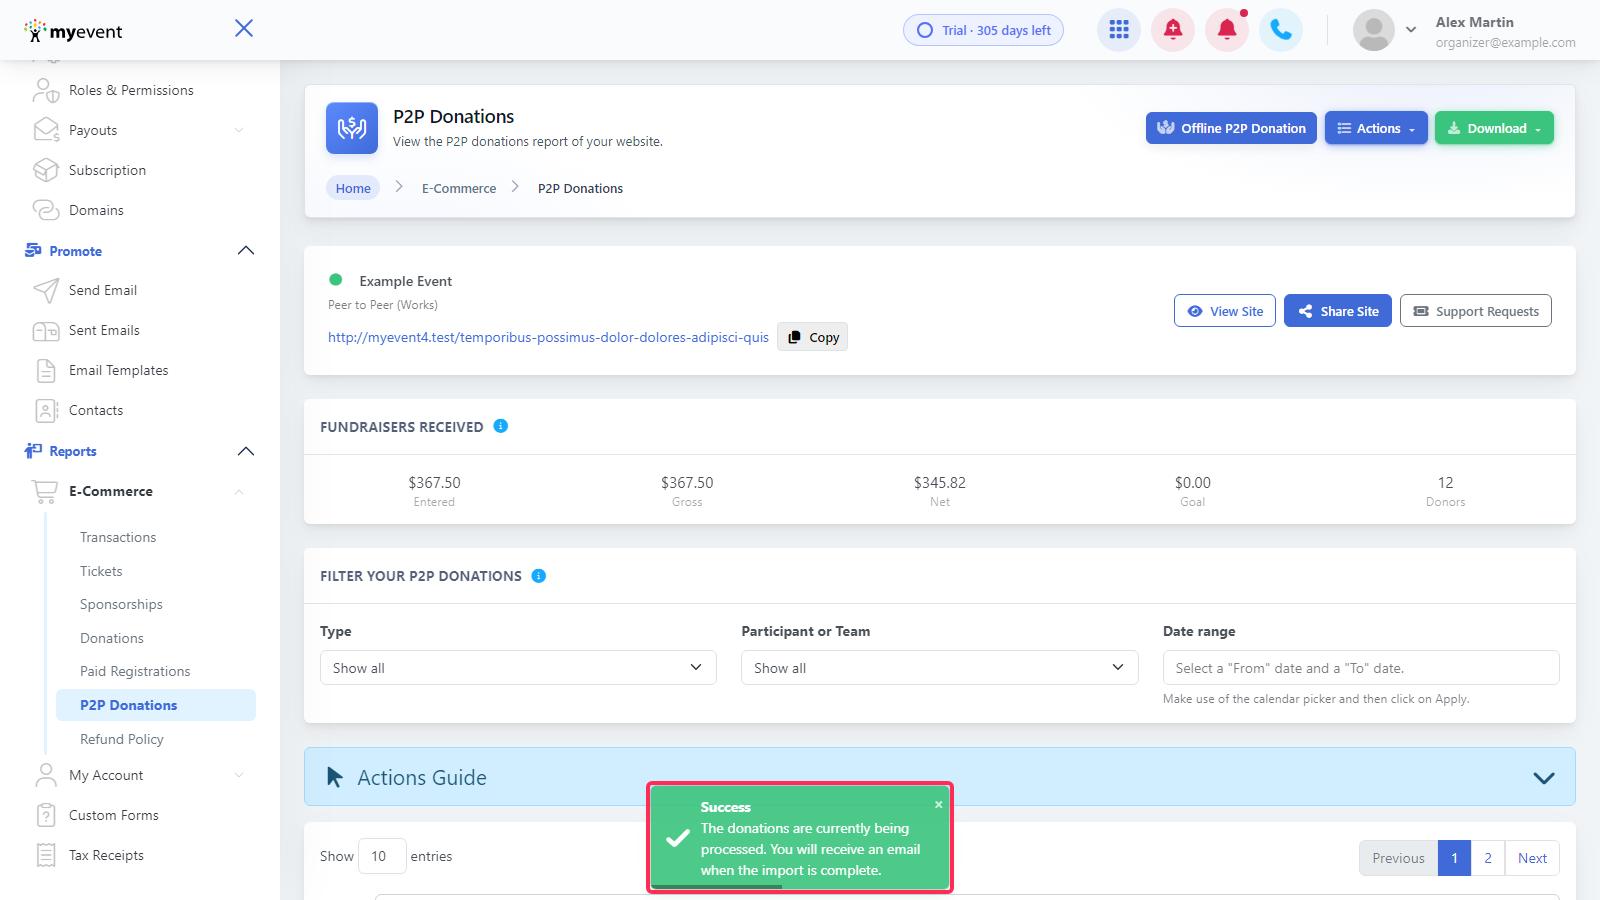
You'll see "The donations are currently being processed. You will receive an email when the import is complete."
When it's done, you get an email with the result. Donors don't get any email. The new donations show up in your reports as offline donations.
The preview only lasts for your current session. If you see "This import preview expired", upload the file again.
Undo an import
Imported the wrong file? From Actions, click Undo an import.
You'll see your latest imports, with the date, who imported, the number of donations and the total amount. Click Undo this import next to the one to remove.
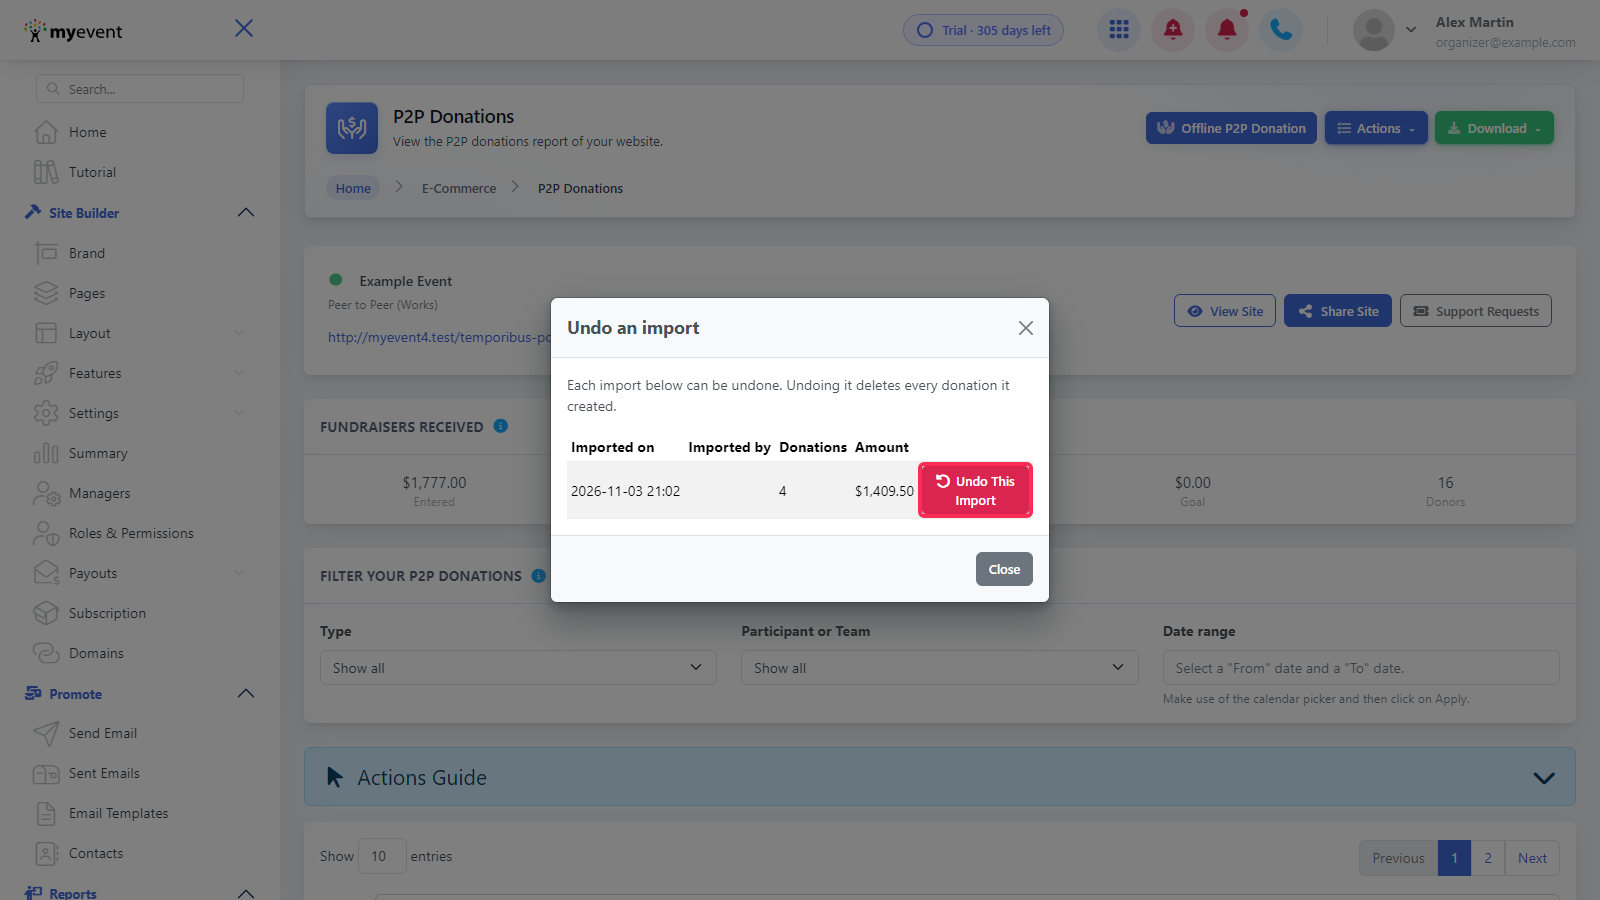
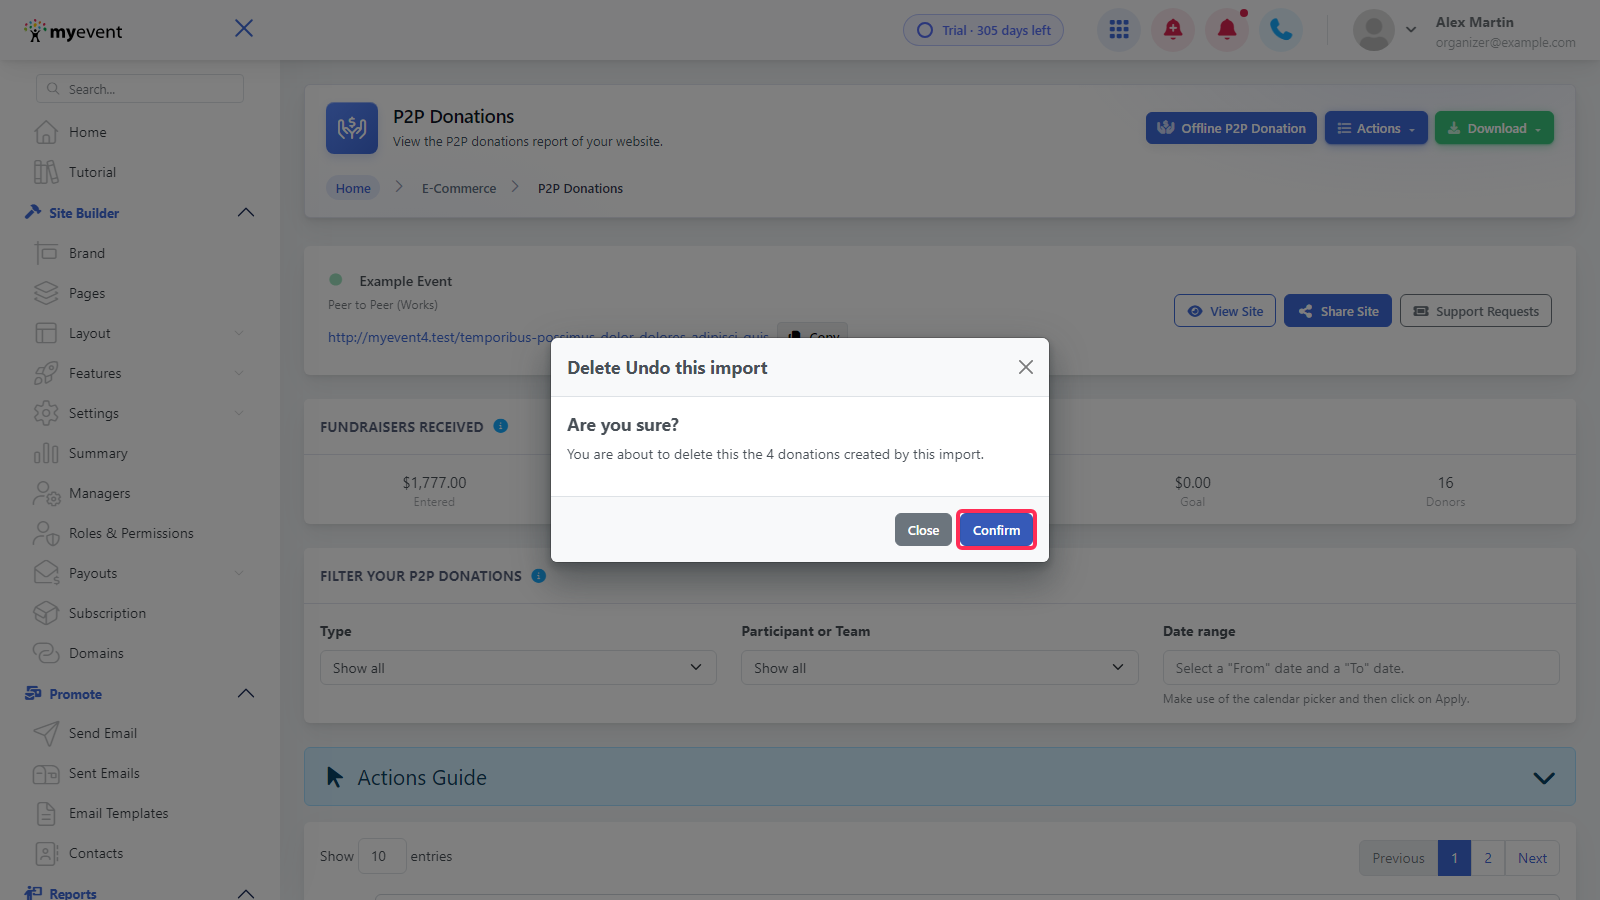
Click Confirm. Every donation created by that import is deleted, and you'll see how many were removed.
Tips for large files
- Use the template with participant list. Rows without an amount are skipped, so you don't have to delete participants who didn't raise anything.
- Use participant_email or profile_id instead of names. They avoid the "same name" problem.
- Keep the file under 10 MB. For very large lists, split it into a few files and import them one at a time.
- Fill in check_number for checks. It records the payment type and helps catch duplicates.
- Fix what you can before uploading, then use Download the list of rows to fix for the rest.
- After a big import, wait for the email before checking totals.