The Ticket Scanning feature enables you to securely validate tickets sold through your website using unique QR codes. Once activated, each ticket purchase automatically generates a digital ticket containing transaction details and a scannable QR code, which is delivered to the customer via email in PDF format.
At the event, a "door person" uses their phone to scan the guests' tickets to "check them in".
Important note: You must enable ticket scanning BEFORE selling tickets. Any tickets sold without ticket scanning enabled will ot include a QR code, and therefore will not be scannable at the door.
Follow the steps below to activate the ticket scanning feature for tickets sold on your website.
1. Open your Site Builder
Log in to your admin panel and go to Site Builder -> Settings -> General.
Find the Ticket Scanning option and turn it ON.
Ticket Re-Entry = Allow attendees to leave and re-enter the event. Staff can mark tickets as temporarily out and scan them again for re-entry. Set the maximum number of times a ticket can be re-scanned. Leave blank for unlimited re-entries.
Manual Entry = Allow staff to manually enter ticket codes instead of scanning QR codes.
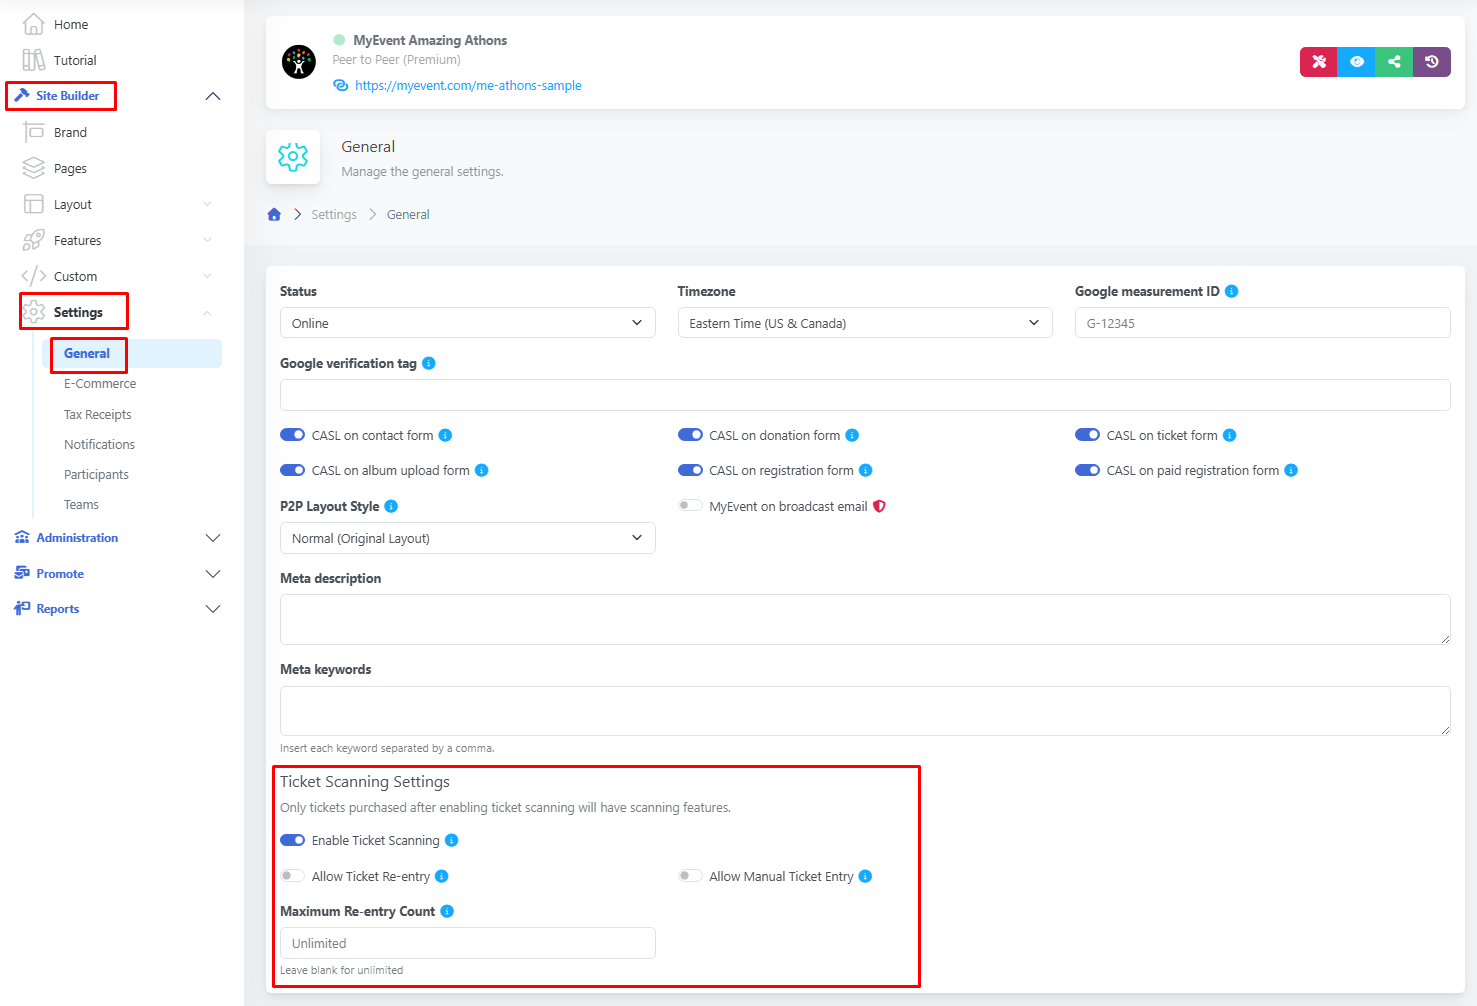
Make sure to save your changes!
What does the customer do after?
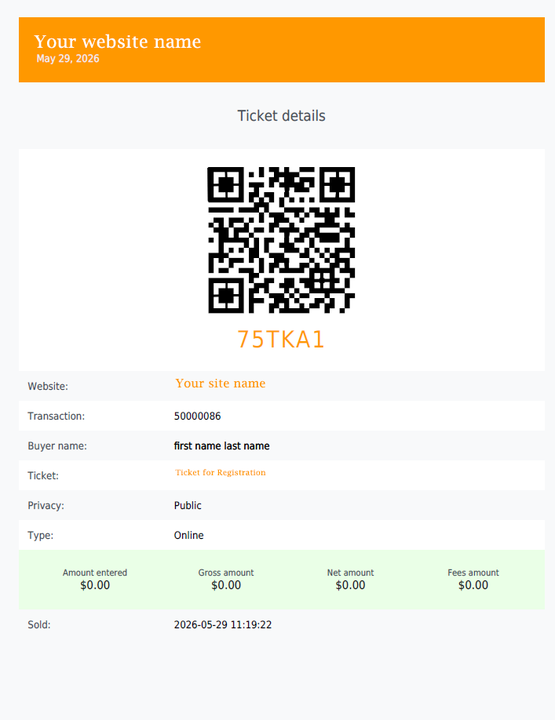
Ticket buyers will automatically receive a confirmation email after purchasing a ticket.
The email will include their ticket details and transaction information. A PDF ticket with a QR code will be attached, but only if TICKET SCANNING WAS ENABLED WHEN THE TICKET WAS SOLD.
![]()
What happens after enabling Ticket Scanning?
The QR code can be scanned at the door or registration desk to validate the ticket and "check in" the guest.
Your customers can either show the QR code on their phone or present the printed PDF version for scanning.
What should I, as Organizer, do during the event day?
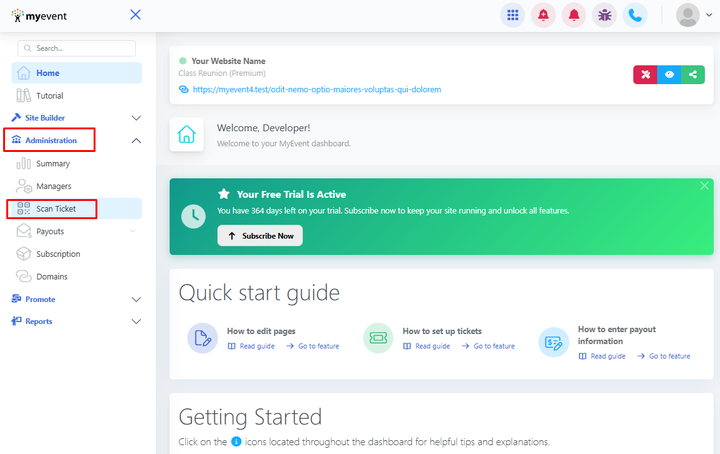
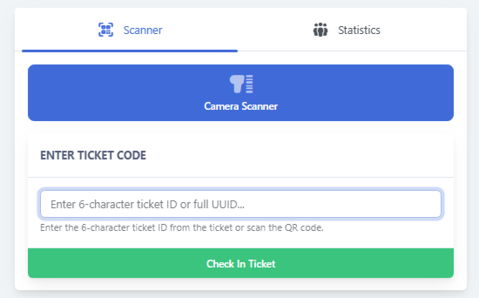
Under the Administration option, you will find the Scan Ticket feature. There, you will be presented with the option to enable your camera on your desktop computer, phone, or other device.
Next steps.

If it cannot be read by your device, you can write the Code.
Once done, you will see a confirmation.
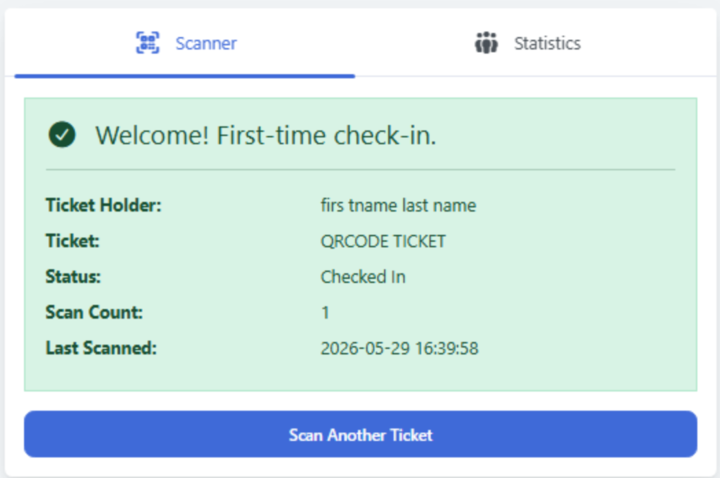
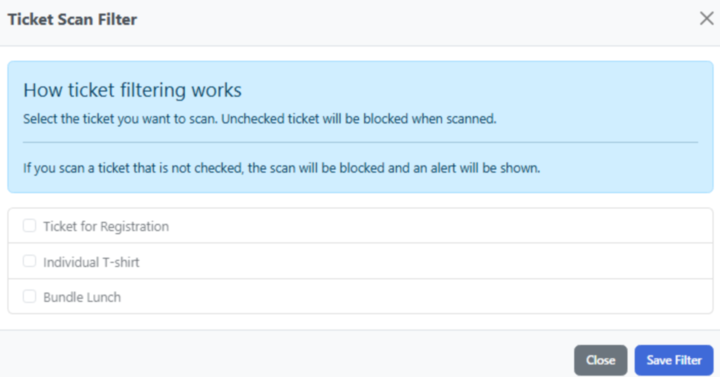
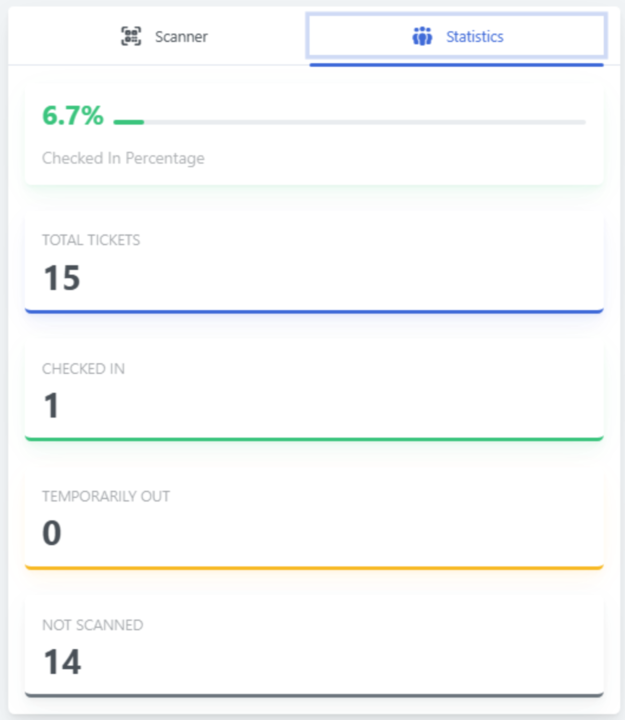
You have the option to filter your other tickets to scan each one accordingly or see their statistics.