Tickets are the foundation of your event registration. Follow these steps to create a ticket for your event.
Step 1: Navigate to Your Tickets
From your dashboard, go to the Site Builder → Features → Tickets.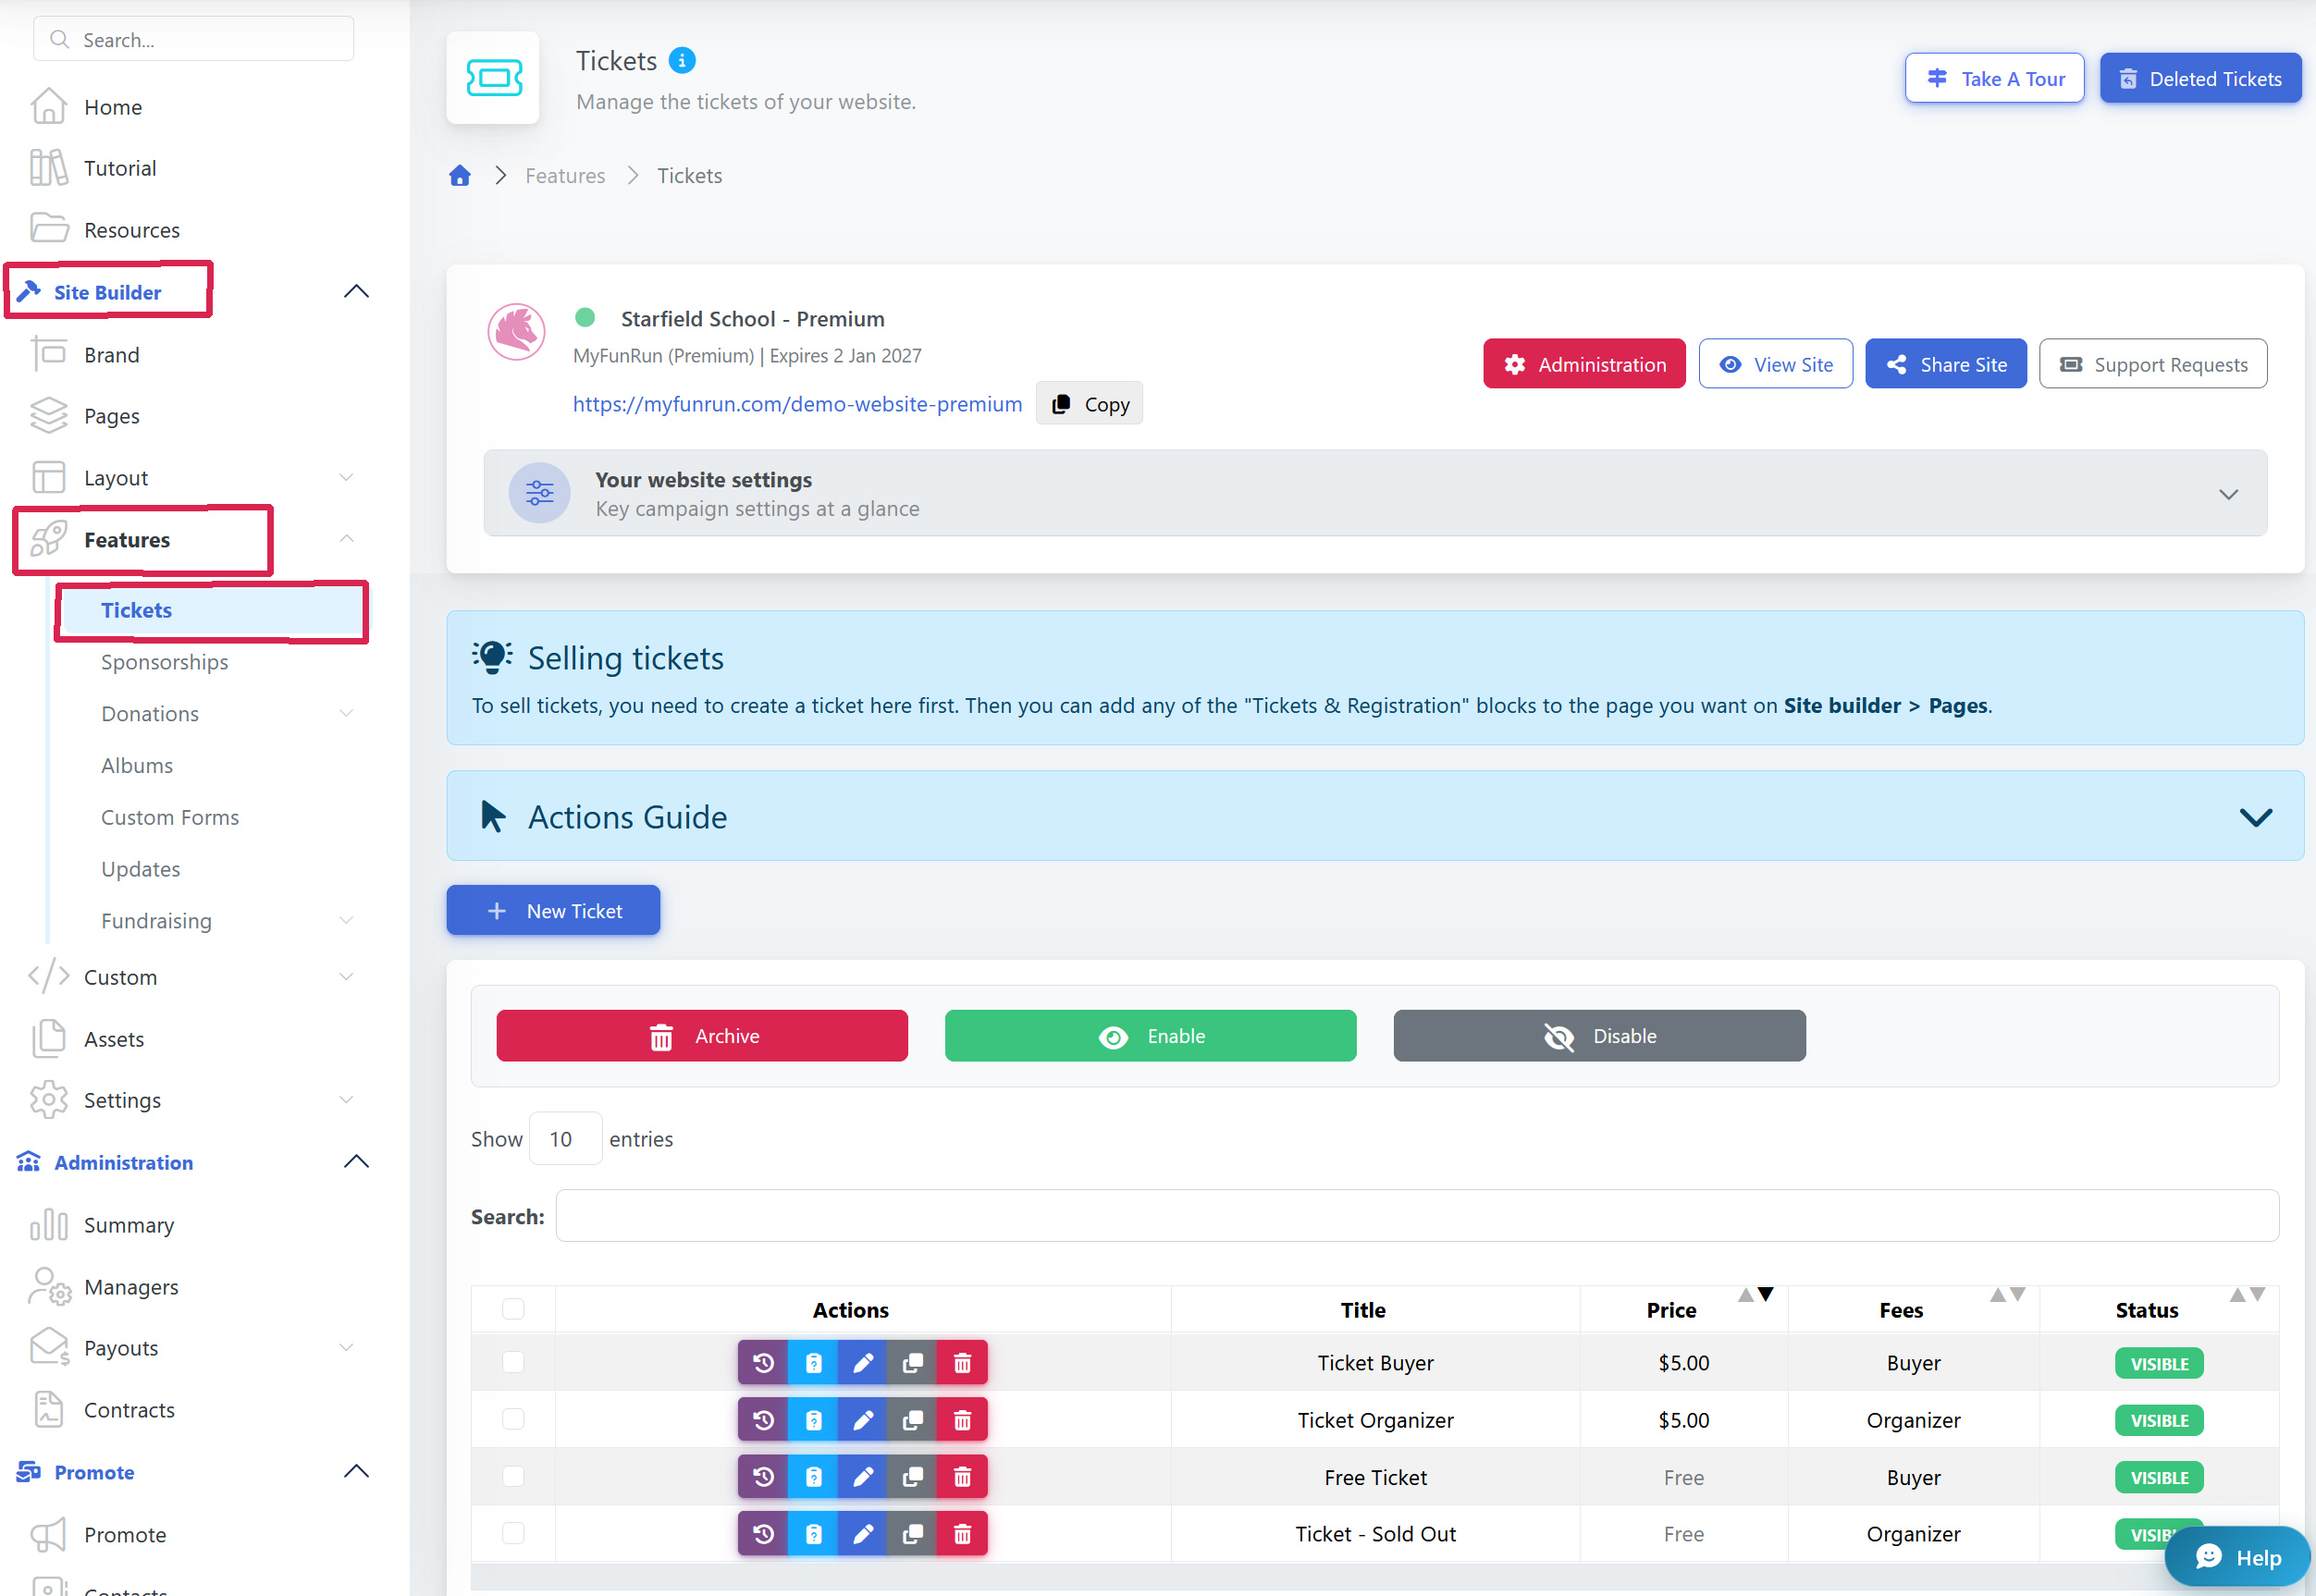
Step 2: Click 'Create New Ticket'
Click the '+ New Ticket' button to open the ticket creation form.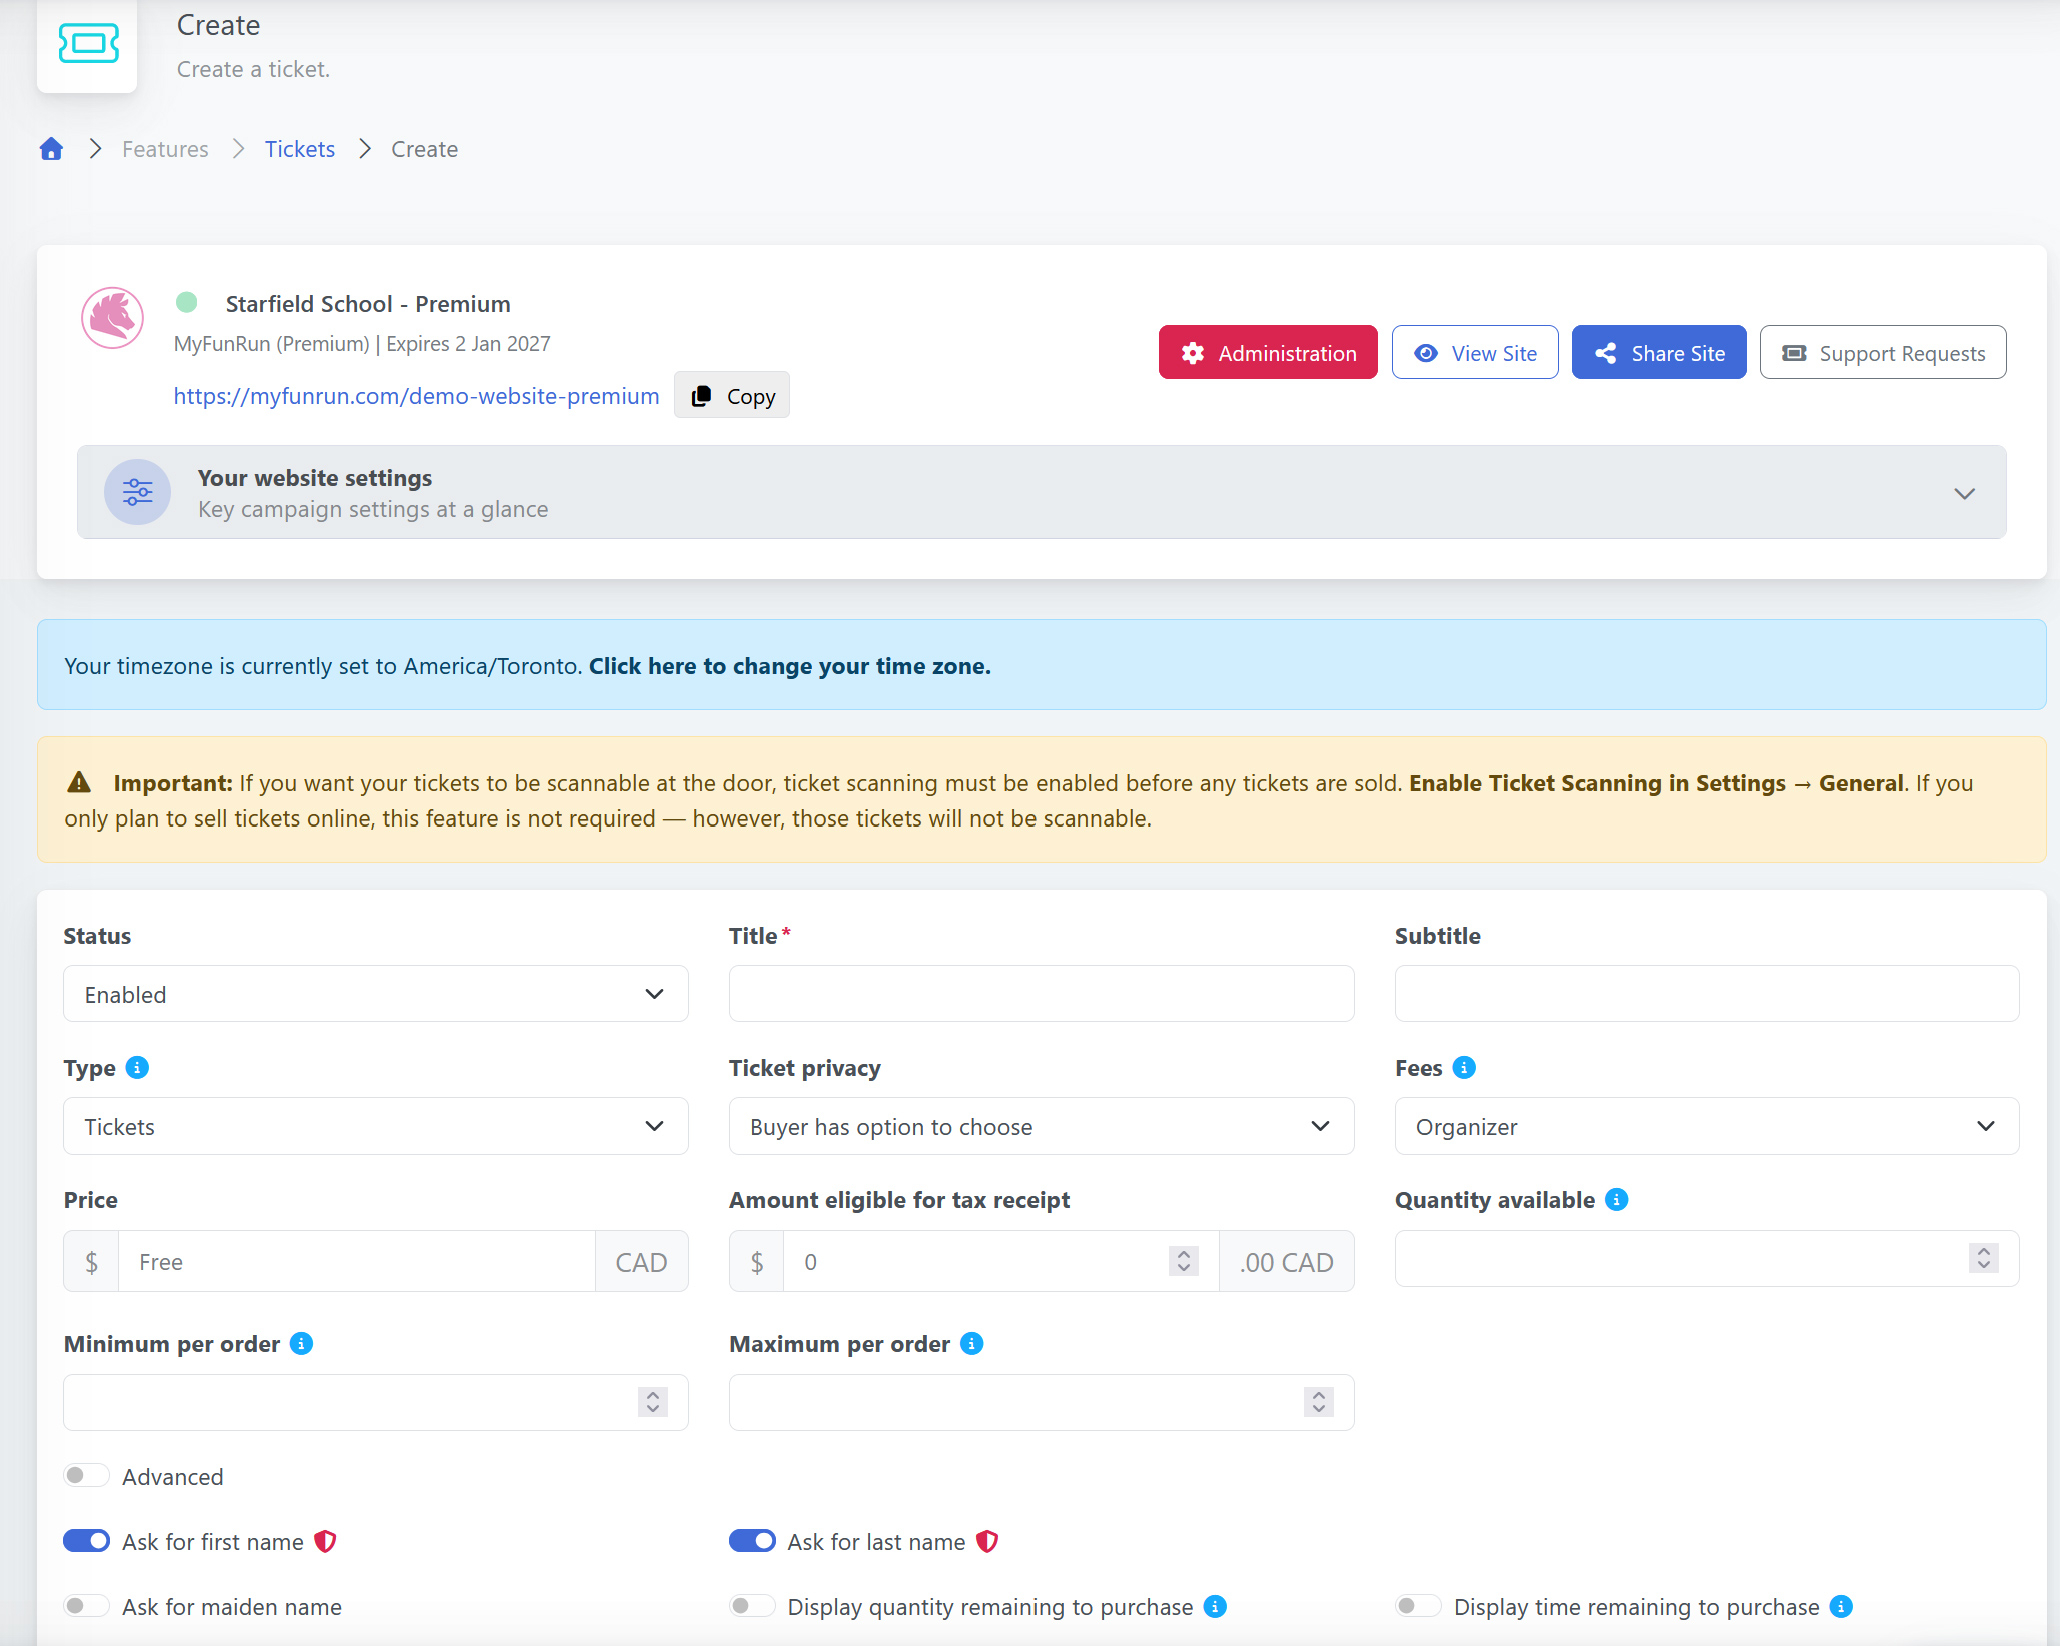
Step 3: Enter Ticket Details
Fill in the following information:
-
Ticket Name: Give your ticket a clear, descriptive name (e.g., 'Early Bird Registration', 'VIP Access', 'General Admission')
-
Description: Add details about what's included with this ticket
-
Type: Select whether you are selling tickets, items, T-shirts, or others.
-
Price: Set the ticket price (or $0 for free tickets)
-
Quantity Available: Set the number of tickets available for purchase. (leave blank for unlimited).
-
Advanced Settings include a date range for when you want a ticket to be available and when to hide the ticket from the public. Enter the date range starting from when the ticket should become available for purchase to when it should no longer be available.
Step 4: Configure Advanced Options
Customize additional settings:
-
Minimum/Maximum Per Order: Control how many tickets each person can buy
-
Display Options: Choose whether to show remaining tickets, time remaining, or who's coming
-
Fee Settings: Configure who pays transaction fees (buyer or organizer)
-
Privacy: Set ticket visibility to display the names of ticket buyers or keep them hidden (public, private, or hidden)
Step 5: Add Custom Questions (Optional)
If you need to collect specific information from ticket buyers, you can add custom questions to this ticket. See our guide on 'How to Add Custom Questions to Tickets' for more details.
Step 6: Save and Publish
Review all settings and click 'Save' to create your ticket.
Your event must be "published" for tickets to be visible to attendees.
Tips for Success
-
Create early bird tickets with lower prices to encourage early registration
-
Use clear, descriptive names that explain the ticket's benefits
-
Set appropriate quantity limits to manage capacity
-
Consider creating multiple ticket tiers (Regular, VIP, etc.) to offer options
-
Test your ticket purchase flow before launching your event
Need to Delete a Ticket?
You can delete an existing ticket type at any time. However, please note that any transactions associated with that ticket cannot be removed automatically.
For example, tickets that have already been purchased will still have their transaction records saved. If needed, these transactions must be archived manually.
To delete a ticket, go to Site Builder > Features > Tickets, then click the red delete icon next to the ticket you’d like to remove.
Please note that any related purchases will remain active.
If you need to remove a ticket from your e-commerce ticket list, you can archive the related transaction. Please note that archiving a transaction does not issue a refund.
If a refund is required, only the buyer can issue a refund request, and only the support team can issue it. The site owner cannot process a refund.